
Configuring secure chat (SSO)
This article describes the steps you need to follow in order to set up secure chat based on single sign on (SSO). For some chat solutions, it is essential that the end user is authenticated and securely identified for the communication to take place. Puzzel's secure chat solution will enable an authenticated users e.g. signed in to a "my page" or similar using an Open ID Connect (OIDC) based authentication (Signicat, Azure AD B2B etc.), to use the same authentication when starting a chat. In this way agents will know the authentication details e.g. the end user's identity, instead of the end user stating their identity manually.
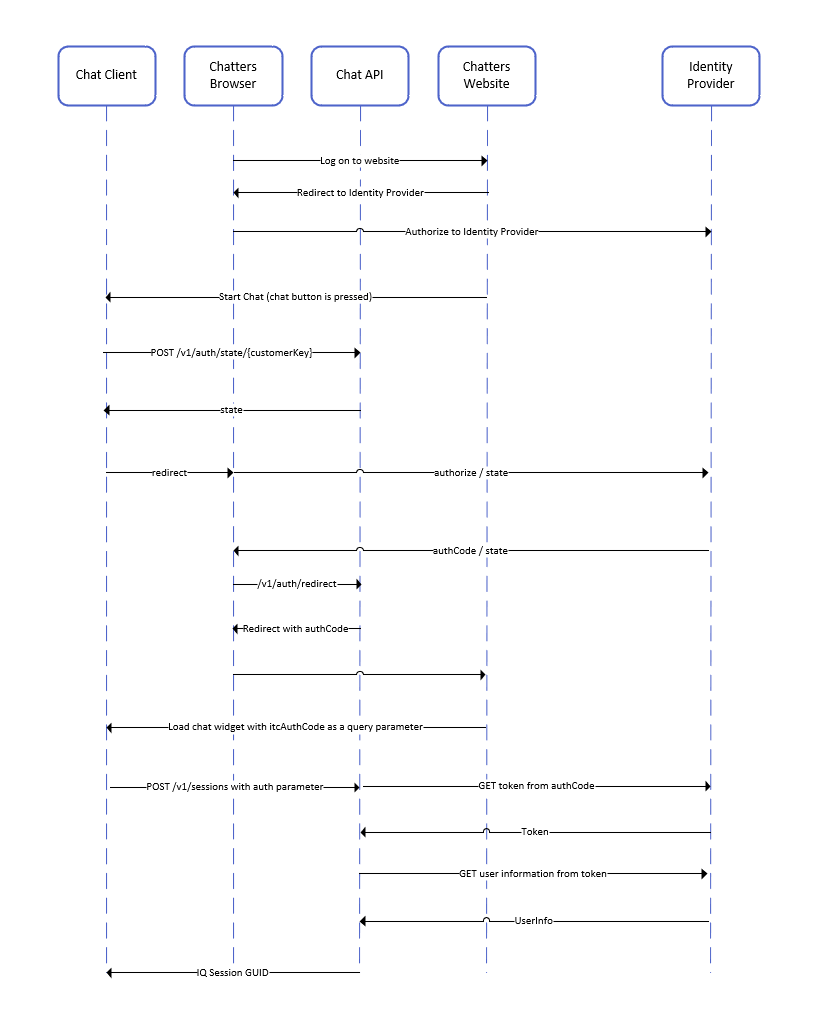
Below is the general flow chart for Puzzel's Chat SSO authentication using Open ID Connect:
Steps to set up secure chat
1. In the Administration Portal, go to "Admin → Users → Products → Secure Chat"

Claims to be masked - semicolon separeted list; every claim present in the list will be masked by the Chat API. Neither the user or the agent will be able to see the full value of the claim.
OIDC ACR Values - Authentication Context Class Reference Values (see https://openid.net/specs/openid-connect-eap-acr-values-1_0.html)
OIDC Client ID - Your client id
OIDC Client Secret - Your client secret
OIDC endpoint for authorization - Authorization endpoint
OIDC endpoint for token - Token retrieval endpoint
OIDC endpoint for token authentication method:
-
client_secret_post - the client secret will be present in the POST data.
-
client_secret_basic - the client secret will be present as Authorization header.
OIDC endpoint for userinfo - User info endpoint
OIDC Scope - Limitation of what user data can be retrieved (see https://oauth.net/2/scope/)
2. In the Administration Portal, go to "Admin → Services → Services → {Customer Service Number} → Queues"

See the Auth. Name field. If you want the queue to accept only secure chat requests, you should fill it in with the connection name (OIDC in our case)
3. In the Administration Portal, go to "Admin → Services → Chat → {Configuration} → Secure Chat"
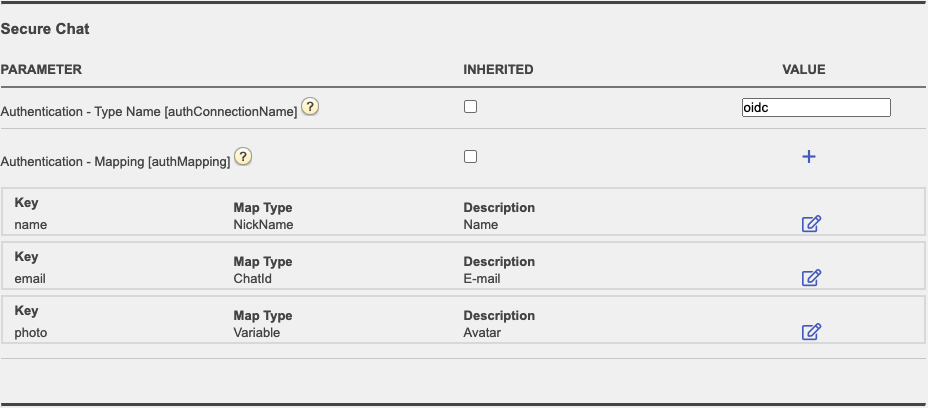
authConnectionName - connection name, should be the same as in step 2 above.
authMapping - data mapping. The key is the first-level properties coming from the user info endpoint (described in step 1).