
Busylight Integration
The integration allows for the Busylight device to synchronise to display the Agent’s status in the Puzzel Agent Application by changing the colour of its light display. This will help colleagues of the Agent to easily see the status of an Agent by the colour of the Busylight device, to prevent disruptions and to get a quick overview of the activities going on in the office landscape.
Overview
This document describes how to activate, configure and pair a Busylight device to start synching the Agent status and to reflect the different status with different colours from the Busylight device.
Features
- Different colour lights to indicate different Agent status.
- Ability to configure your own custom colouring scheme.
- No browser extension required.
- Easy to pair device directly from the Agent Application.
Installing Busylight
- Navigate to the Puzzel Administration Portal - https://admin.puzzel.com. For instances hosted on Azure UK, please use https://uk.puzzel.com/admin.
- Once there select Widget from the menu, then Widget Configuration. You will now see a section called "Busylight Service".
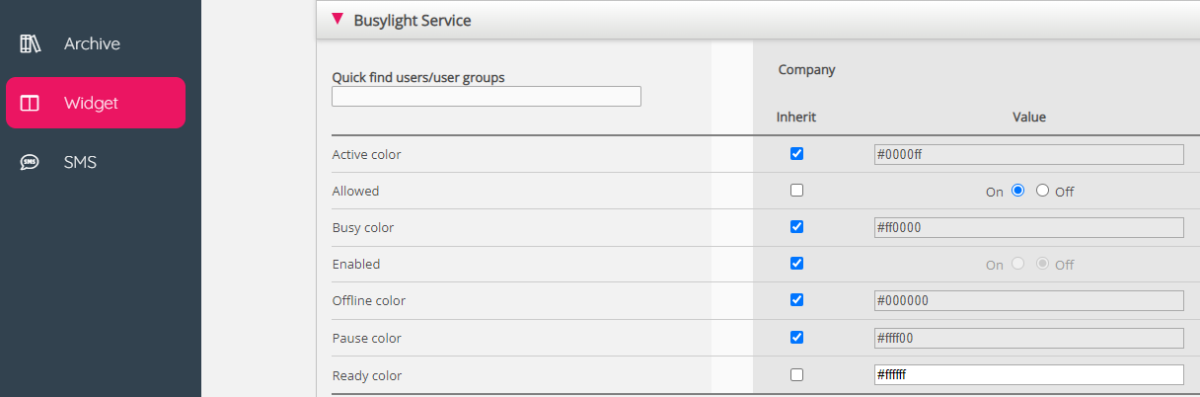
- To allow the Agents to enable and pair their Busylight device the setting "Allowed" must be set to On.
- Optional: In the same section, you are able to change the colours that are displayed for each status. The colours should be written as hex colour codes.
- Navigate to the Puzzel Agent Application: - https://agent.puzzel.com. For instances hosted on Azure UK, please use https://uk.puzzel.com/agent.
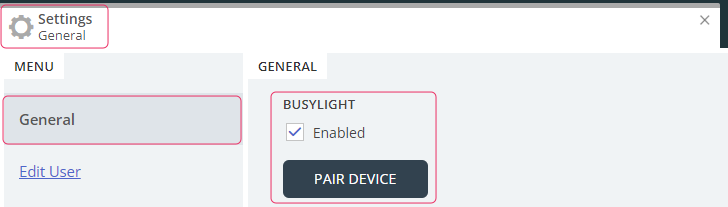
- Open the Settings Tab, either via opening it from the Tab Library or the Hamburger Menu.
- Select the General and check the checkbox "Enabled" under Busylight.
- Once enabled, press the "Pair Device" button.
- A pop-up will open up and the Busylight device can be selected and connected.
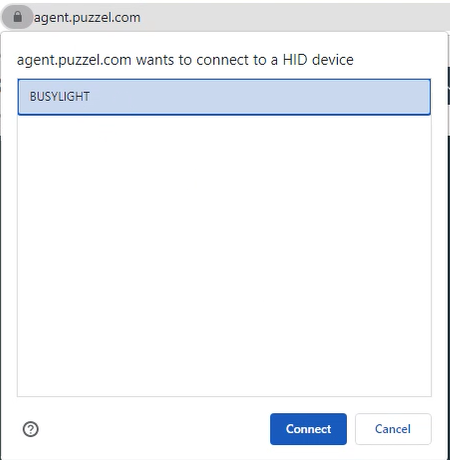


If Busylight is enabled and no device is paired step 9 will automatically trigger to allow the Agent to pair the Busylight device quickly.
- Once the Busylight device have been connected press the "Save" button on the bottom of the Settings Tab.