
Handling "high value" intents in a GenAI Bot
In many customer service scenarios, certain intents—such as account cancellation, billing disputes, or formal complaints—are better handled by a human agent rather than through AI-generated responses. For instance, when a user requests to cancel their account, you may want to immediately escalate the conversation to a live agent who can handle the matter with care and context.
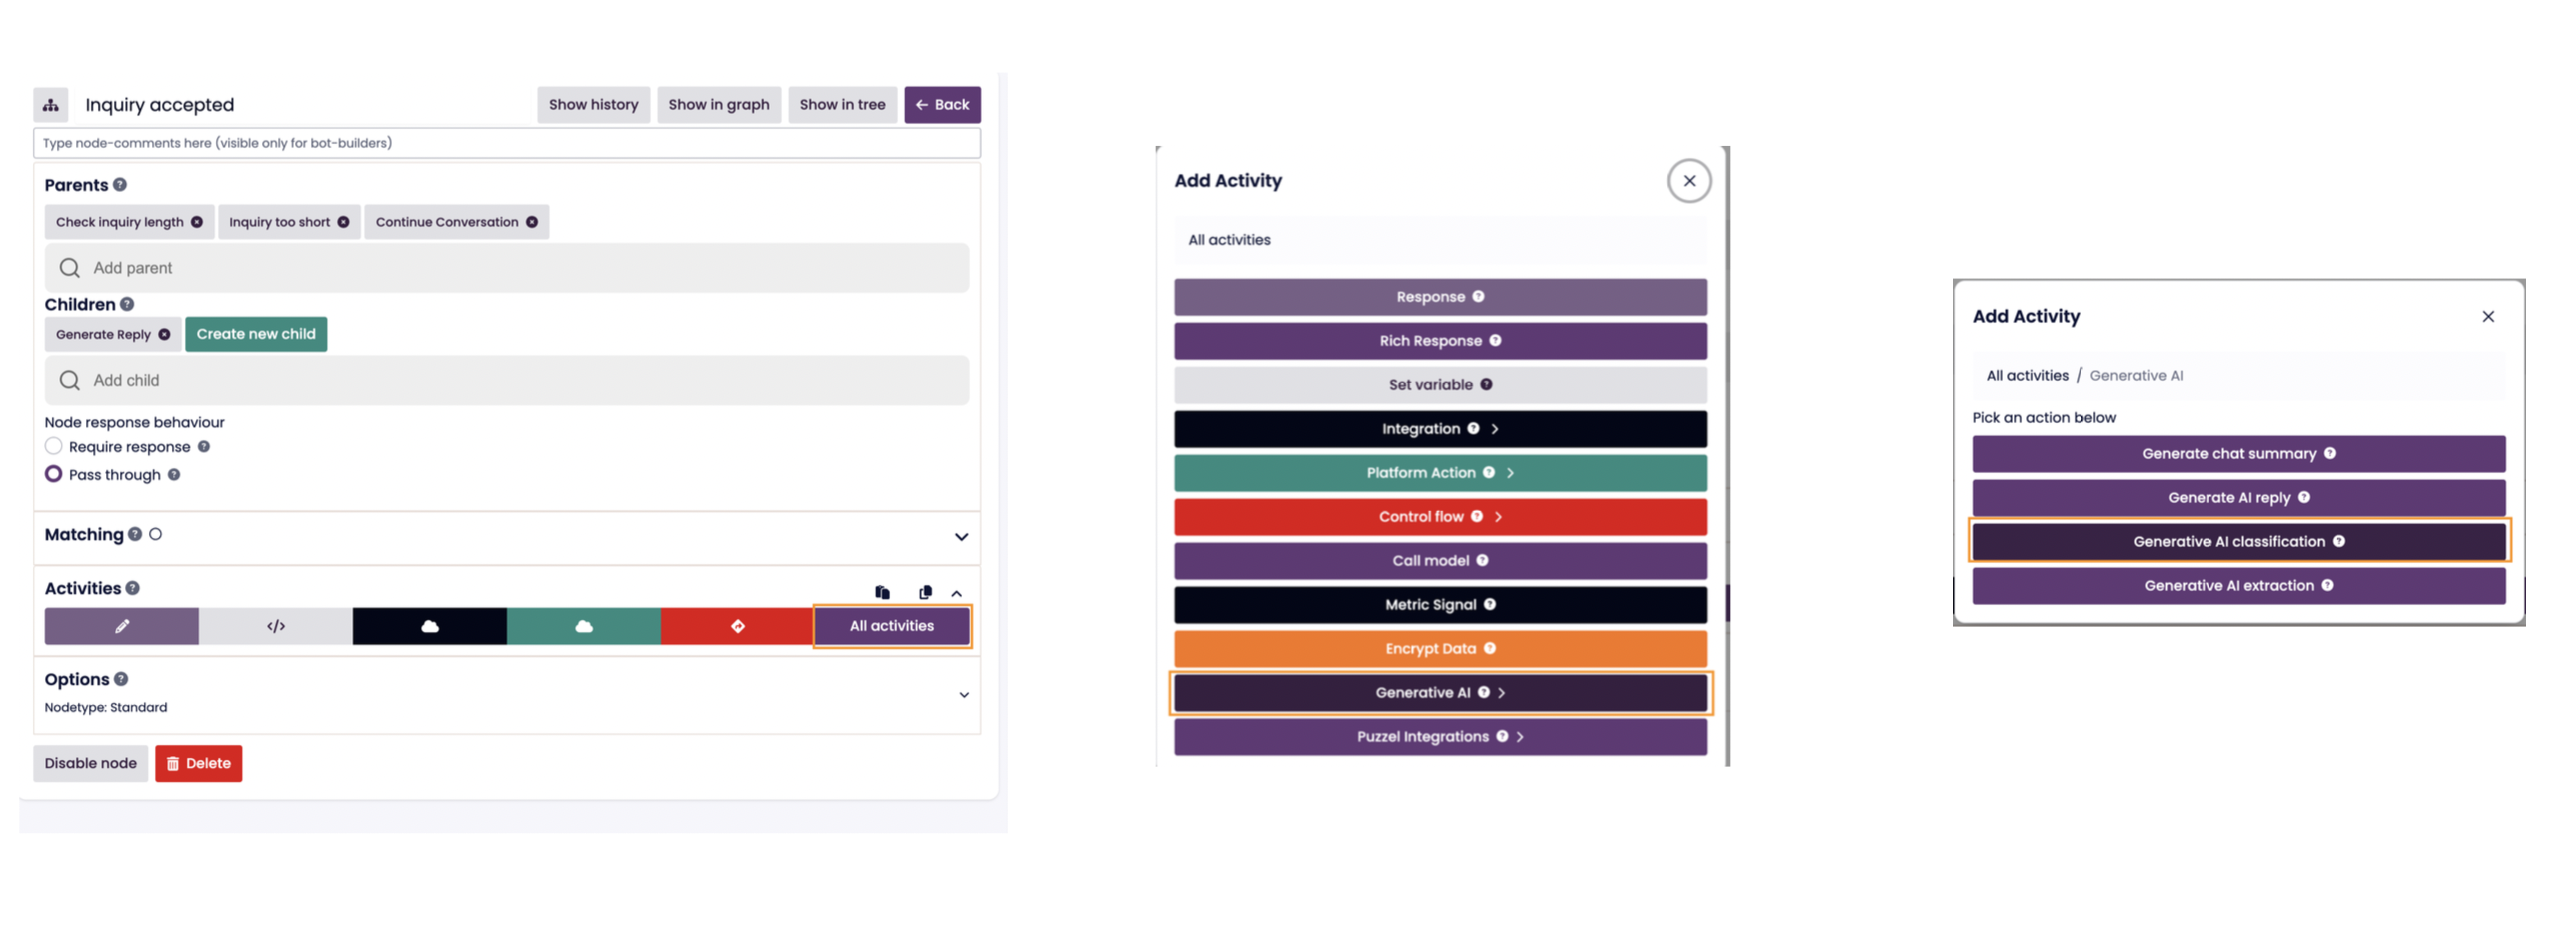
To manage this effectively, you can use the Generative AI Classification activity in the Inquiry Accepted node. This allows you to classify the user’s intent early and direct specific topics to dedicated flows or human agents for appropriate handling.
Step-by-Step Guide
Step 1: Add the GenAI Classification Activity
- Navigate to the Inquiry Accepted node.
- Click All activities.
- Under Generative AI, select Generative AI classification.
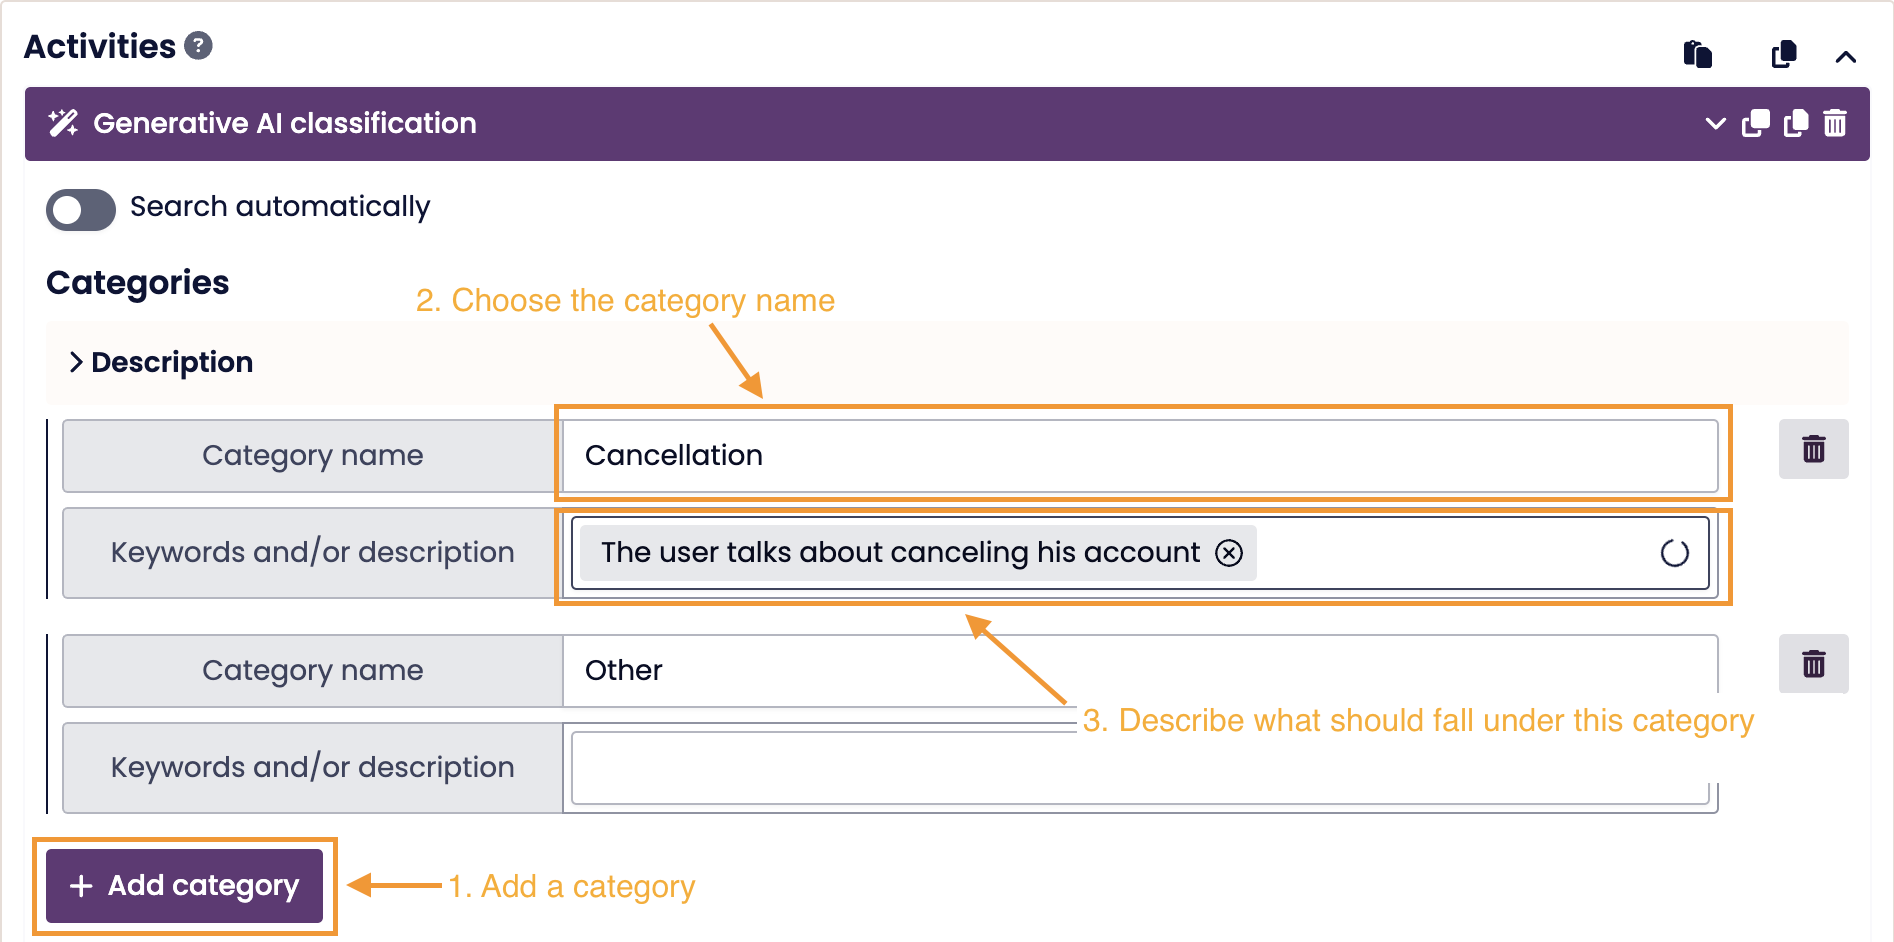
Step 2: Define Classification Categories
Once the activity is added, configure it by specifying the categories you want to classify. Examples might include:
- Cancellation
- Billing issue
- Complaint
You can also add sample utterances for each category to improve classification accuracy.
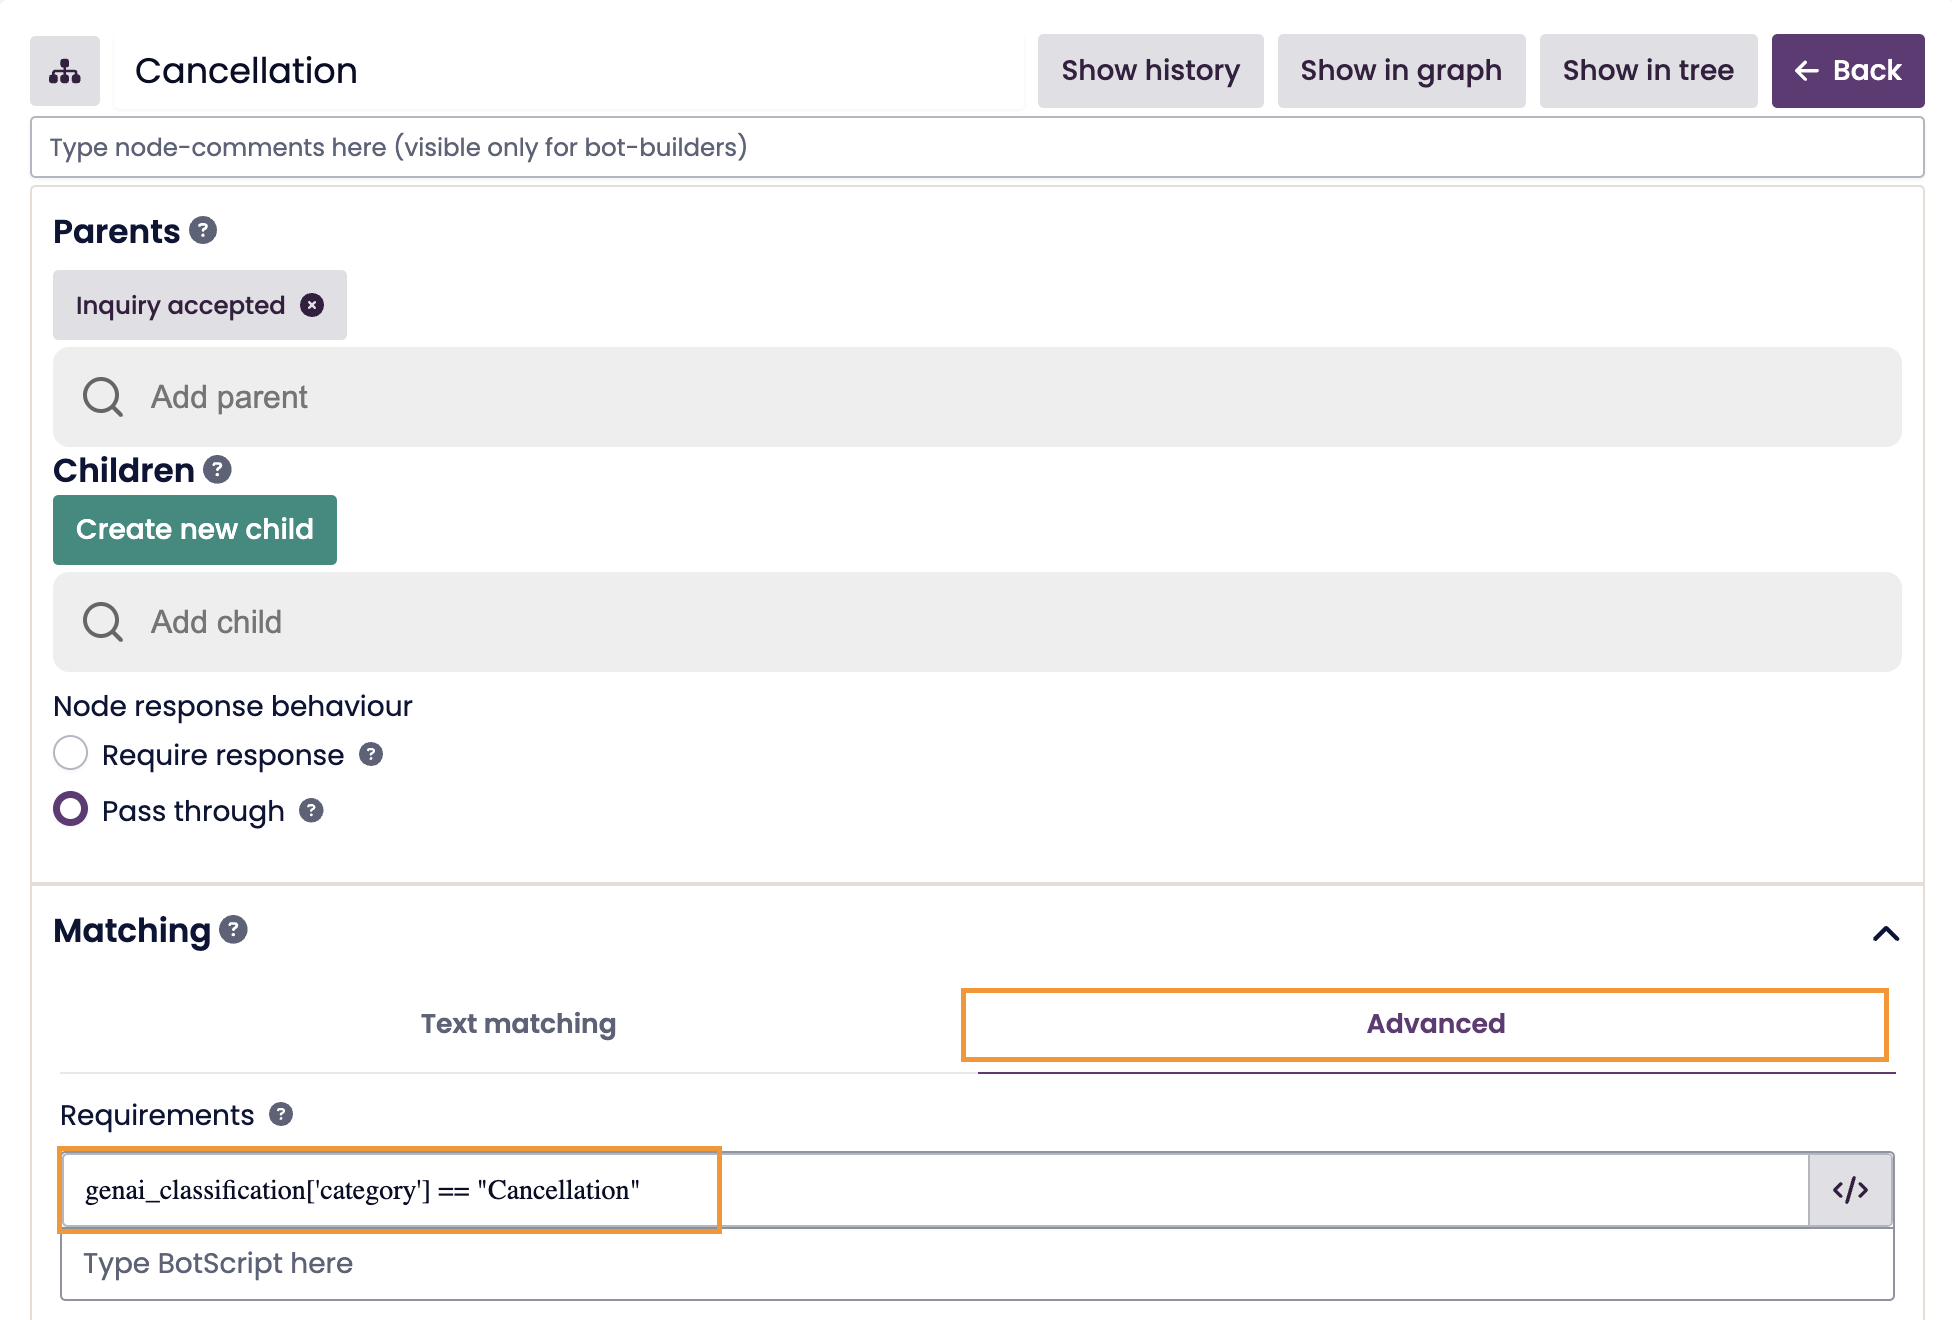
Step 3: Create Child Nodes for Each Category
The Inquiry Accepted node typically has one default child node: Generate Reply. To handle the newly classified categories, create a separate child node for each one (e.g., a Cancellation node).
Important: Child nodes are evaluated left to right. Make sure your new intent-specific nodes are placed to the left of the Generate Reply node to ensure they can be matched before the Generate Reply node.
To reorder child nodes, use drag and drop.

Step 4: Set Up Matching Criteria for Each Category
The GenAI classification activity saves its result in a variable named:genai_classification
To match a specific category, use this condition in the Advanced Matching section of your child node:
genai_classification['category'] == "Cancellation"
This ensures that when the classification result is “Cancellation,” the bot routes the user to the Cancellation node instead of the generic response path.
Step 5: Test the Classification
Open the Demo Panel and make sure the API Mode is set to Generative AI API.
Enter a sample cancellation message (e.g., “I want to cancel my subscription”) and confirm that it correctly routes to the Cancellation node.
