
Node Matching
Overview
Matching decides which node in your conversation flow should be triggered when a visitor sends a message.
Each node can have one or more matching methods, which define when the bot should select that node.
If a node has no matching methods, it will always match (unless another sibling node matches first).
How Matching Works
When multiple matching methods are added to the same node, they are checked in a fixed order from top to bottom:
Requirement
Keyword
Examples (AI Matching)
Classifier (AI Matching)
Matching Methods Explained
1. Requirement
Use this when you need the node to match only if specific conditions are met.
Requirements are written in Botscript, and are often used to check things like visitor data or context.

Example:
This example checks that the visitor information exists, includes an email address, and that the email equals test@email.com
2. Keyword
Keyword matching triggers the node when a visitor’s message exactly matches one of the defined keywords or phrases.
Matching is case-insensitive (e.g., “Hi” = “hi” = “HI”).
Always matches with 100% confidence.
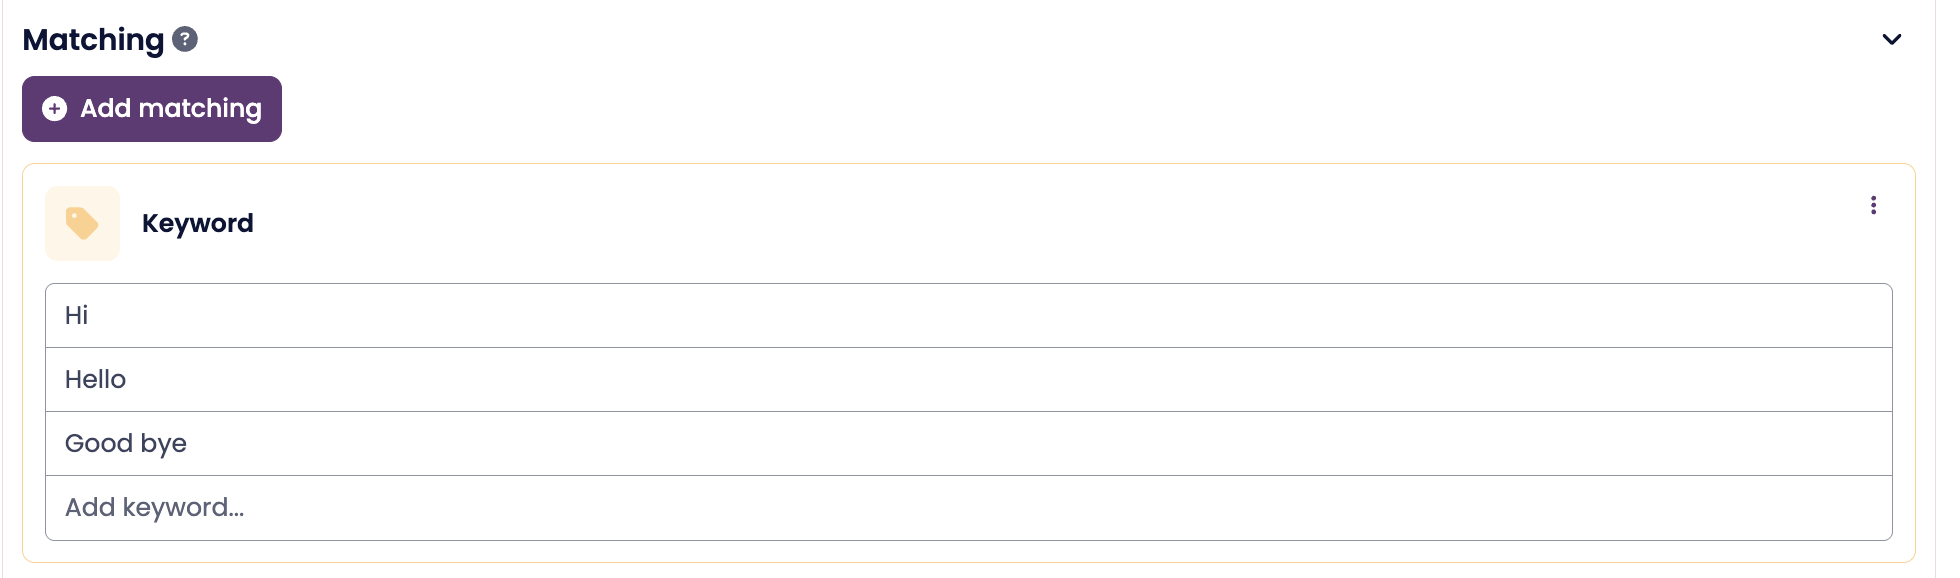
Example:
If a visitor types “hi”, “Hello”, or “good bye”, this node will match.
3. Examples (AI Matching)
Example Matching uses AI to understand and match messages that are similar in meaning to the examples you provide — even if the visitor’s wording isn’t an exact match.
You can add multiple example sentences that represent how a visitor might express the same intent.
This method is ideal when there are many natural ways to phrase a message. It’s faster to set up than a classifier, but generally less precise.
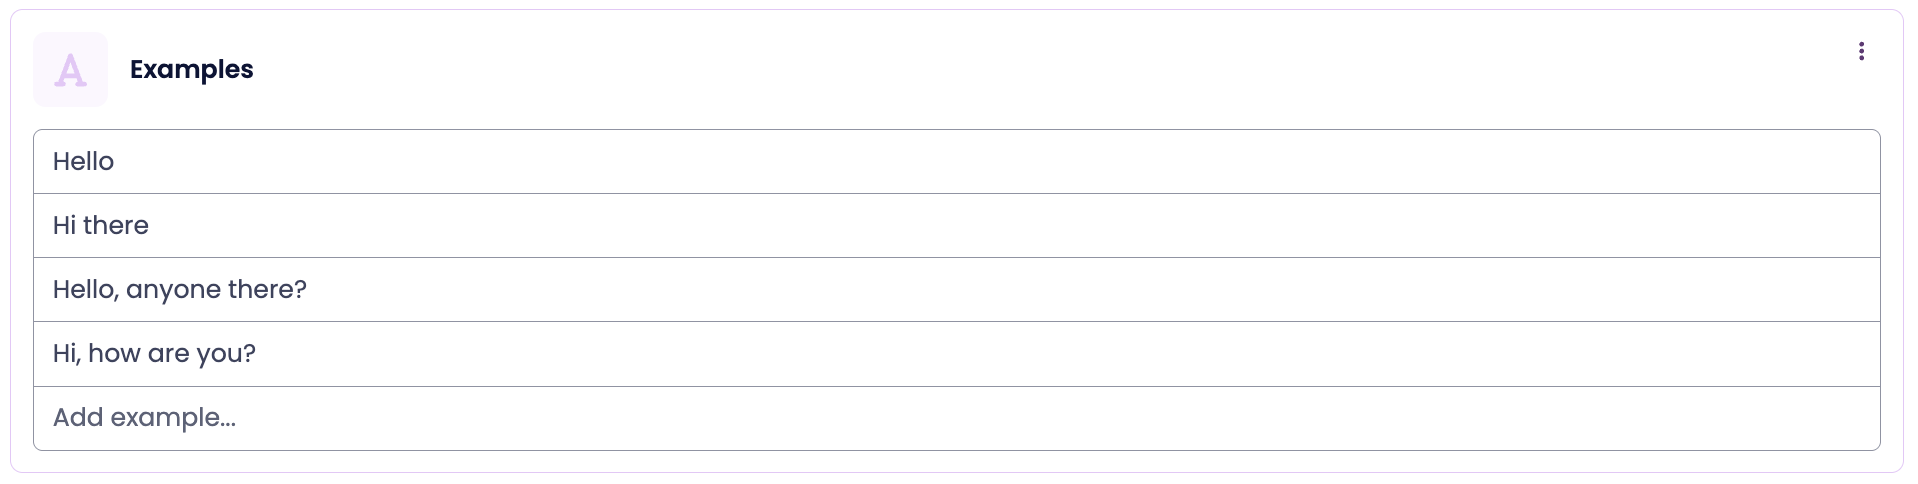
Example:
If a visitor says something like “Hey, how’s it going?”, the bot will recognize it as a close match to your examples and trigger this node.
4. Classifier (AI Matching)
Classifier matching uses a trained AI model to detect specific intents based on your classifier setup.
It’s best used for bots that have structured, predefined intent categories.

To use it:
Train and add a classifier under Advanced → Classifiers in your bot settings.
Select the classifier model and the label you want to match on.
The node will trigger if the classifier identifies the selected intent label.
Combining Matching Methods
You can combine certain matching methods to make your bot more accurate.
| Combination | Allowed | Order of Evaluation |
|---|---|---|
| Requirement + Keyword | Yes | Requirement → Keyword |
| Requirement + Examples | Yes | Requirement → Examples |
| Requirement + Classifier | Yes | Requirement → Classifier |
| Keyword + Examples | Yes | Keyword → Examples |
| Keyword + Classifier | Yes | Keyword → Classifier |
| Examples + Classifier | No | Not supported |
Tip:
Combining Keyword and Examples works well when you want both exact phrase matches and flexibility for similar wording.
For example, “Hi” could be a keyword, and “Hey there!” could be captured through examples.
You can’t combine Examples and Classifier on the same node.
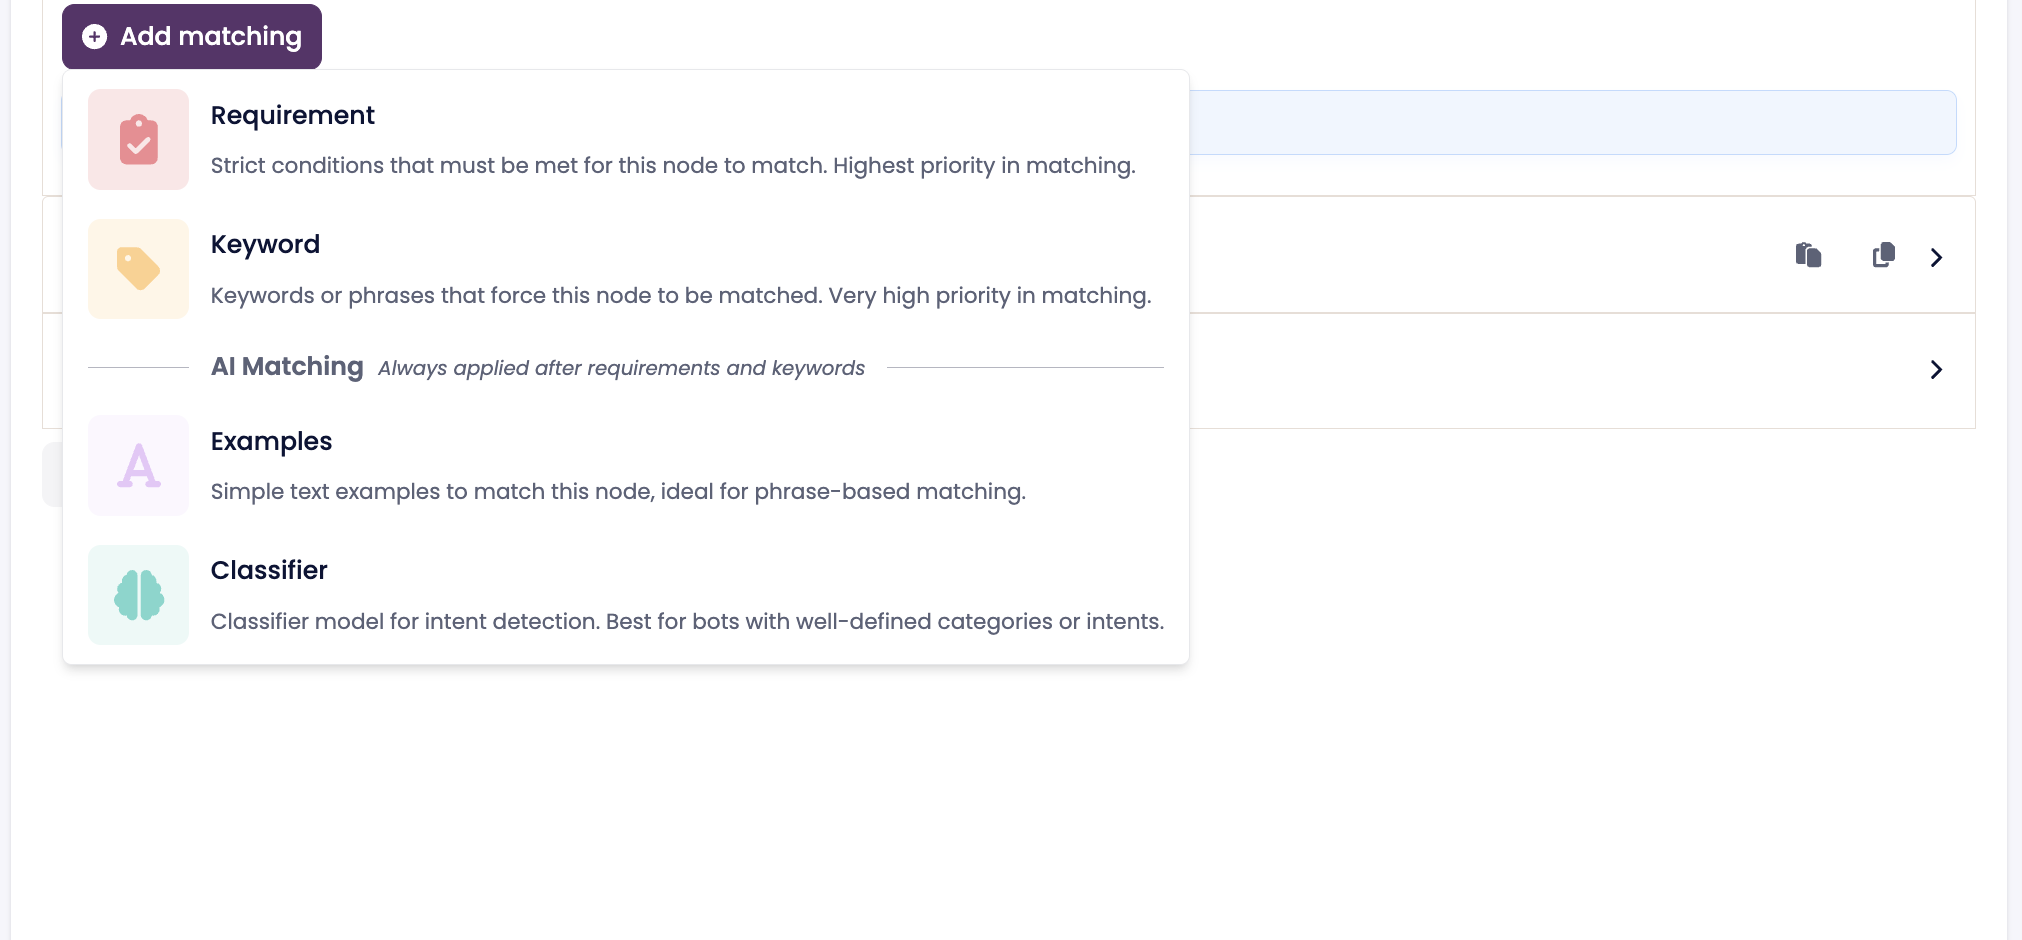
How to Add Matching
Click Add Matching on the node.
Choose the type of matching you want:
Requirement – logic-based condition using Botscript
Keyword – exact phrase match
Examples – AI-powered similarity match
Classifier – trained AI intent detection
Fill in the required details and save.
Key Takeaways
Matching decides when a node is triggered in your flow.
Evaluation order is always: Requirement → Keyword → Examples → Classifier.
You can combine Requirement and Keyword, or Keyword and Examples.
Only one of Examples or Classifier can be used per node.
Keyword matching is exact (case-insensitive).
Example and Classifier matching use AI to understand intent and similar wording.