Configure Single Sign-On with Salesforce
This article describes how to configure single sign-on (SSO) to Puzzel using Salesforce as an external provider.
This method utilizes Open IDConnect, see also:
Integrate Service Providers as Connected Apps with OpenID Connect for more information.
Step 1 : Create a new SSO Connection in Organisation settings portal
Start by creating a new Single Sign-on connection in the Organisation Settings portal to get the redirect URIs you need in the Connected App in Salesforce.
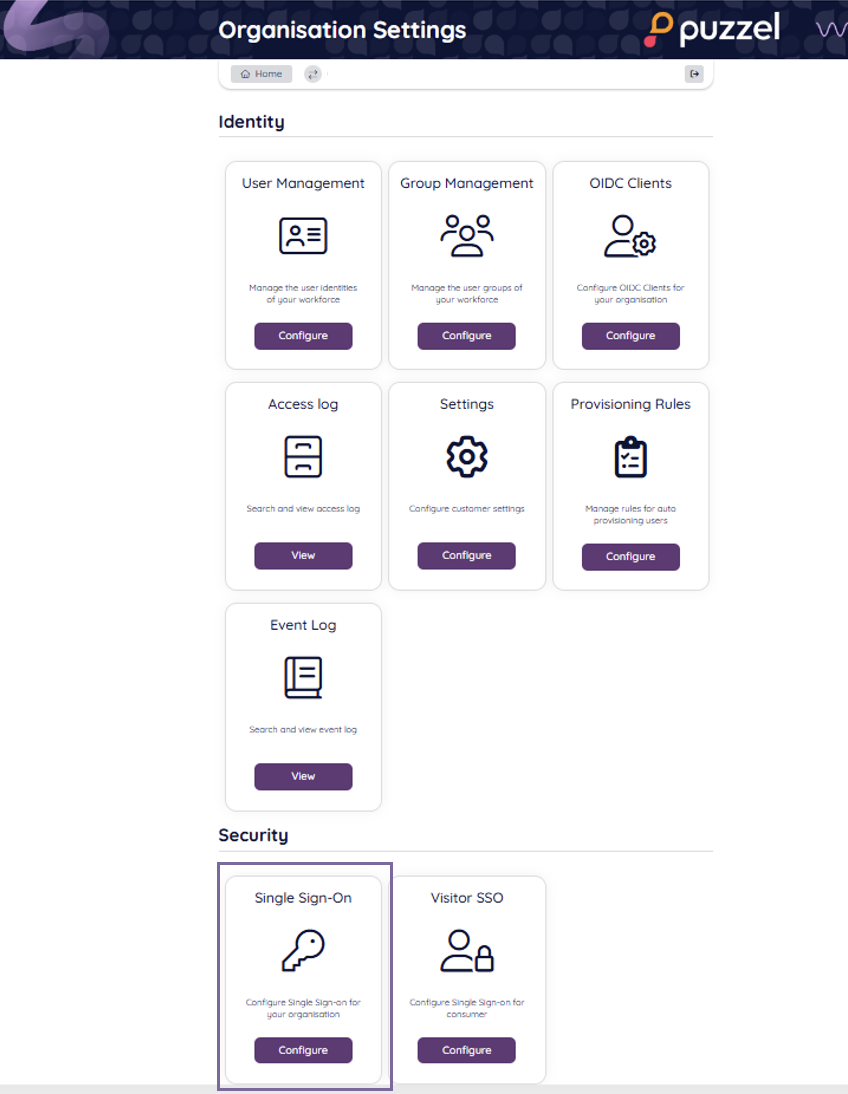
From the Organisation Settings home page, click on the “Single Sign-On” icon as shown below:
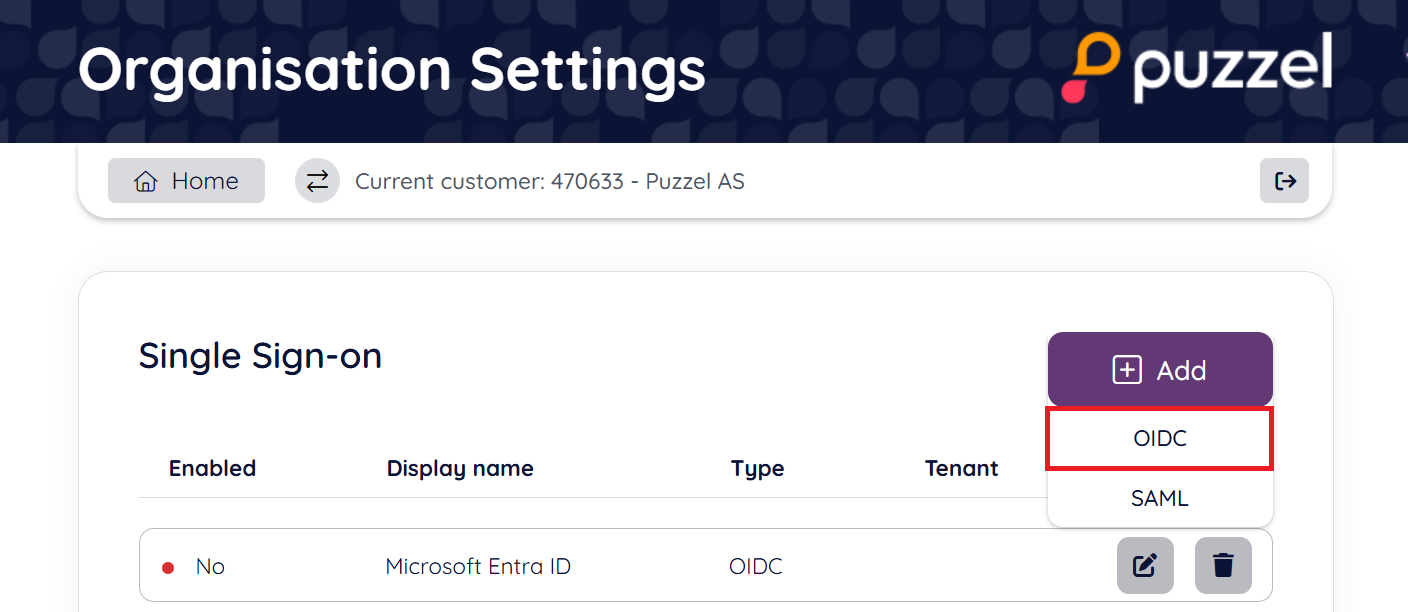
Depending on whether you have added SSO configurations previously or not you should either see a list of current configurations or just an empty list, either way you should also have the “Add” button displayed on the top right.
Click on the “Add” button and choose “OIDC” as illustrated below:
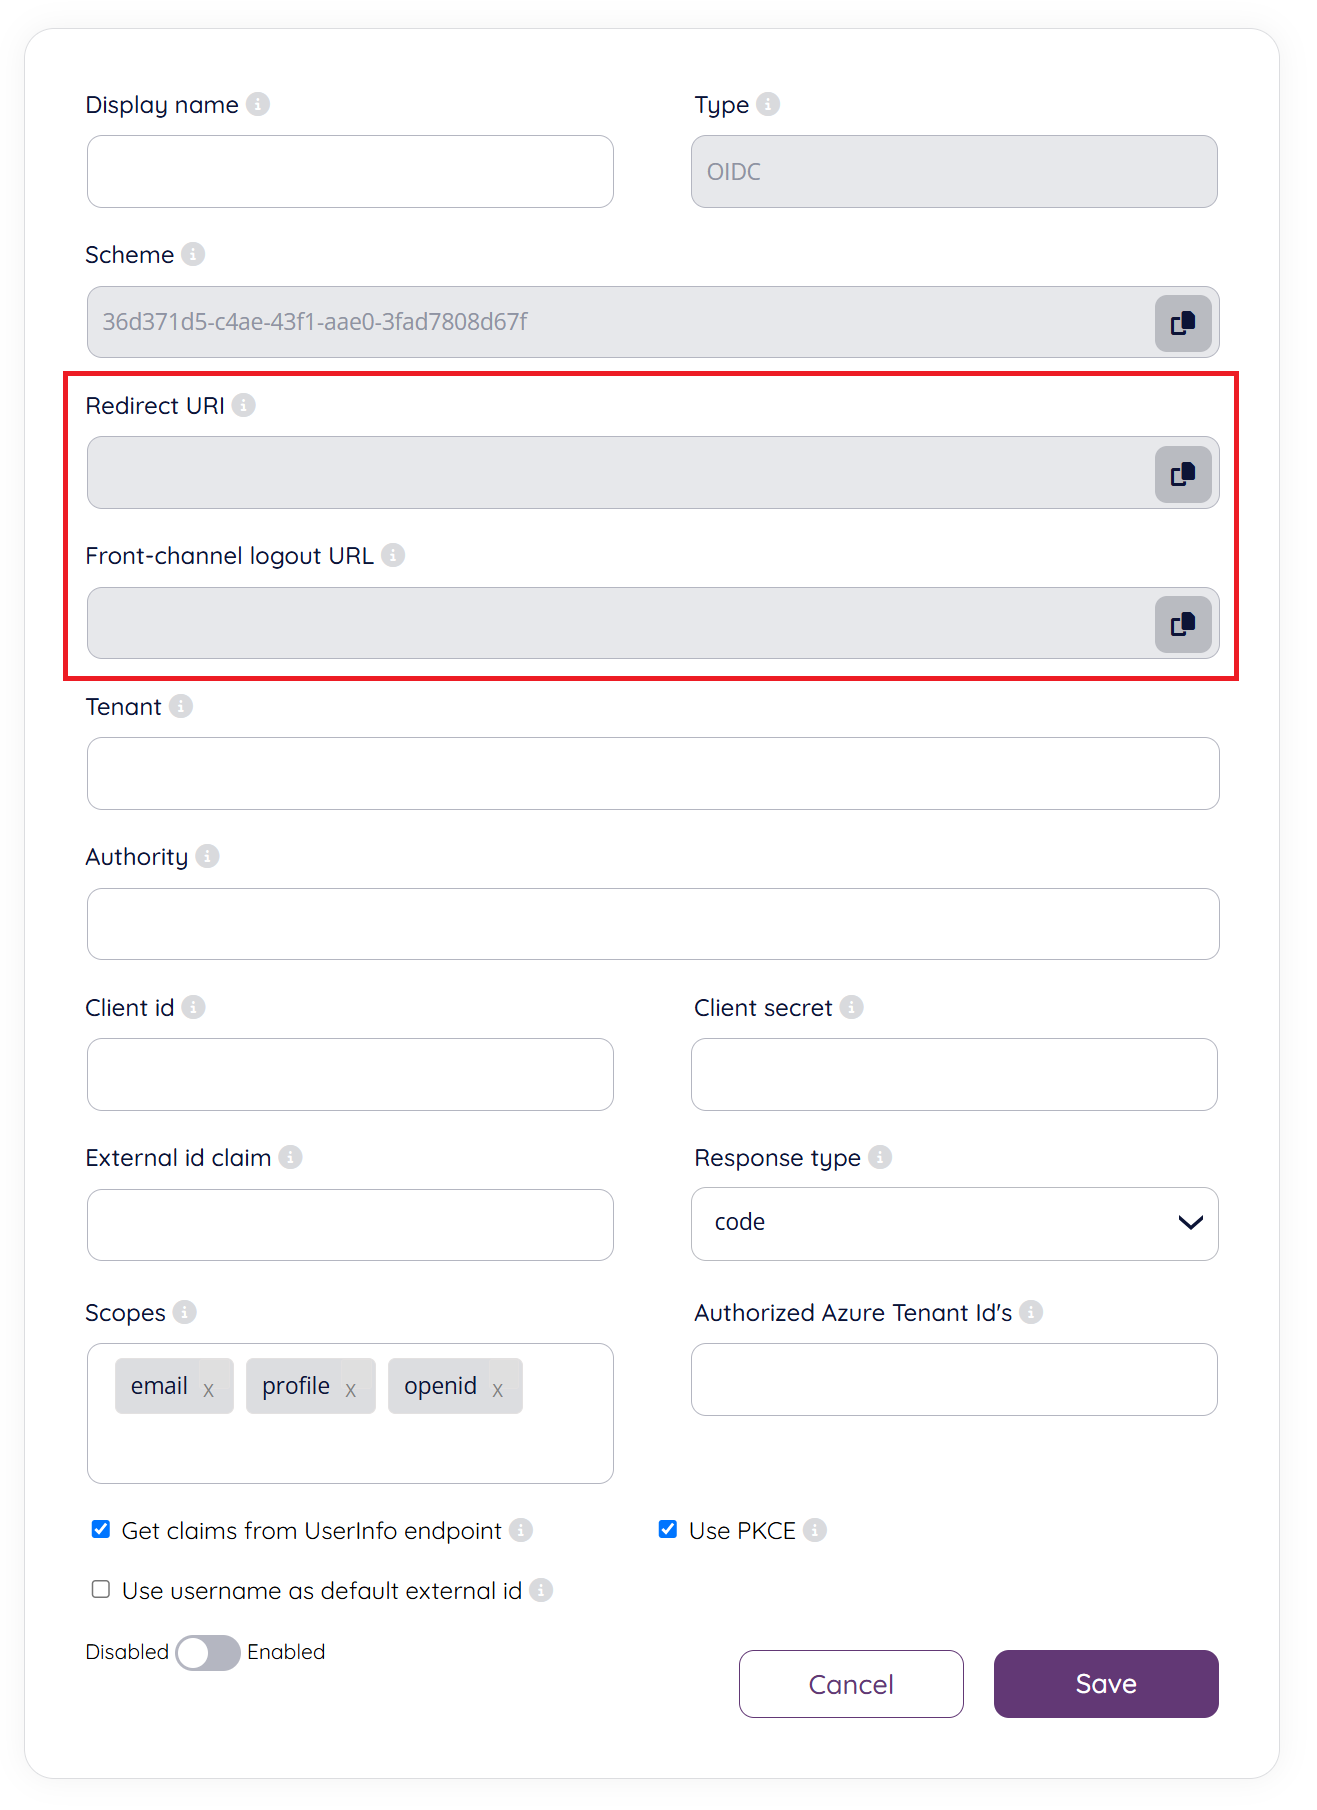
On the next screen you will be presented with two fields which you need to add to your Salesforce configuration, “Redirect URI” and “Front-channel logout URL”. See screenshot below:
Step 2: Create a new Salesforce Connected App and add initial config
From Setup, enter Apps in the Quick Find box, and select App Manager.
Click “New Connected App”.
Enter the connected app’s name, which displays in the App Manager and on its App Launcher tile. The connected app name must be unique within your organisation.
Enter the API name used when referring to your app from a program. It defaults to a version of the name without spaces. Only letters, numbers, and underscores are allowed, so if the original app name contains any other characters, edit the default name.
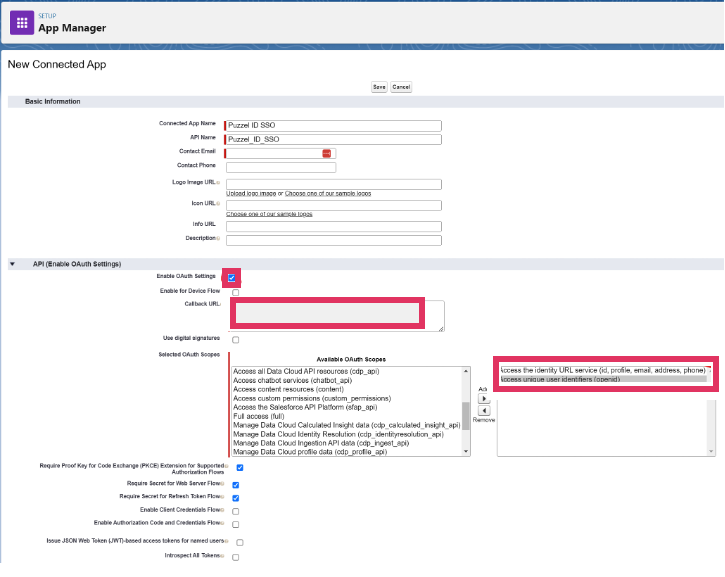
Check “Enable OAuth Settings“
Add Redirect URI from Puzzel ID Organisation Settings (see step 1) to “Callback URL”
Add the two scopes shown in the screenshot above in “Selected OAuth Scopes”.
The scope “Access the identity URL service (id, profile, email, address, phone)” is for sending the e-mail to match the user in Puzzel ID. You could use other claims to match the user as well, like the “sub” claim, and then this scope would not be needed.
Click the “Save” button on top of the screen.
Step 3: Configure details in Puzzel ID
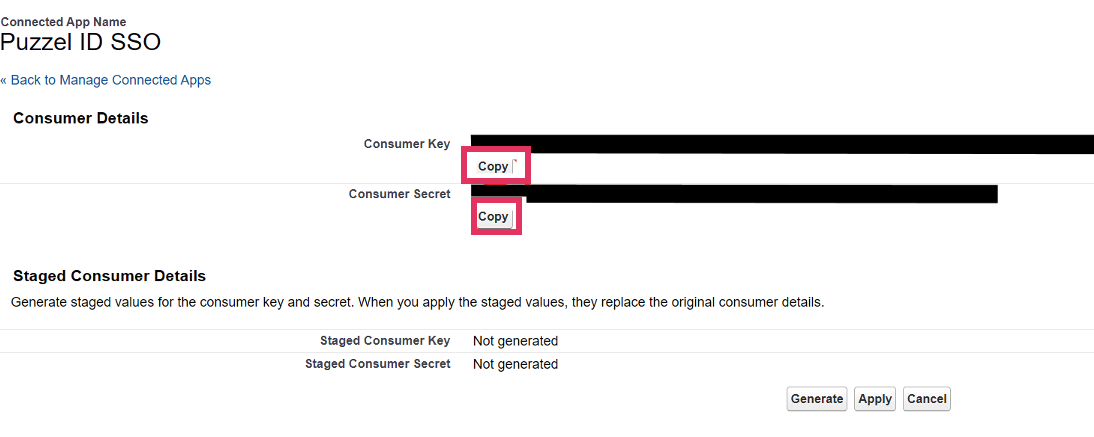
Once Saved, you need to fetch the consumer details to configure in Puzzel ID.
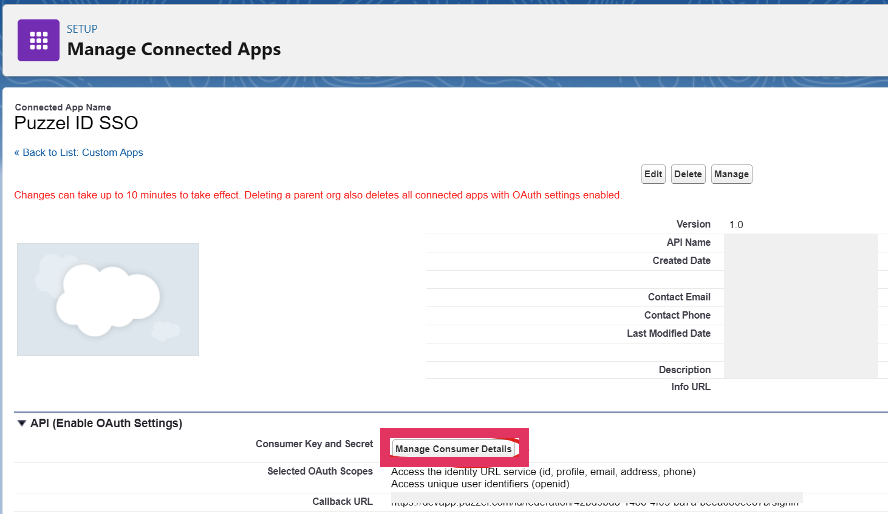
Configure the Single Sign-on client in Puzzel ID Organisation Settings with values from Salesforce:
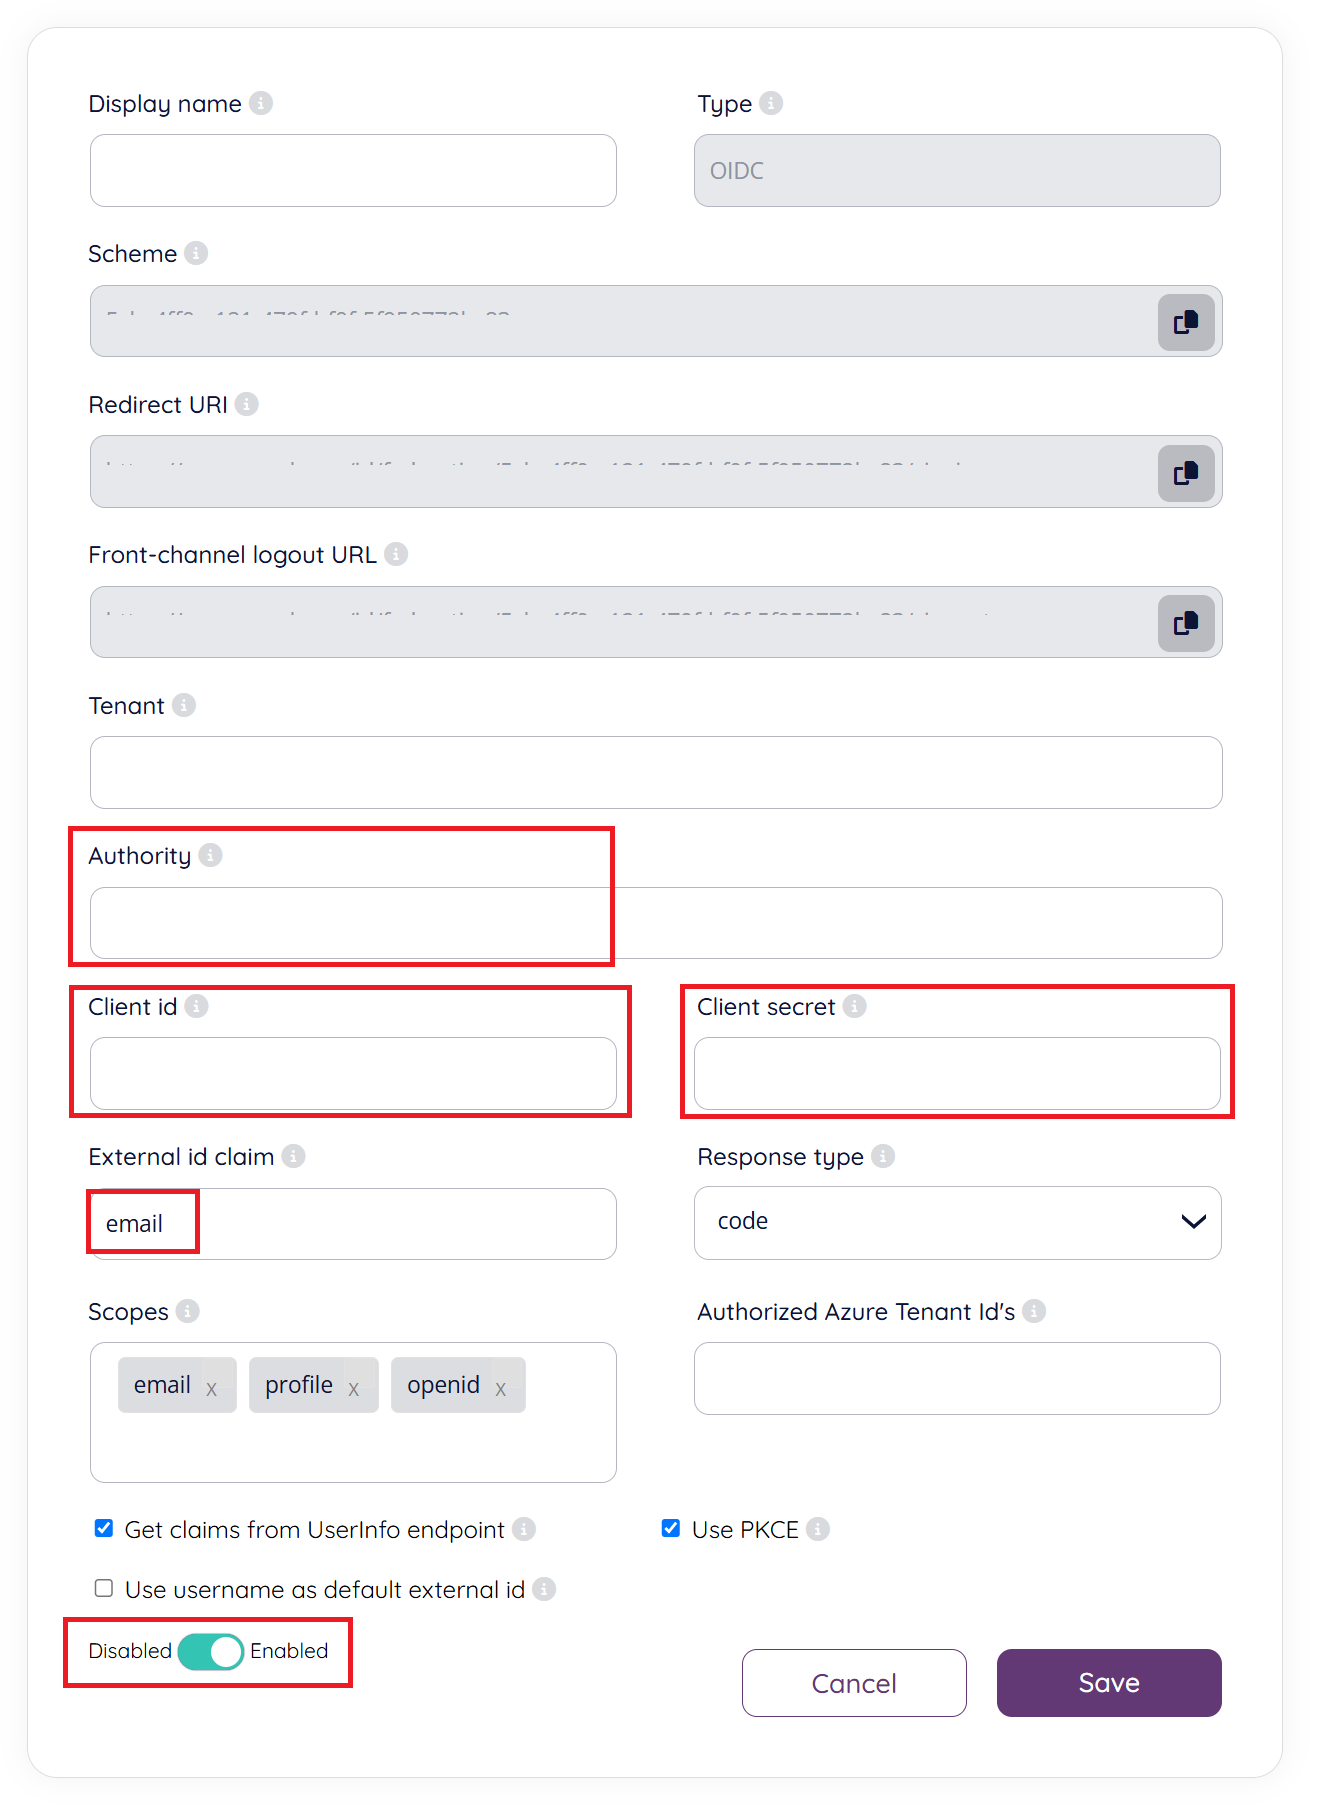
In the field “Authority” enter the URL to your Salesforce tenant
Copy the “Consumer Key” in Salesforce to “Client id”
Copy the “Consumer Secret” in Salesforce to “Client secret”
Continuing in same form as in the previous step, the field “External id claim” requires special attention. Here you need to provide a valid Salesforce claim that will be used to map the user to Puzzel ID.
The easiest path is to set the External id claim to "email" (can also be i.e. “sub”).
For more information about external id see: Validate users using external id.
Step 5 - Save and enable the configuration
Still in the same form as in the previous step, make sure to toggle the configuration to “Enabled” if you wish to start using the configuration right away.
Click “Save” to store your configuration.
Step 6 - Optional - Change scheme name
This is an optional step to improve readability when referring to a SSO configuration. It can be skipped if you just want to use the default GUID based scheme value or don't want to use the "idp=" query parameter at all.
You can use the “Scheme” value for a SSO configuration as the “idp” parameter for the agent. This is described in the section "Accessing external providers directly" in this article.
If you do not change the Scheme name it will use the default GUID for the scheme, as an example:
https://app.puzzel.com/agent/?idp=42bd9bd8-1486-4f05-ba7a-xxxxxxxxxxxxxxx
To change the “Scheme” from the generated id to a readable name, you can edit the “Scheme” field as shown below and click save:
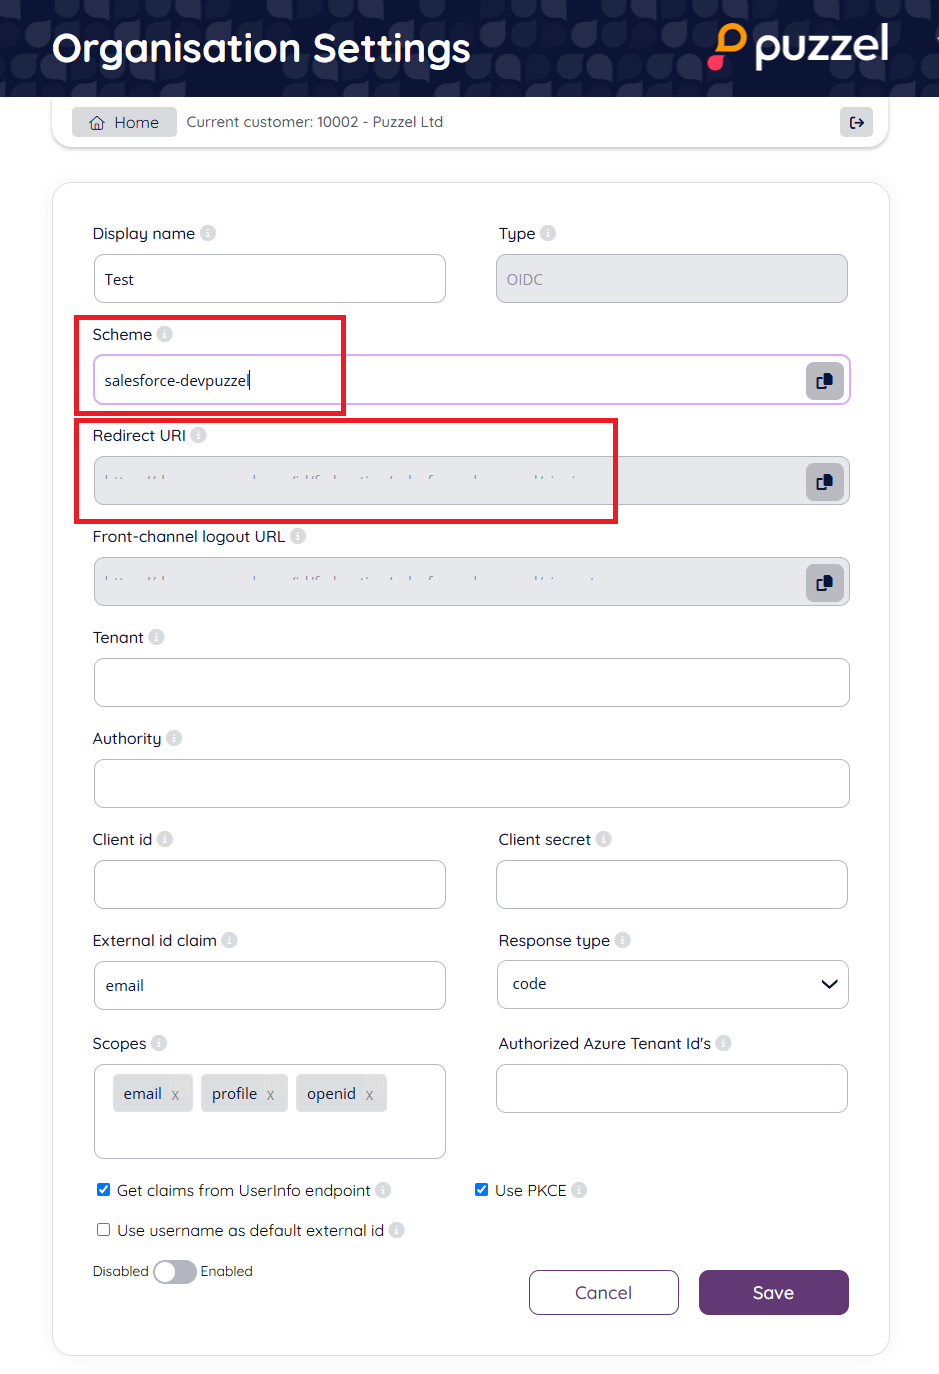
The new “idp” parameter for the agent is now: https://devapp.puzzel.com/agent/?idp=salesforce-devpuzzel
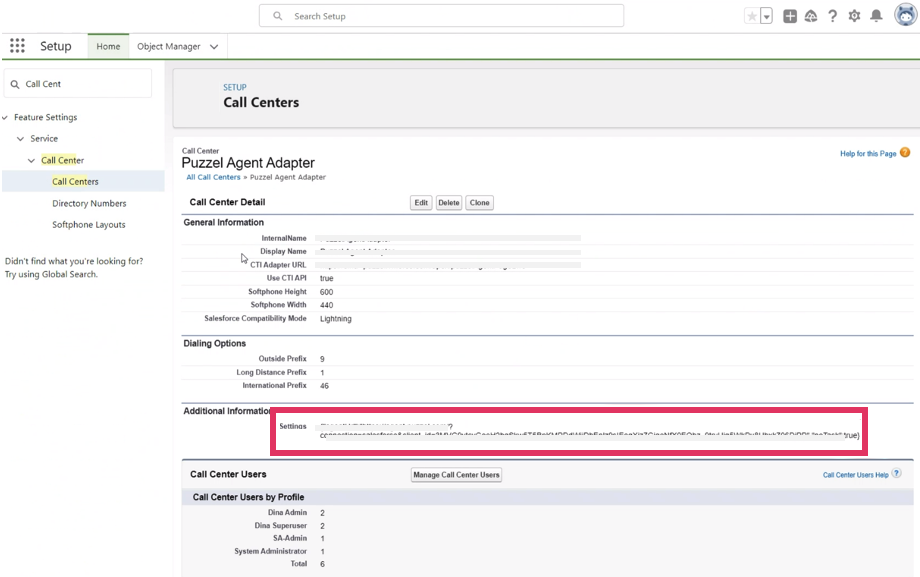
Step 7: Changing agentUrl setting
Finally you will have to change the “agentUrl” setting under “Additional Information” in SETUP.
The “agentUrl” value needs to be changed referring to a SSO connection within Puzzel ID using the “idp” parameter as explained in the previous step.