
Configure SSO with Google Workspace
Step 1: Add the custom SAML app in Google Admin
1.1 Sign in to your Google Admin console.
Sign in using an account with super administrator privileges.
1.2 In the Admin console, go to Menu and then Apps > Web and mobile apps.
1.3 Click "Add App" and then "Add custom SAML app".
Enter the app name and, optionally, upload an icon for your app. The app icon appears on the Web and mobile apps list, on the app settings page, and in the app launcher. If you don't upload an icon, an icon is created using the first two letters of the app name.
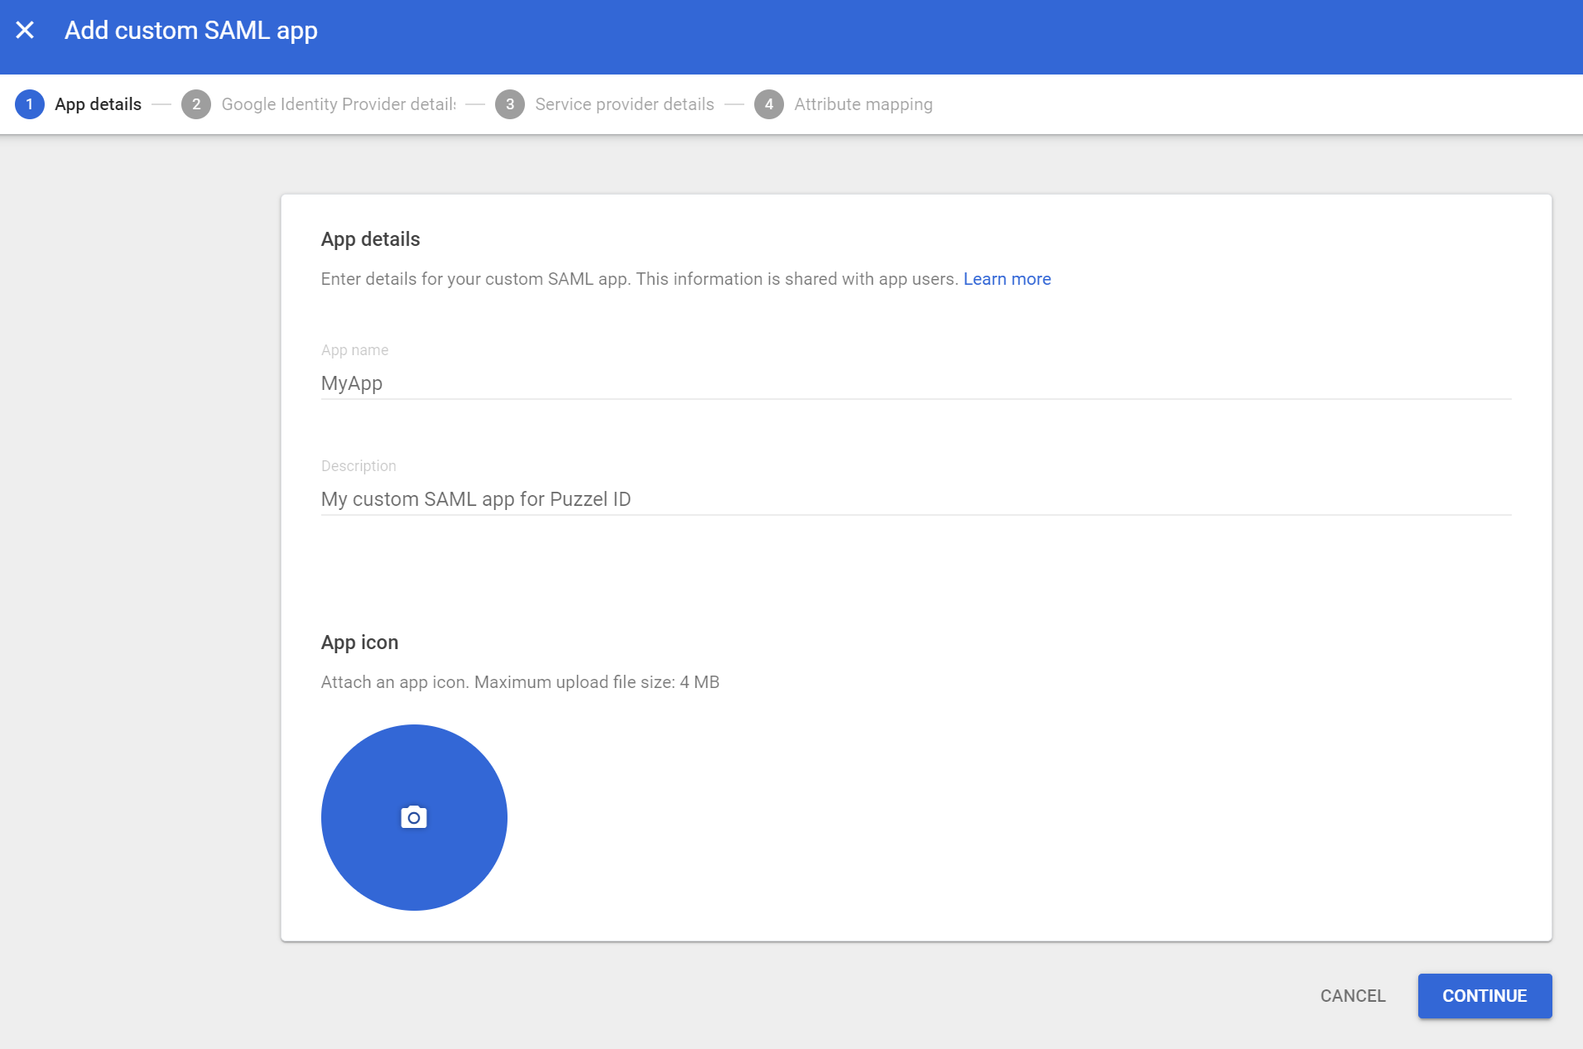
1.4 Click Continue.
1.5 On the Google Identity Provider details page, copy the SSO URL, Entity ID and the Certificate

Step 2: Add SSO Configuration in Puzzel ID
2.1 Open Puzzel Organisation settings in a new browser window / tab. From the Organisation Settings home page, click on the “Single Sign-On” icon.
2.2 Depending on whether you have added SSO configurations previously or not you should either see a list of current configurations or just an empty list, either way you should also have the “Add” button displayed on the top right.
2.3 Click on the “Add” button and choose “SAML” from the dropdown menu.
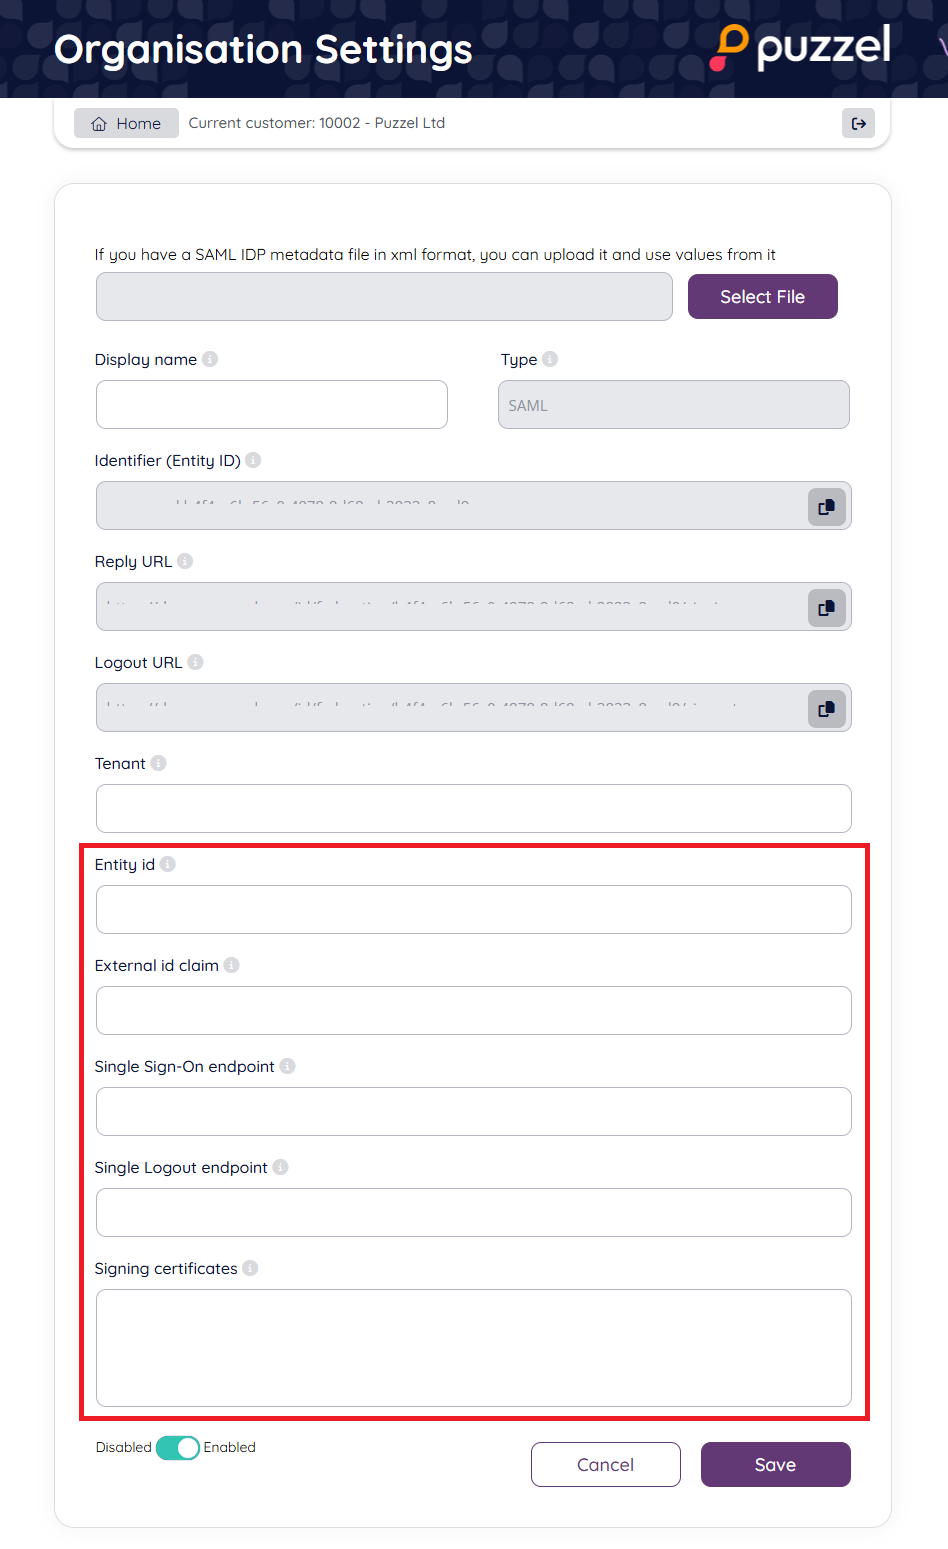
2.4 In the field "Entity id" paste the "Entity ID" value from the Google SAML app (step 1.5 above).
2.5 In the field "Single Sign-On endpoint" paste the "SSO URL" value from the Google SAML app (step 1.5 above).
2.6 In the field "Single Logout endpoint" add the value "https://accounts.google.com/Logout" (note that Google does not support SAML SLO as an identity or service provider)
2.7 In the field "External id claim" add the value "http://schemas.xmlsoap.org/ws/2005/05/identity/claims/nameidentifier" this means email address will be need to set as "External id" in Puzzel ID for each user that is to use this SSO connection. If you want to use other fields for externalid claims update this field accordingly.
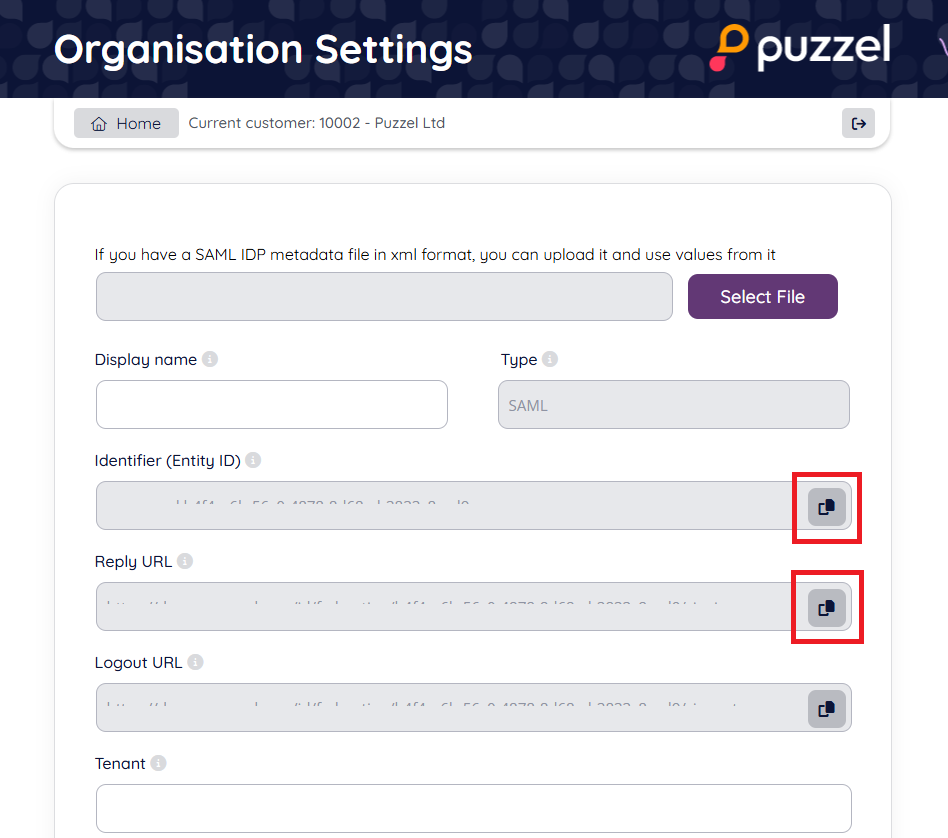
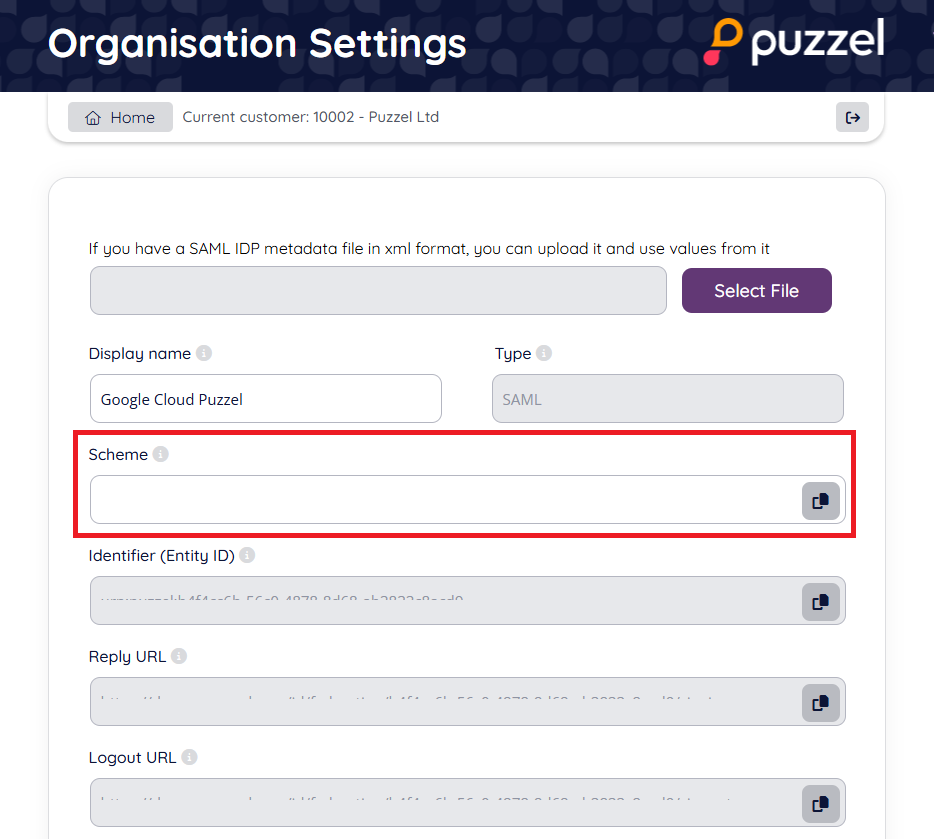
2.8 Copy the values from "Reply URL" and Identifier (Entity ID)
Step 3: Add further configuration to SAML app in Google Admin
3.1 Return to the Google Admin console and navigate to the Service Provider Details window.
3.2 In the field "ACS URL" add the value from "Reply URL" as copied in step 2.8 above.
3.3 In the field "Entity ID" - add the value from "Identifier (Entity ID) as copied in the 2.8 above
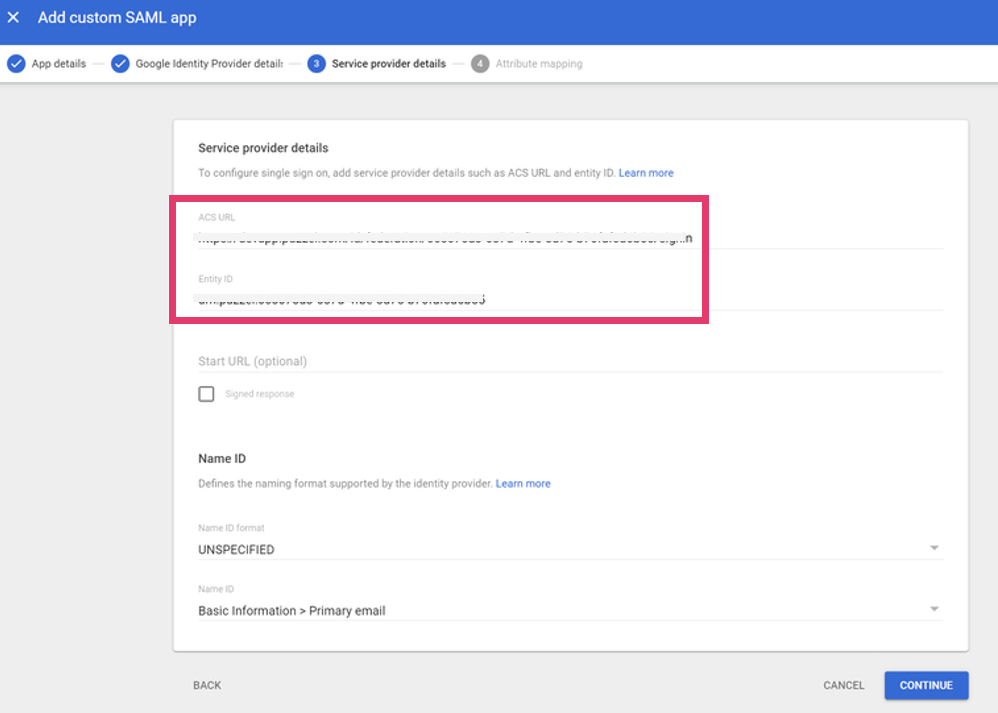
3.4 Leave all other fields with default settings and click Continue.
Step 4: Change scheme name (optional)
This is an optional step to improve readability when referring to a SSO configuration. It can be skipped if you just want to use the default GUID based scheme value or don't want to use the "idp=" query parameter at all.
You can use the “Scheme” value for a SSO configuration as the “idp” parameter for the agent. This is described in the section "Accessing external providers directly" in this article.
If you do not change the Scheme name it will use the default GUID for the scheme, as an example: https://devapp.puzzel.com/agent/?idp=42bd9bd8-1486-4f05-ba7a-xxxxxxxxxxxxxxxx.
To change the “Scheme” from the generated id to a readable name, you can edit the “Scheme” field as shown below and click “Save”:
Step 5 - Make sure externalid field is populated for users
To test the configuration, the field “externalid” must be filled out for the users to login with during testing. If you have followed the guide above, and not changed anything in “External id claim”, then it is the users email that needs to be present in the representative external id field.
Example:
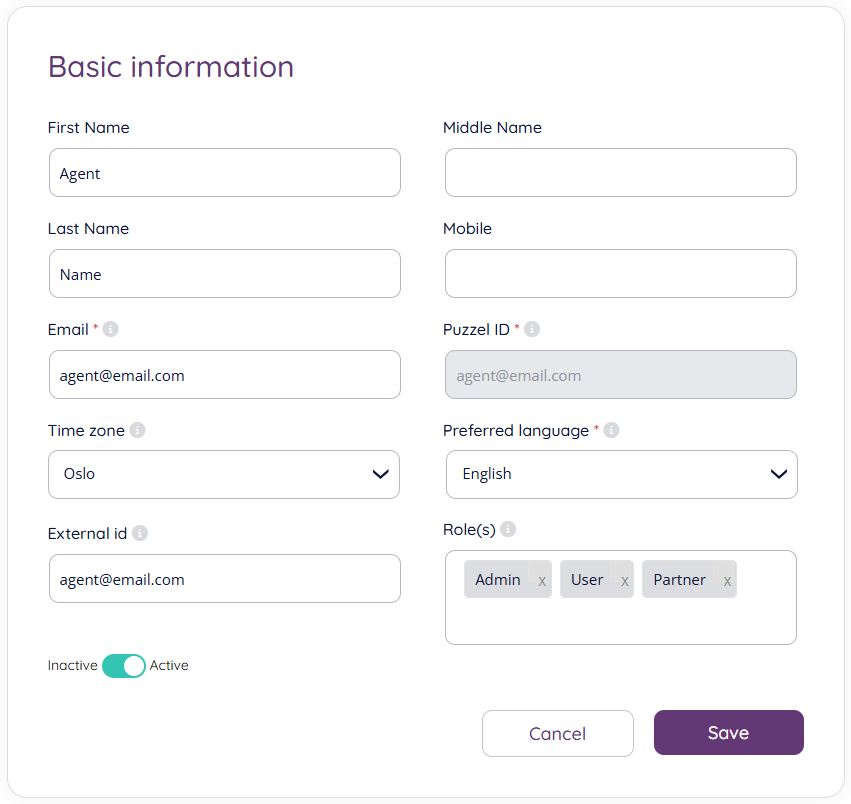
See more information on this in the section “Validate users using external id” in this article.