
Data Sources
Overview
The main purpose of a data source in SupSearch is to extract articles — small, searchable units of knowledge — from your connected information sources.
These articles can represent help topics, troubleshooting steps, policies, or sections of larger documents.
From the Knowledge Hub, you can:
Add and configure data sources
Extract and review articles from connected systems
Monitor synchronization or scraping progress
Connect extracted articles to Search Engines for indexing
2. Adding a New Data Source
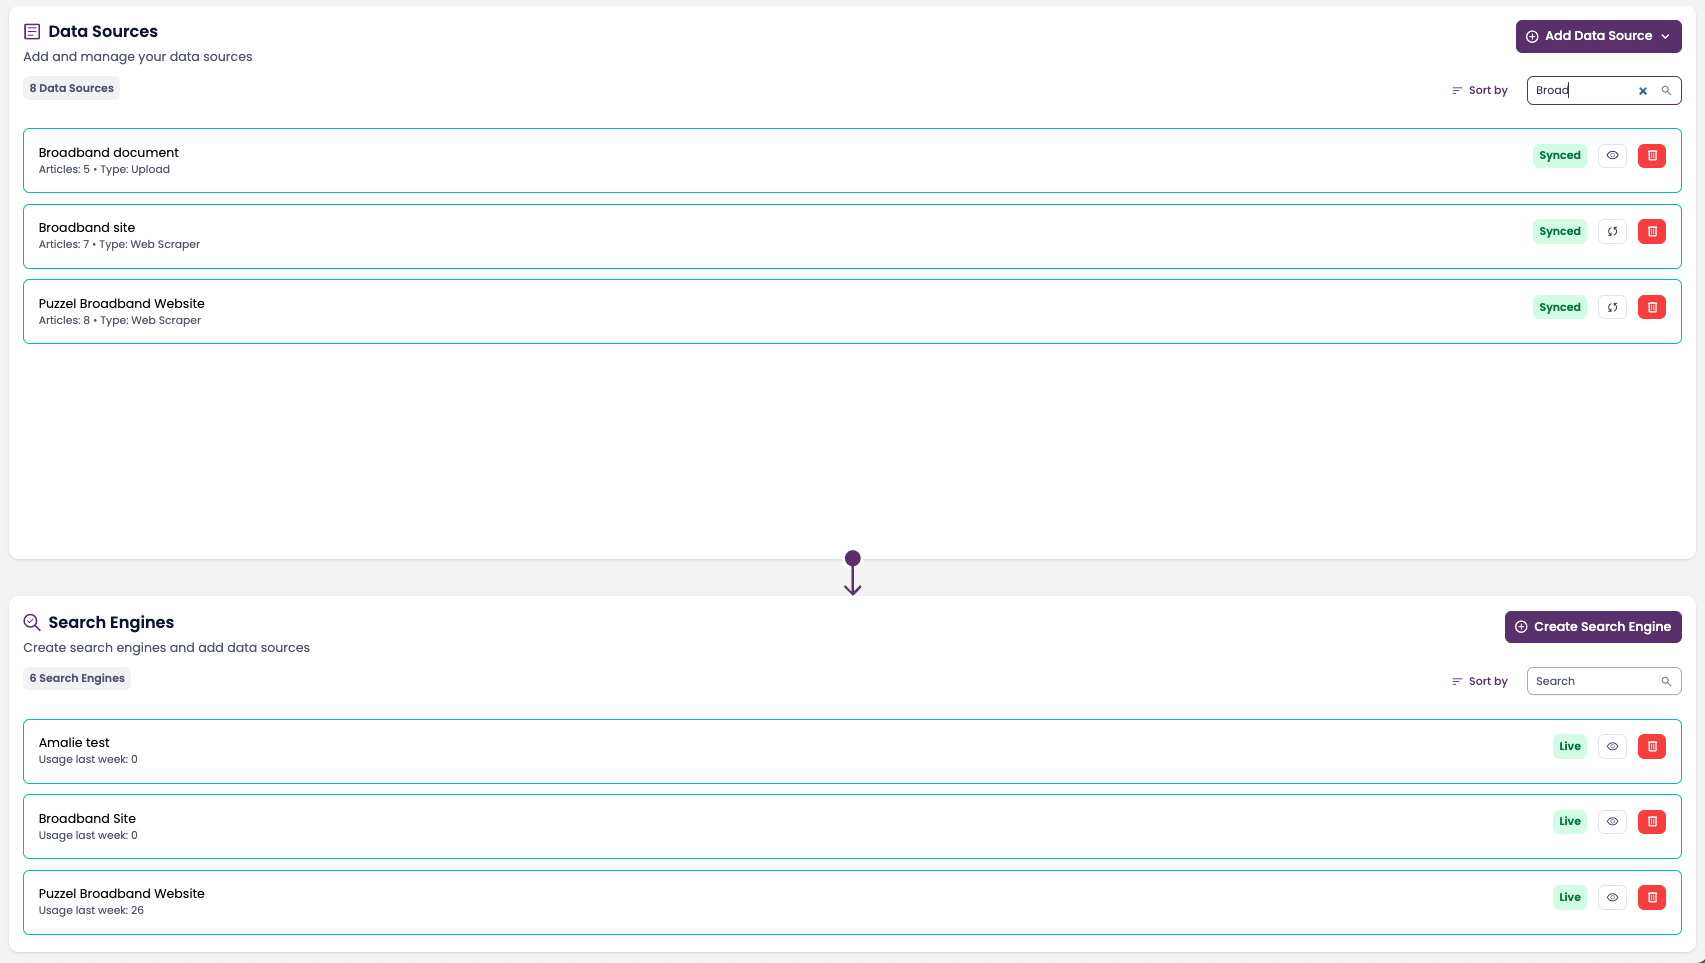
Go to Knowledge Hub → Data Sources.
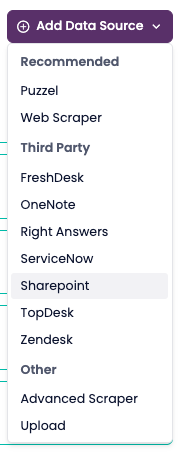
Click Add Data Source in the top-right corner.
Select the type of data source (Puzzel, Web Scraper, Upload, or third-party).
Fill in the required fields.
Click Create Data Source to save.
Once created, the data source begins extracting articles when synced or scraped.
However, these articles only become searchable after you add the data source to a Search Engine.
Core Data Source Types
Most SupSearch environments use these three primary data sources:
Puzzel Knowledge Base (recommended)
Web Scraper (website extraction)
Upload (document-based extraction)
3.1 Puzzel Knowledge Base (Recommended)
The Puzzel connector integrates directly with your Puzzel Knowledge Base, automatically extracting published articles.
Each article becomes searchable after it’s linked to a Search Engine.
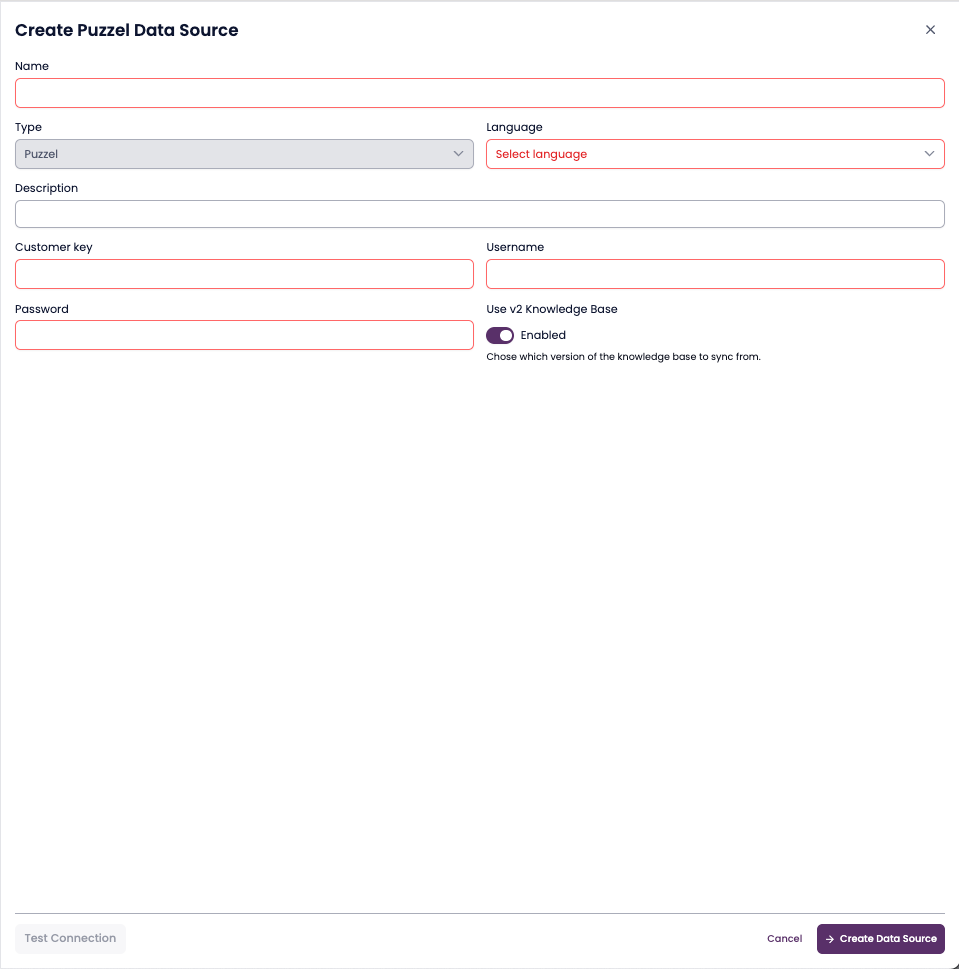
Required Fields
| Field | Description |
|---|---|
| Name | A descriptive name (e.g. Puzzel Help KB) |
| Language | Primary content language |
| Customer Key | Provided by your Puzzel administrator |
| Username / Password | API credentials |
| Use v2 Knowledge Base | Toggle for latest KB API version |
Steps
Enter credentials and details.
(Optional) Enable Use v2 Knowledge Base.
Click Test Connection.
Click Create Data Source to extract articles.
3.2 Web Scraper
The Web Scraper automatically extracts articles from public or internal web pages.
It’s ideal for external help centers, FAQ pages, and documentation portals.
Required Fields
| Field | Description |
|---|---|
| Name | e.g. Broadband Support Website |
| Description | Optional details |
| Domain | The base URL or sitemap to scrape |
💡 Tip: Limit the scope to specific subdomains or paths for faster results.
Steps
Enter the domain and details.
Fill in the name, description, and base domain for your website.
You can also specify subdomains or paths to narrow the scope.Click Create Data Source.
This saves your configuration and prepares the source for scraping.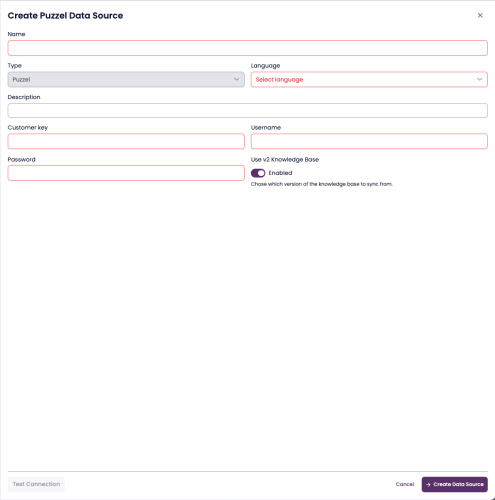
Click Scrape to start extraction.
SupSearch uses a Large Language Model (LLM) to analyze your site and decide which pages should be scraped.
The LLM automatically identifies relevant help articles, FAQs, or documentation pages.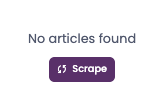
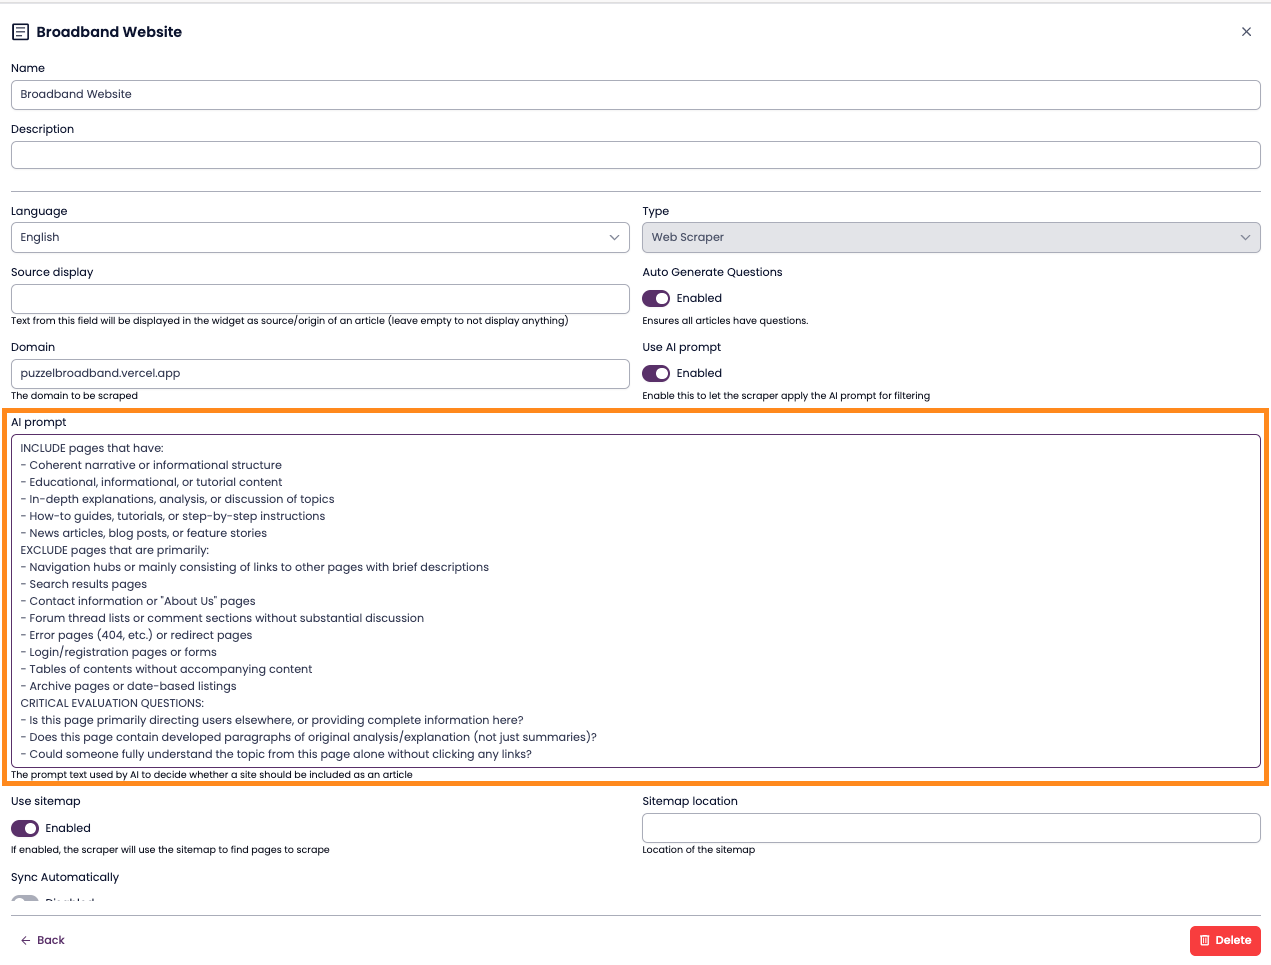
(Optional) Adjust the inclusion prompt.
There is a default prompt that guides how the LLM decides which pages to include.
The default works well in most cases, but you can edit it under Advanced Settings for finer control.
Review the site tree.
After crawling, a site tree is displayed showing all pages and subpages included in the scrape.
You can override the LLM’s inclusion/exclusion decisions by clicking Include or Exclude next to each page.
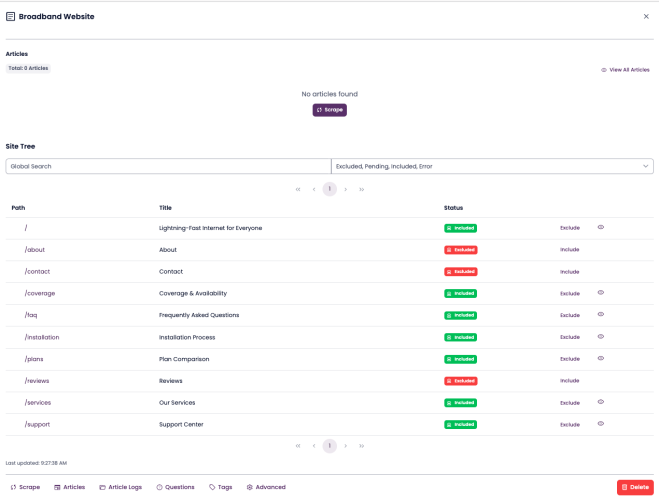
- Confirm and complete the scrape.
Once your selections are finalized, the web scrape completes and the extracted articles are ready for use.
- Your website content is now searchable through SupSearch.


Status Indicators
🟠 Scraping – Extraction in progress
🟢 Synced – Articles extracted and ready
⚪ No Data – No content found
3.3 Upload
The Upload data source lets you extract articles from local documents such as manuals, PDFs, or internal files.
SupSearch automatically splits documents into article-sized sections.
📸 [Screenshot – Upload Data Source view]
Supported File Types
PDF (.pdf)
Word (.docx)
CSV (.csv)
JSON (.json)
Creating an Upload Data Source
Go to Knowledge Hub → Data Sources.
Click Add Data Source → Upload.
Enter:
Name – e.g. Product Manuals
Language – Primary language
Description – Optional
Click Create Data Source.
Uploading and Converting Files
Converting Files into Articles (Refined)
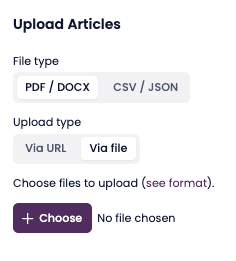
Click Upload Articles.

Choose the file type.
Select PDF/DOCX, CSV, or JSON.
Choose the upload method.
URL: Enter the web address where the document is stored online, used for source links.
File: Click + Choose, select a file from your computer.
Upload the document.
If using URL, paste the link and confirm.
If using File, select your file and click Upload.
📸 Screenshot placeholder: “File chooser / URL input”
Open the “Convert Files to Articles” modal.
After the upload finishes, the Convert Files to Articles modal opens automatically.
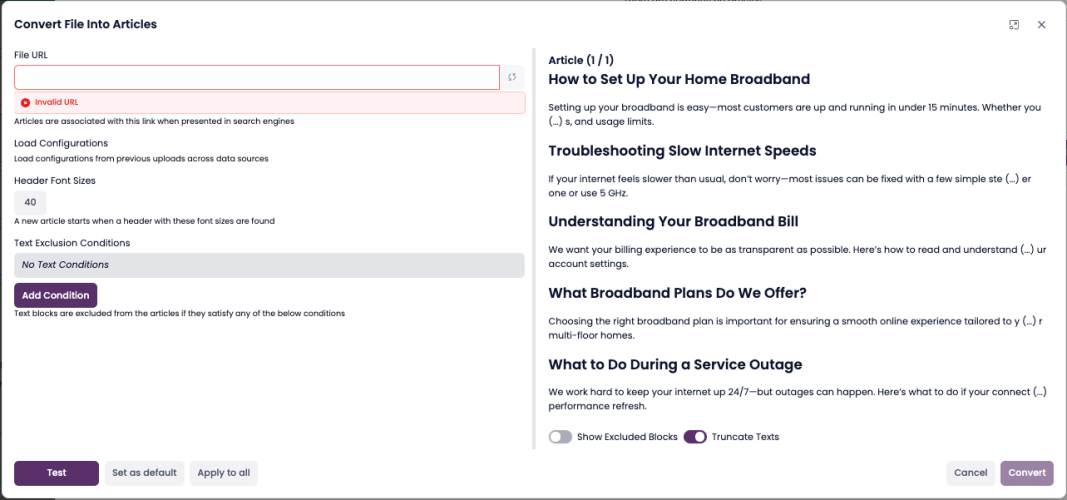
Add the Source URL (required).
Enter a URL where the document can be found online. This is used for source reference in search results.Set how the document should be split into articles.
Header Font Sizes: Choose which heading levels to use for splitting (e.g., H2, H3).
Text Exclusion Conditions (optional): Define rules to remove unwanted sections (e.g., footers, disclaimers).
Click Convert.
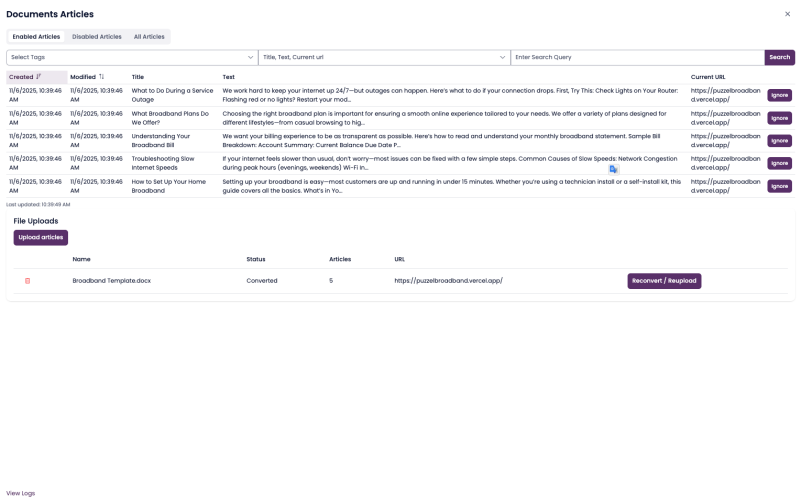
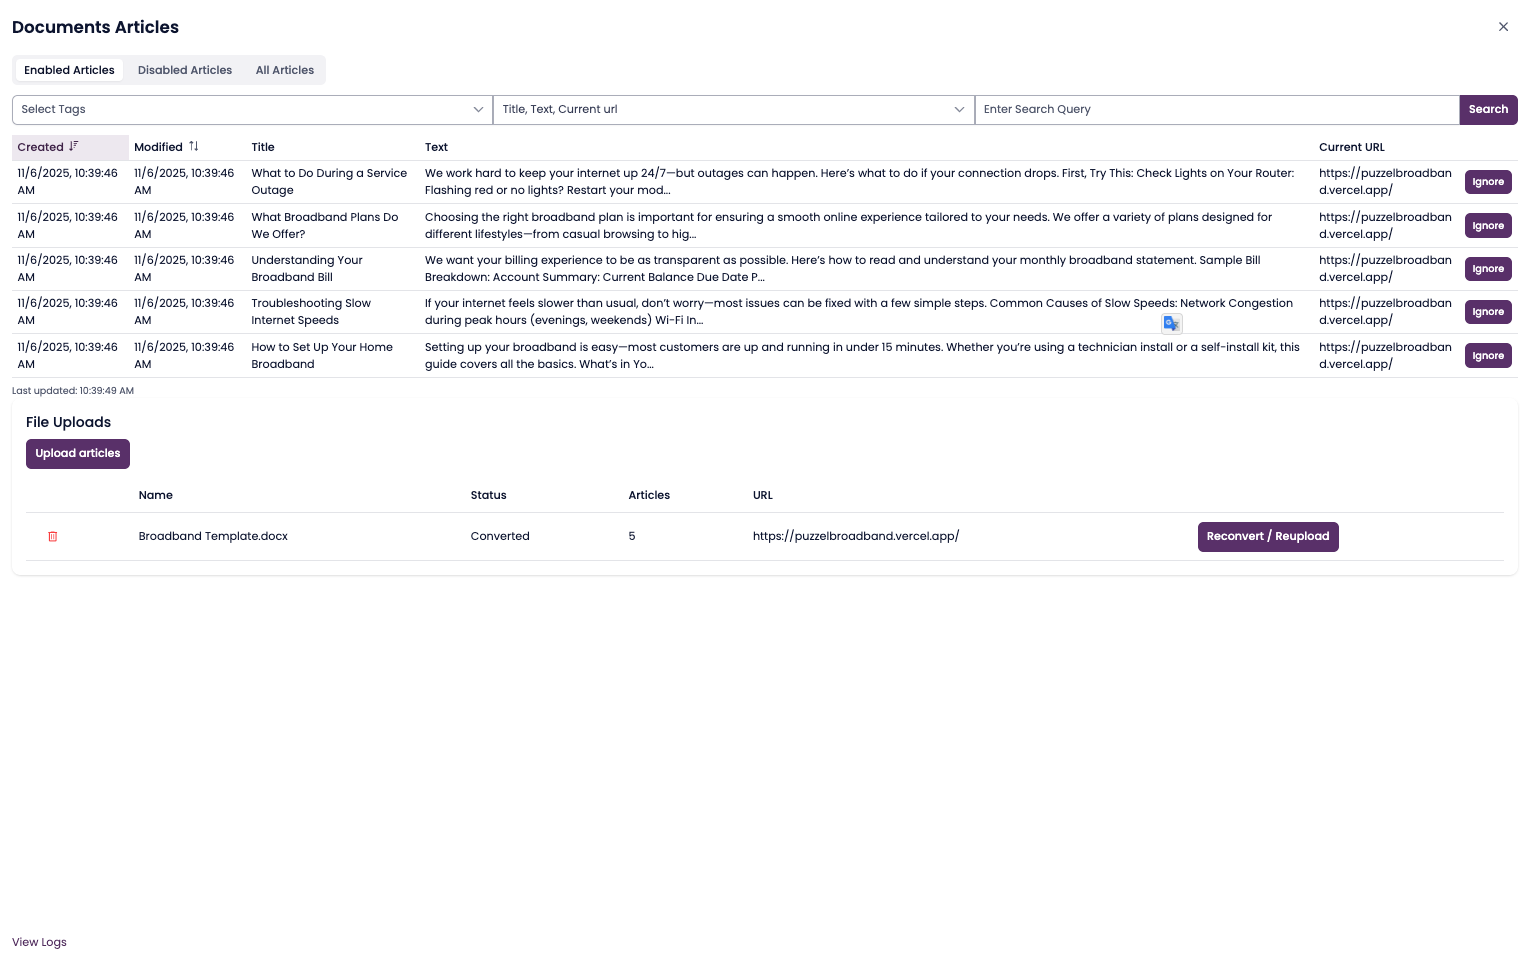
SupSearch converts the document into articles using your selected rules.Review the results.
After conversion, articles appear under the Articles tab for review and any edits (rename, merge, delete).


4. Third-Party Integrations
SupSearch can also extract articles from external systems through API-based connectors.
These work similarly but require authentication details for each platform.
| Connector | Description | Required Fields |
|---|---|---|
| Freshdesk | Extracts articles from Freshdesk Help Center | Instance Name, API Password |
| OneNote | Extracts notes from Microsoft OneNote | Tenant ID, Client ID, Client Secret |
| Right Answers | Connects to RightAnswers API | Endpoint, Company Code, Username, Password |
| ServiceNow | Extracts ServiceNow KB content | Instance Name, Username, Password, API Token |
| SharePoint | Extracts internal documentation | Tenant ID, Client ID, Client Secret |
| TopDesk | Extracts IT/Service Desk knowledge | Endpoint, Username, Password |
| Zendesk | Extracts Zendesk Help Center articles | Endpoint, API Token |
💡 Note: These integrations also require being added to a Search Engine for their articles to become searchable.
5. Monitoring and Maintenance
The Data Sources list shows extraction progress and readiness for each source.
| Status | Meaning |
|---|---|
| 🟠 Scraping / Syncing | Extracting articles in progress |
| 🟢 Synced | Extraction complete and ready for indexing |
| ⚪ No Data | No accessible content found |
You can re-sync, edit, or delete data sources at any time.