
Creating Scorecards
To create a scorecard, you will need to:
1. Go to EVALUATE
2. Click Manage scorecards
Tip: To help get you started, your account is seeded with 3 best practice scorecards
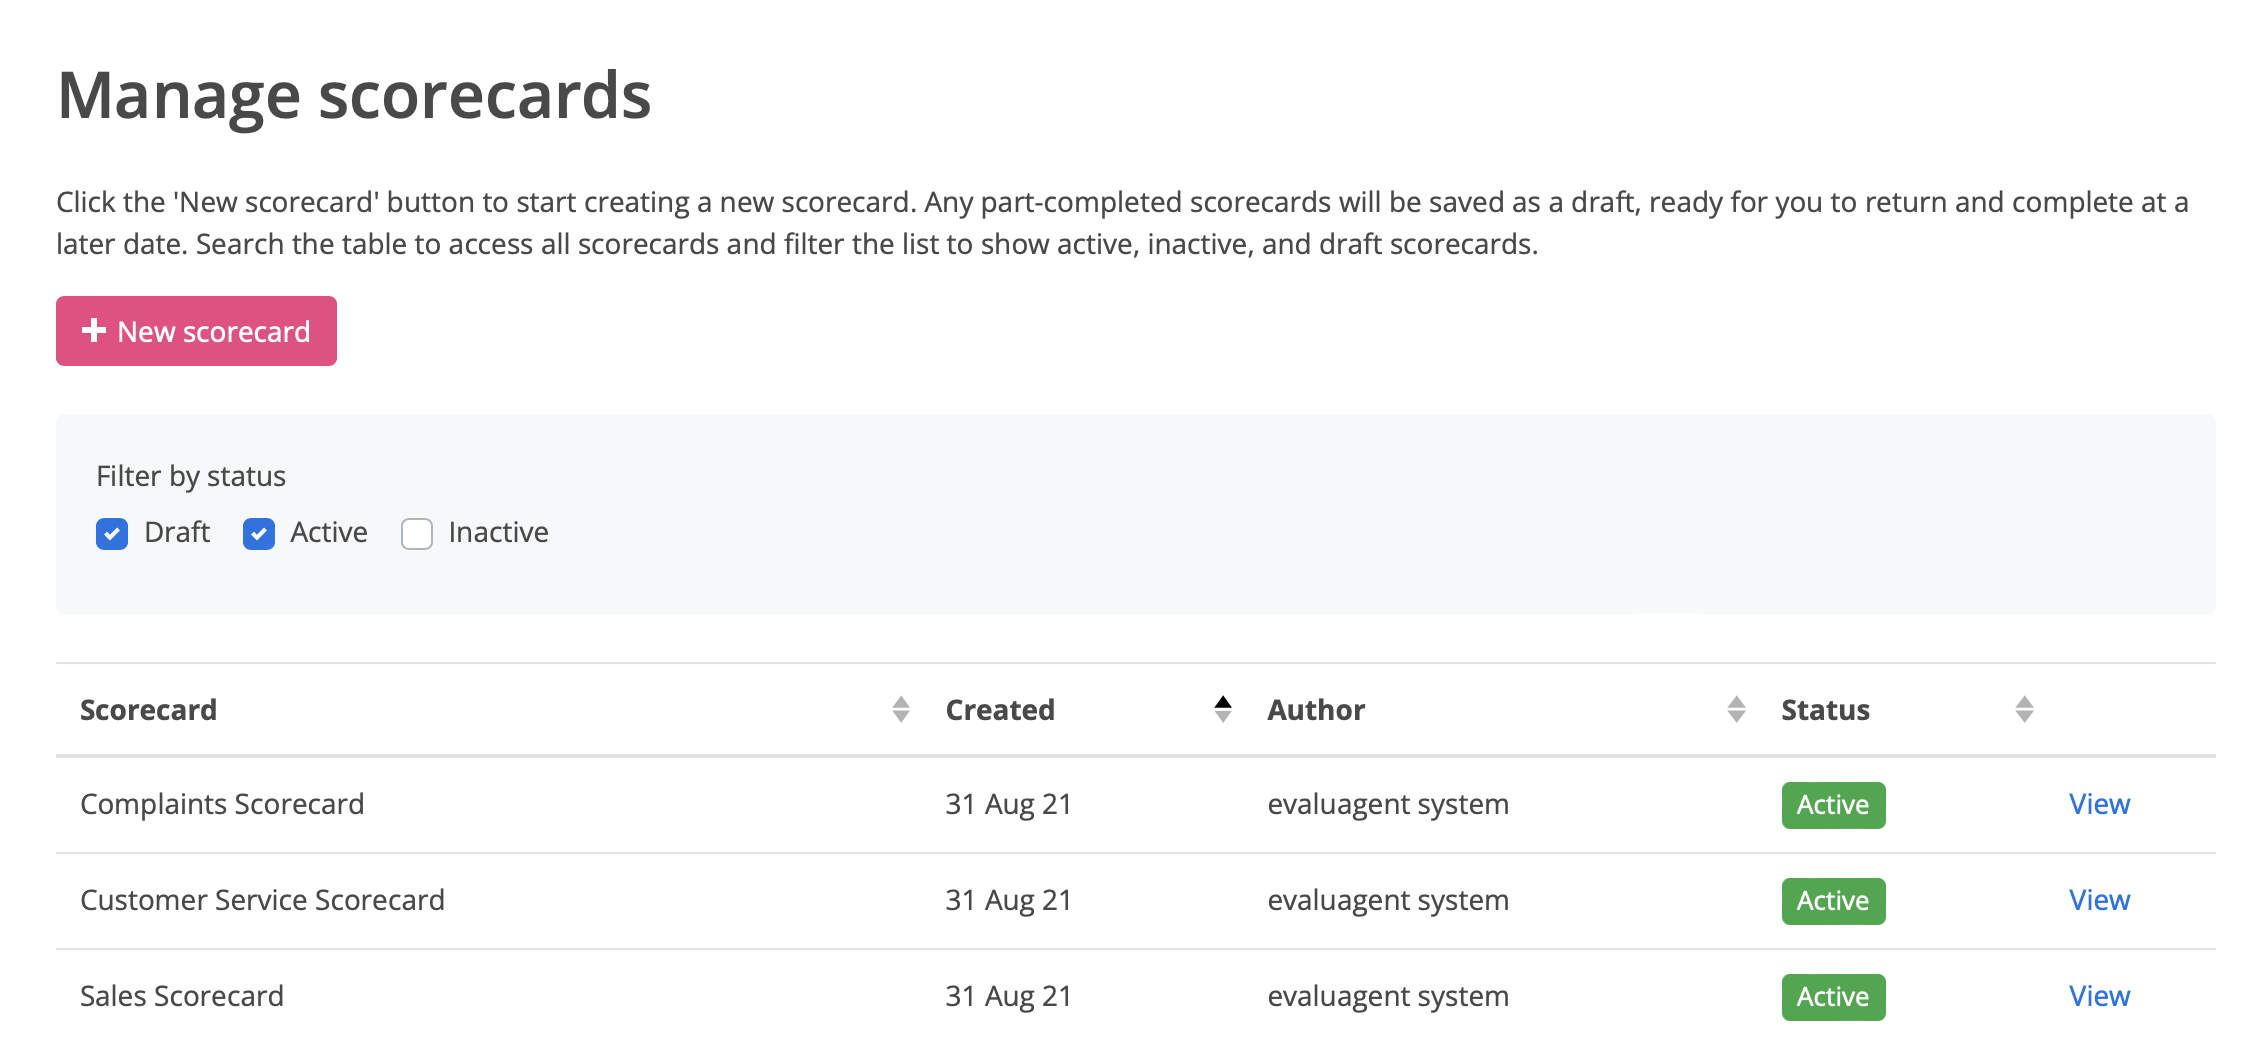
Click the button + New scorecard and you'll be directed to the following screen
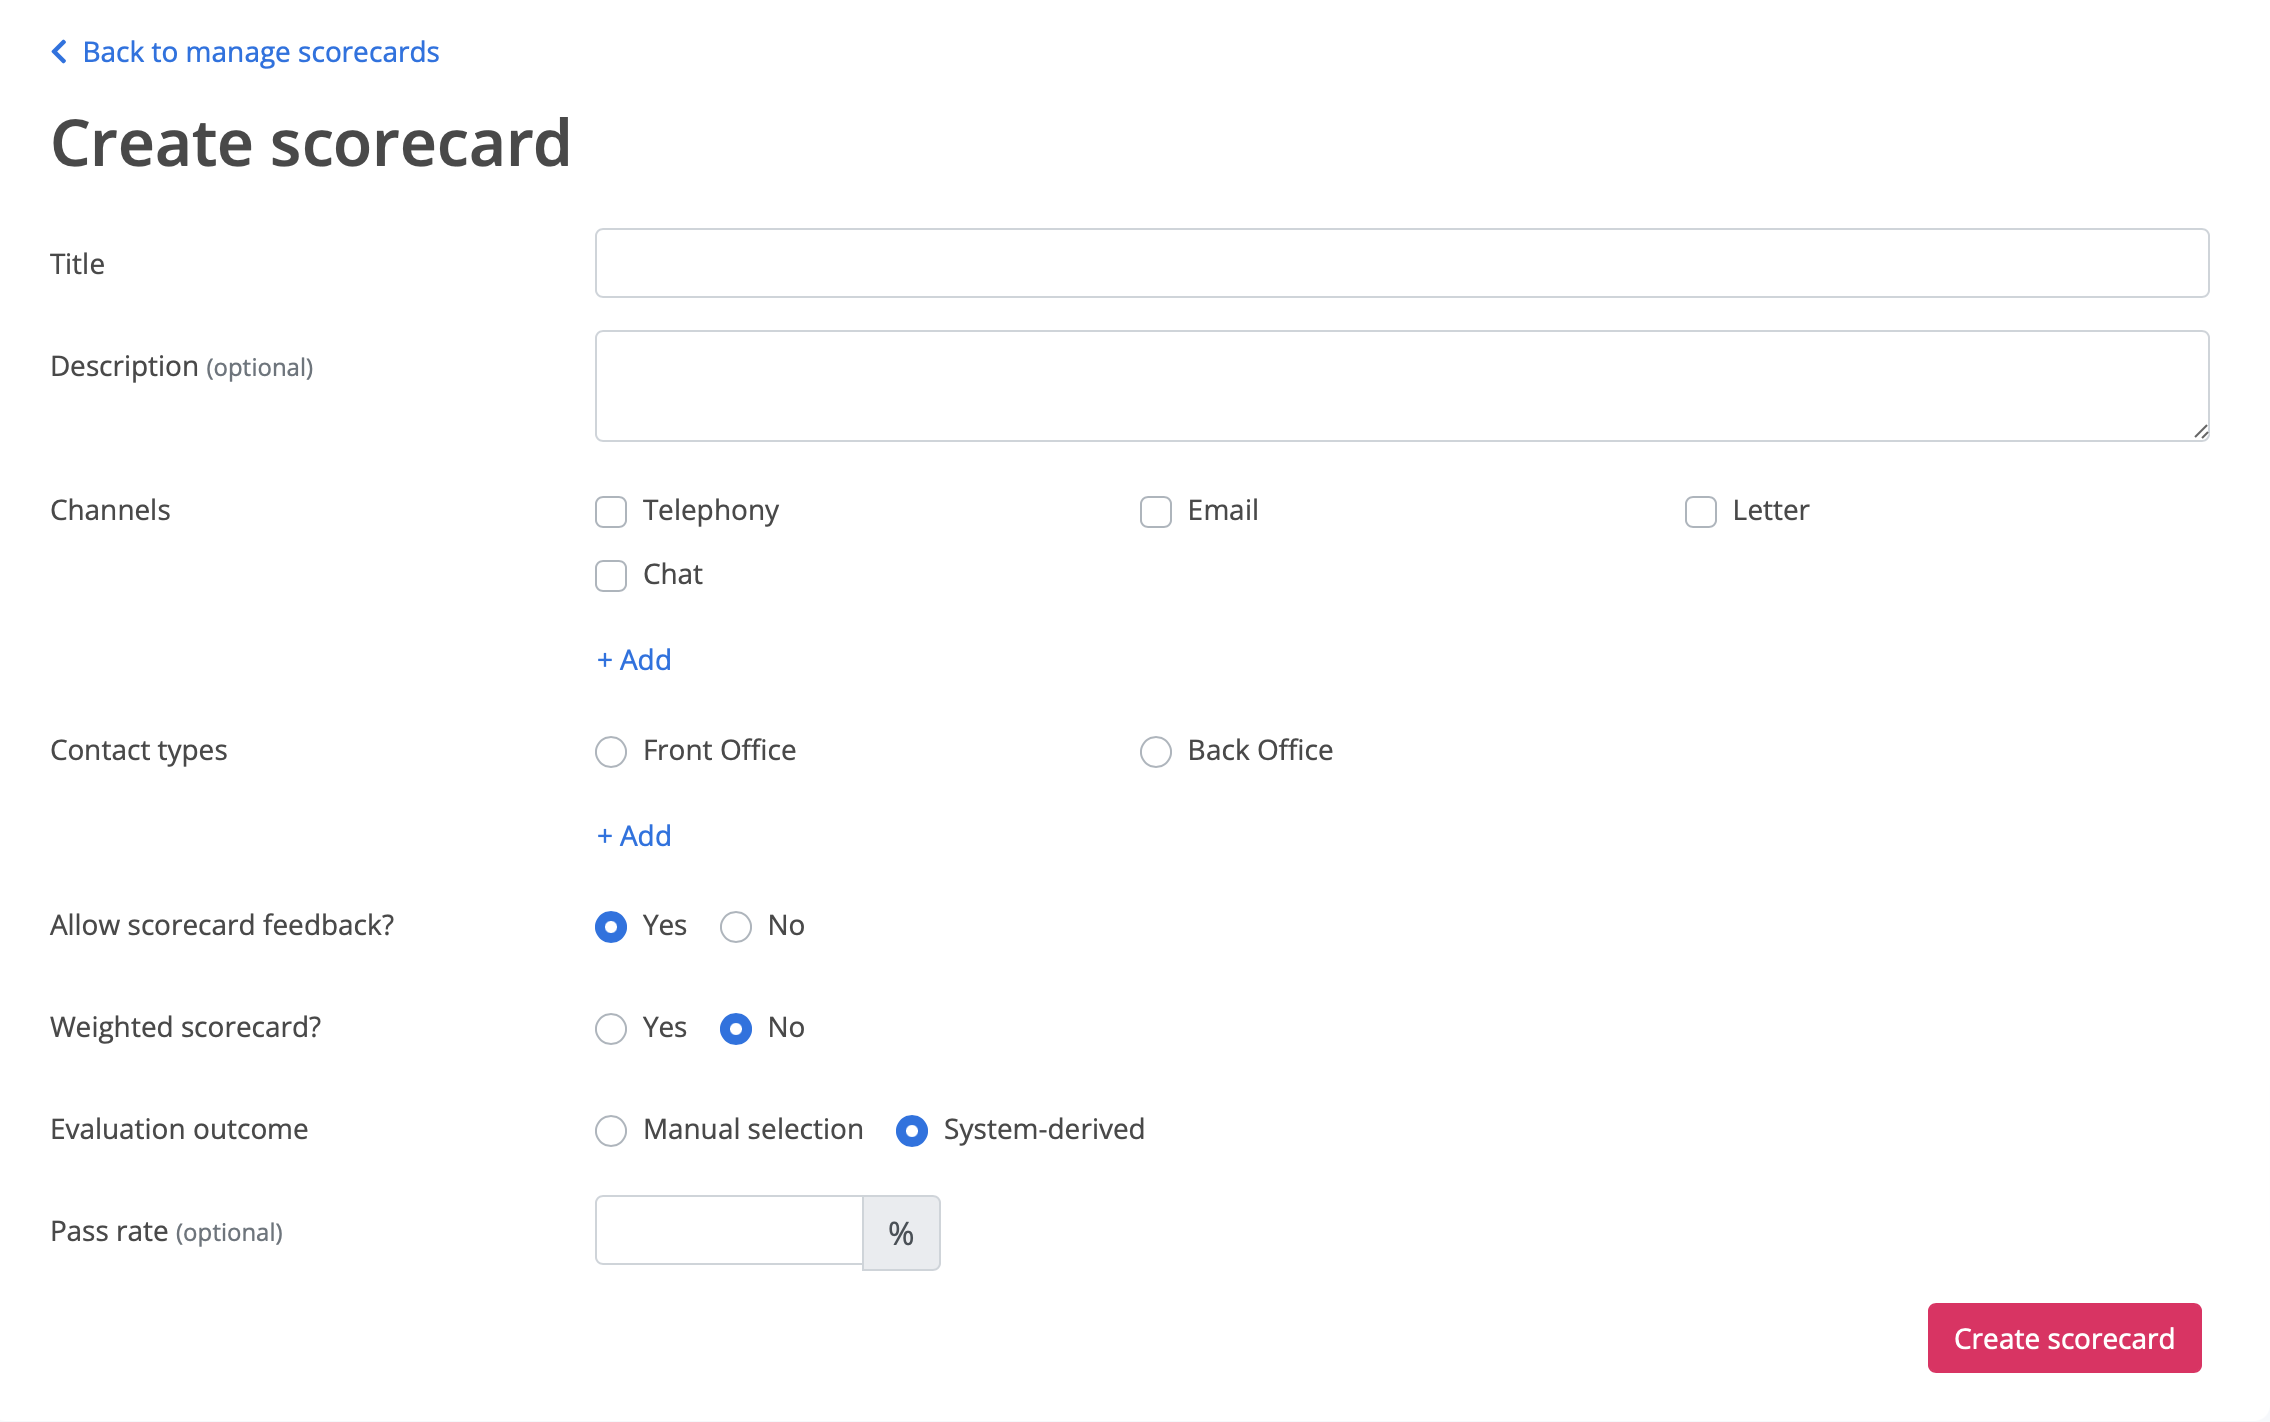
Step 1: Configure scorecard settings
There are a number of fields to complete on this first screen
Part 1: Title: This name will appear in all reports. It is not possible to have two scorecards with the same name, so we recommend that you version control your scorecards.
Part 2: Description: This is optional, but you can use the description field to add any context to the scorecard.
Part 3: Channels: You can evaluate contacts on any channel. Channels are used to help filter which scorecards are presented to the evaluator and can also be used to filter reports. Contact channels can be configured in Quality Settings. Alternatively, for your convenience, a new channel can be added as you are building the scorecard. Simply click the +Add button
Part 4: Contact types: Like channels, contact types can be used to filter scorecards and reports. Contact types can be configured in Quality Settings. Alternatively, for your convenience, a new contact type can be added as you are building the scorecard. Simply click the +Add button
Part 5: Allow scorecard feedback?: You can create scorecards that prompt Evaluators to add agent-feedback on the overall evaluation, on a section or on a line item. Here you simply decide whether your scorecard will allow an evaluator to add feedback on the overall evaluation. The words and language used to prompt feedback can be configured in Quality Settings.
Part 6: Is it a weighted scorecard?: You can can accommodate weighted and non-weighted scorecards. If the scorecard is weighted, then you will be prompted to assign a weighting to each line item/question when you start adding line items in the next step of the process.
Part 7: Evaluation Outcome: You have two options here.
- System Derived: Every time this scorecard is used to evaluate a contact, the Outcome ("Pass" or "Fail") is derived by comparing the resulting quality score against the Pass rate that you enter. In this option, auto-fail line items are also used to determine the Outcome. E.g. if an auto-fail line item is marked as a "Fail", then the Evaluation Outcome will be a "Fail". You can change the words used to describe these System-derived "Pass" / Fail" outcomes via Quality Settings.
- Manual Selection: Every time this scorecard is used to evaluate a contact, the Outcome is to be selected by the Evaluator from a list of manual outcomes you can configure in Quality Settings. Alternatively, for your convenience, you can view and edit manual outcomes as you are building the scorecard. Simply tick the manual selection radio button and then click show manual outcomes
Once you have added the scorecard details, you’re ready to start adding sections and line items/questions to your scorecard. Click the button, Create scorecard and you'll be directed to the next screen.
Step 2: Add Sections to you scorecard
Sections are used to group line items together to help organise the evaluation process. For example, you may choose to create an Identify & Verify Section which will be used to group all of the line items you need to QA in order to determine if a customer has been properly identified and verified.
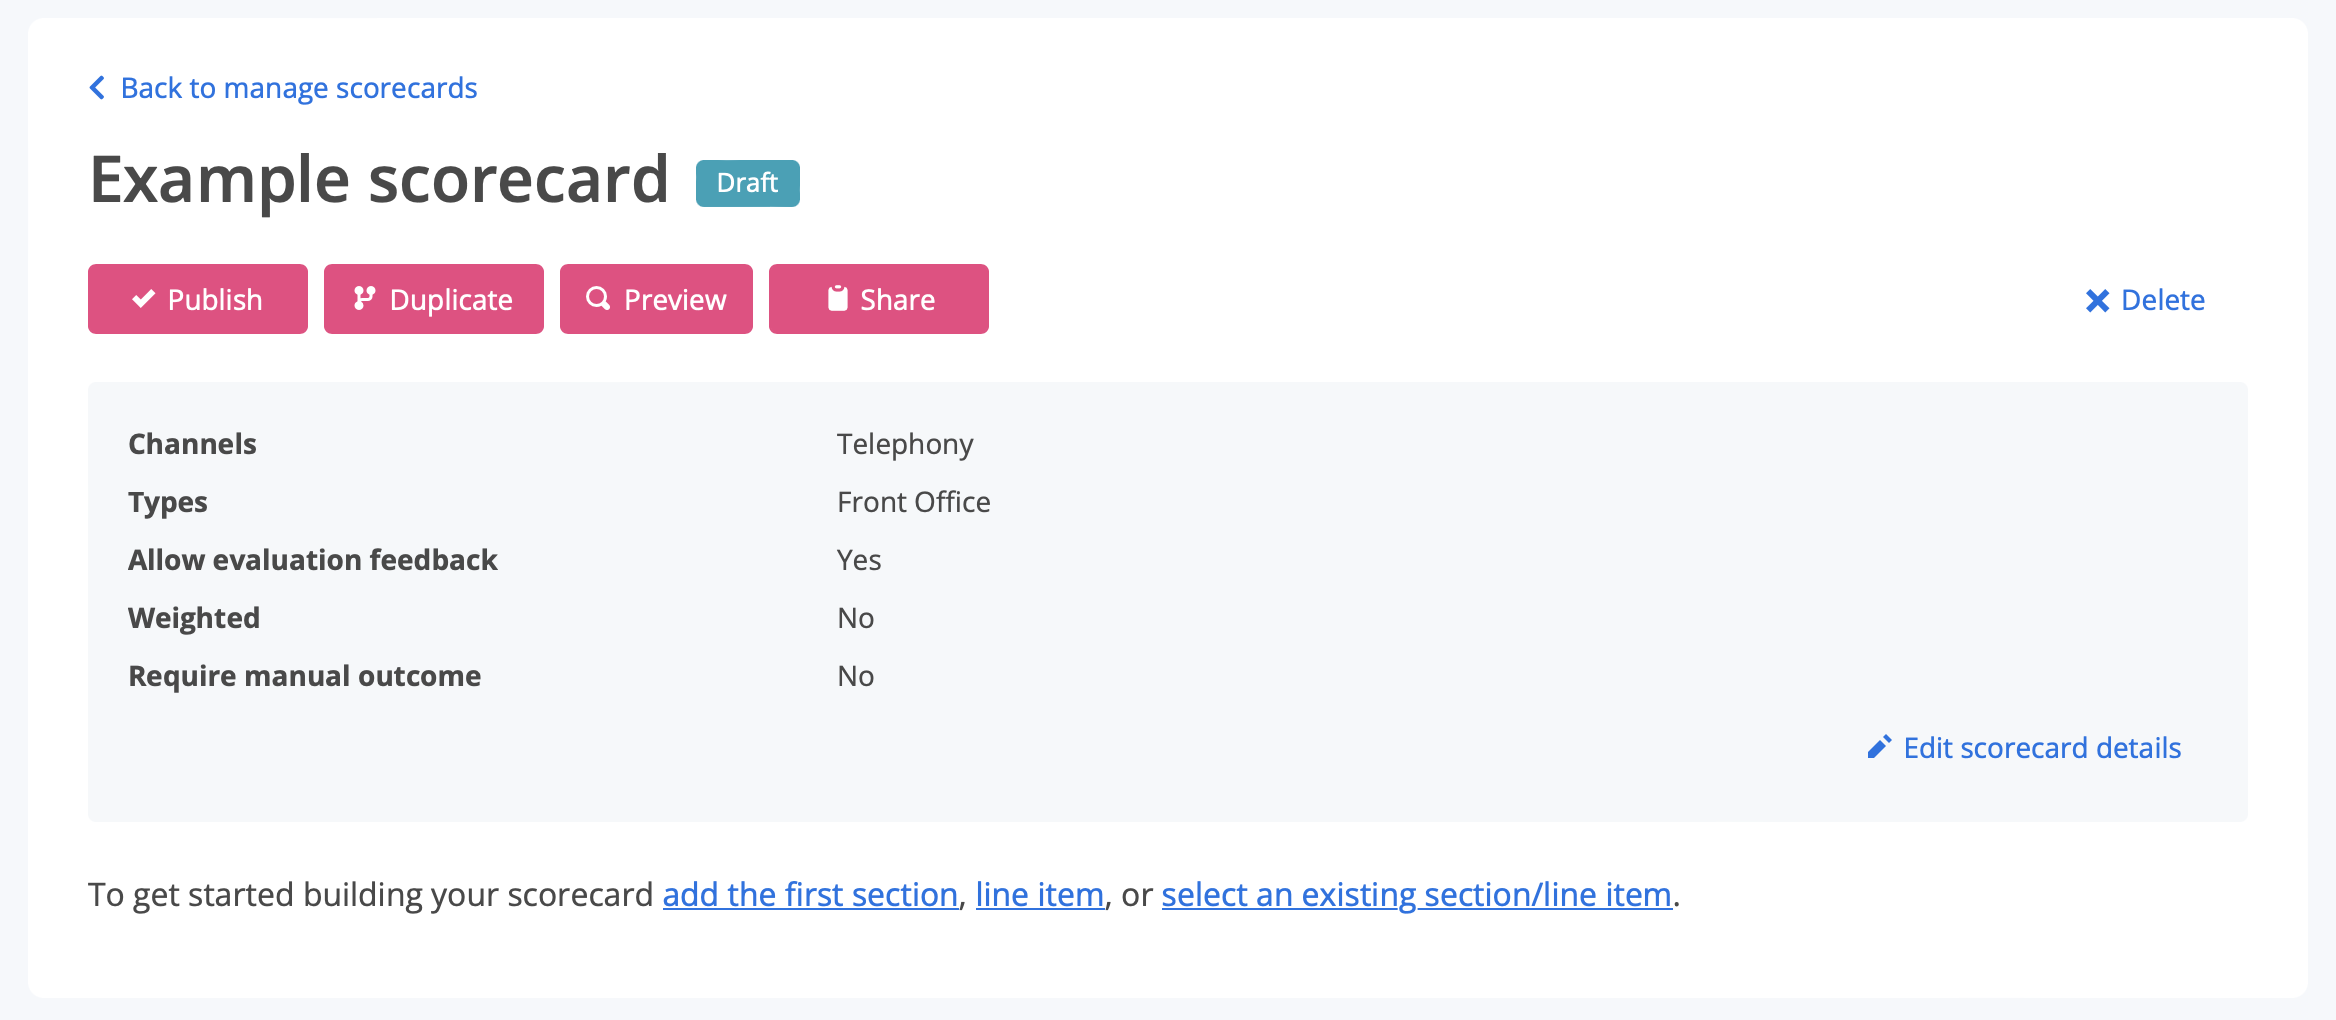
You may choose not to add sections at this time and skip straight to the next step of adding line items. Don't worry, you can add a section at any time during the scorecard creation/editing process and, if you don't even need to add any sections on your scorecard
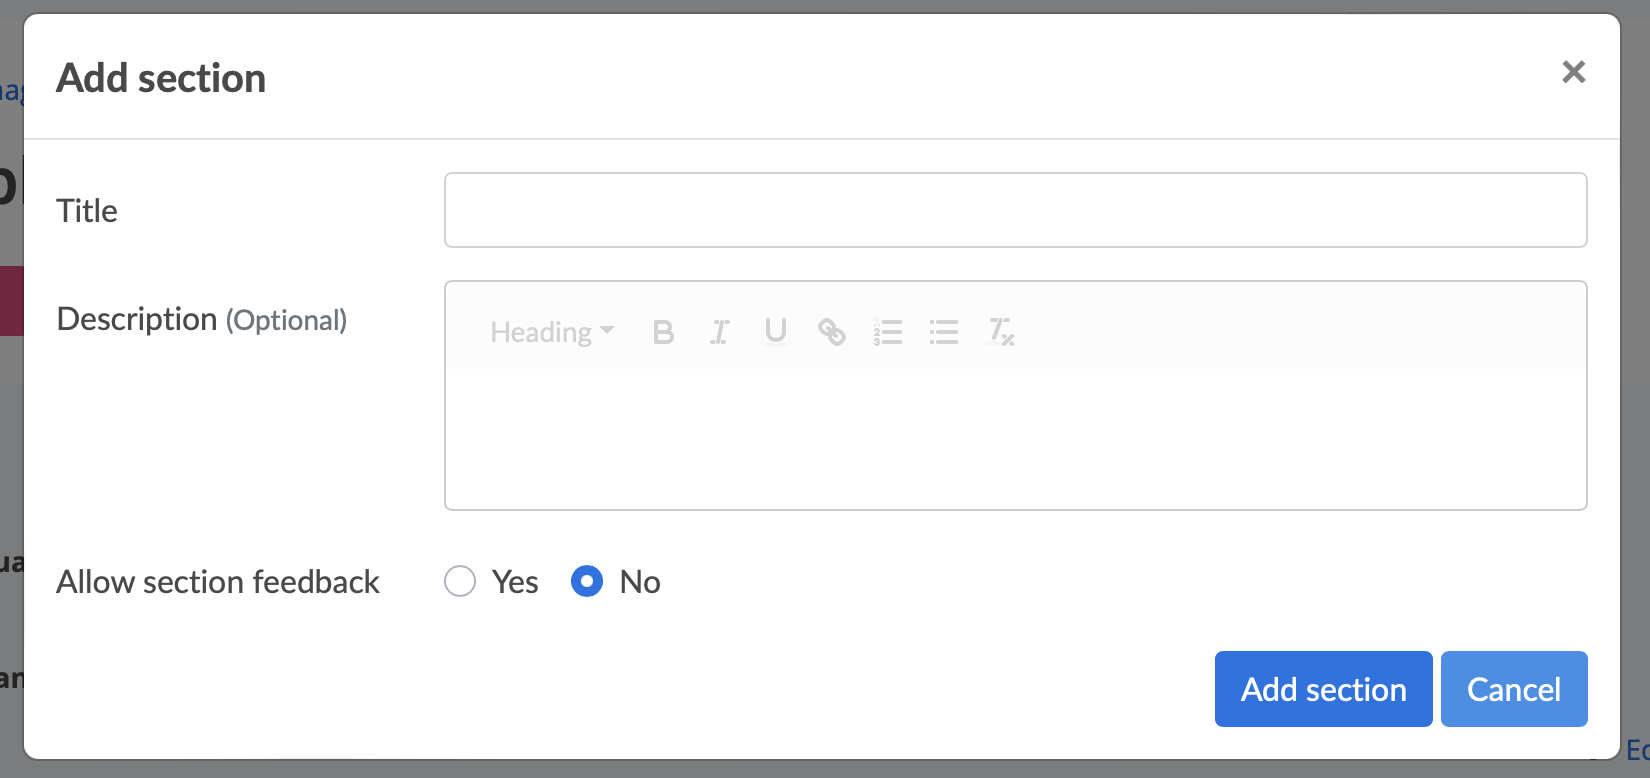
To add a brand new section, simply click add the first section and the following screen will appear. Add a Title for the section; add a Description (optional) and decide whether to allow Evaluators to add agent-feedback to this section during evaluation.
Click Add section and your new section will appear on the Scorecard.
From here, you can continue to add new sections, or import sections from existing scorecards, or you can start adding line items.
Step 3: Add Line items to you scorecard
To add a brand new line item, simply click a + Add line item and the following screen will appear.
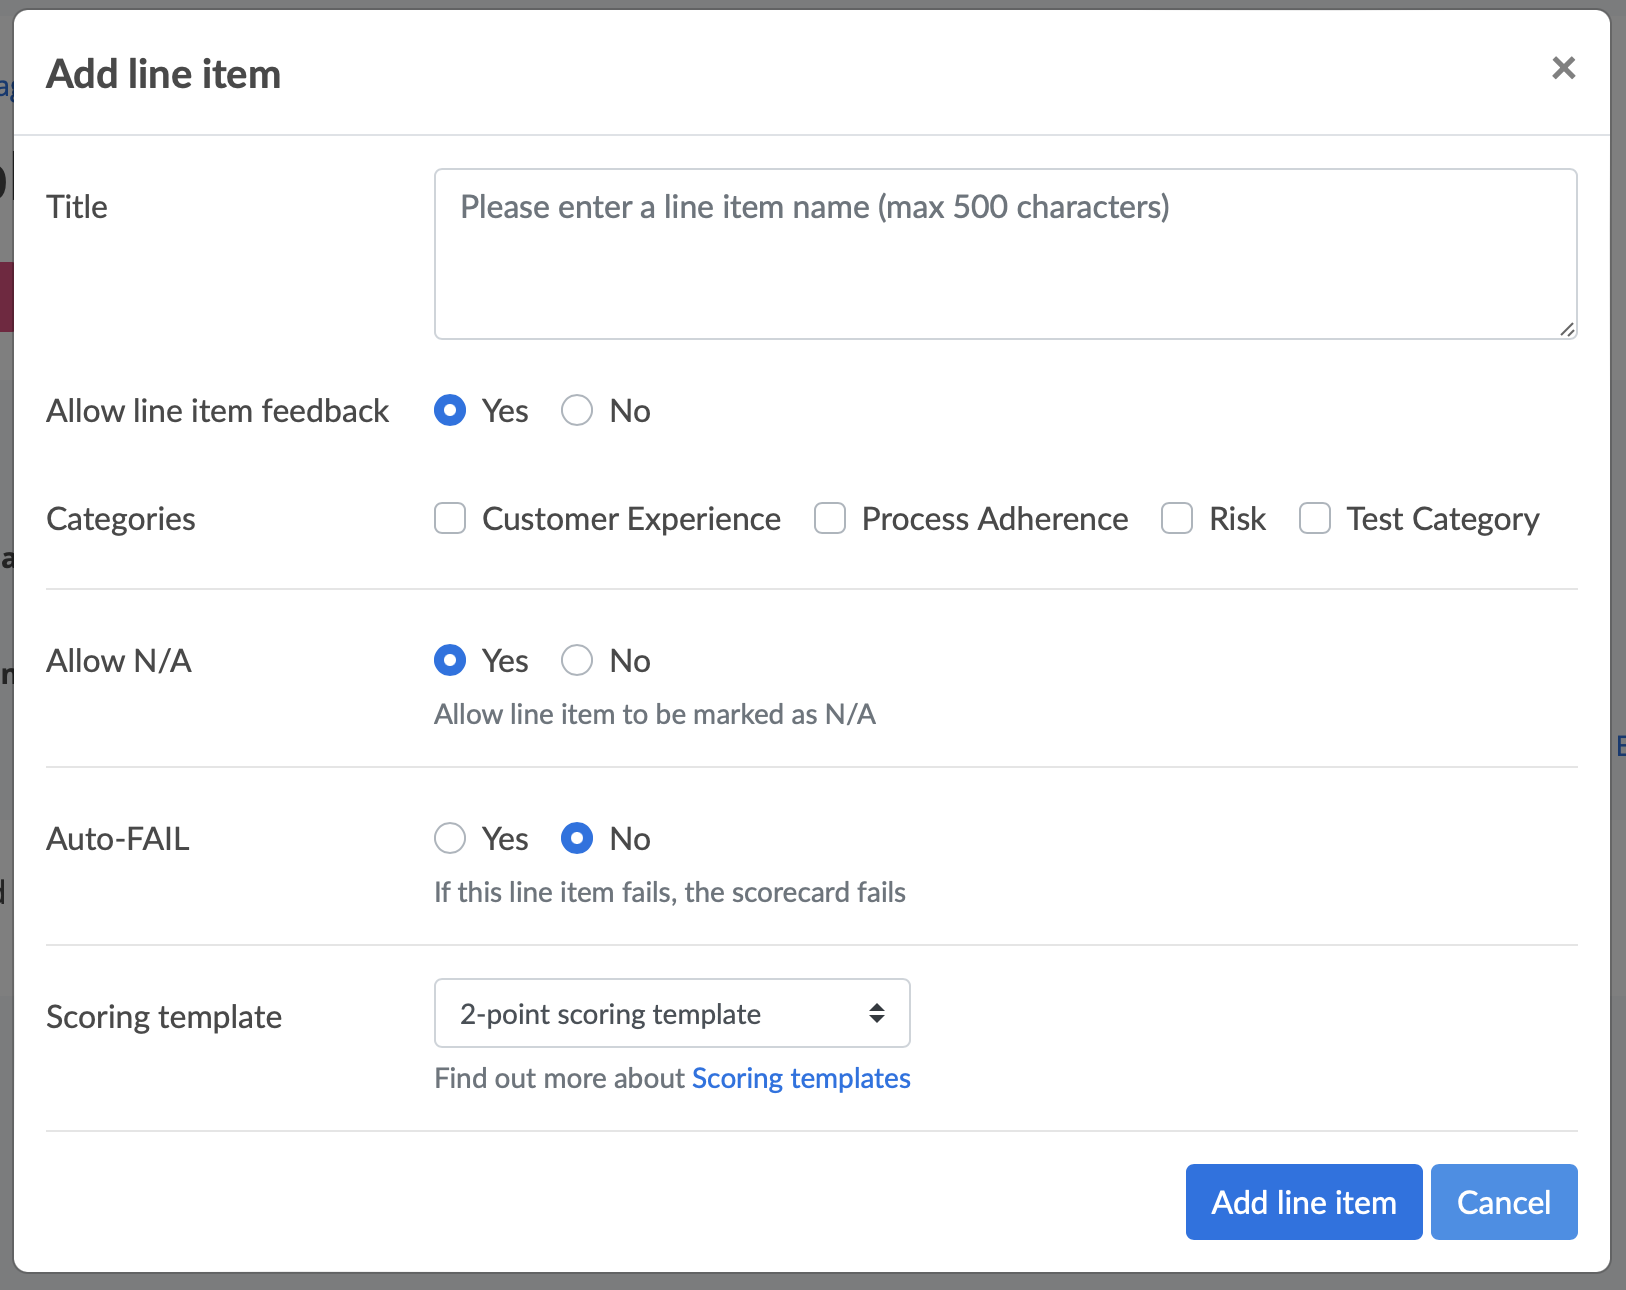
Here, you can add the line item details:
Part 1: Title: Add a Title for the line item. This is the line item description or question that will appear on the scorecard.
Part 2: Allow line item feedback?: Decide whether the system will prompt an Evaluator to add feedback for this line item during evaluation. The words and language used to prompt feedback can be configured in Quality Settings.
Part 3: Categories: Assign any categories to the line item. Categories can be used to filter reports and identify the performance of line items that have been categorised under a specific heading. For example, you may wish to understand the performance of all line items categorised as Risk. Line item categories can be configured in Quality Settings.
Part 4: Allow N/A (not applicable)?: Decide whether or not the line item can be marked as not applicable. If you're going to allow N/A as an option, you can also choose N/A to be the default score for this line item so that every time this line item loads on a scorecard, it's pre-scored as N/A.
Don't worry, if you assign a default score outcome to a line item using this feature, evaluators can still select any one of the line item's other score outcomes as part of the evaluation process.
Part 5: Set line item as an Auto-fail: Decide whether or not the line item is an auto-fail line item whereby the evaluation FAILS if this line item is marked as a "fail" during evaluation.
Part 6: Scoring template: Assign a scoring template to be used as the basis for marking this line item.
Puzzel QA offers a number of default scoring templates. Alternatively, you can create your own fully customised scoring templates.
All active scoring templates will be available in the drop-down box. Any templates you have made inactive will not appear. Based on the example image above (where the user has selected the 2-point scoring template), you can now configure a number of scoring options
- Use guidelines: You may choose to add guidelines to help evaluators choose the correct scoring option. If assigned, these guidelines will be available for evaluators to access on the scorecard during evaluation.
- Default line item to this outcome: So long as you haven't selected N/A to be the default score, you have the option to choose one of the outcomes as the default score for this line item so that every time this line item loads on a scorecard, it's pre-scored as that outcome. Don't worry, if you assign a default score outcome to a line item using this feature, evaluators can still select any one of the line item's other score outcomes as part of the evaluation process. Obviously, you can only choose one score outcome (or N/A) to be the default score outcome, so only ONE of the default score tick-boxes can be selected on a line.
- Root Cause: During the process of adding a step, you may choose to assign a list of possible root causes to each scoring outcome to prompt evaluators to select a root cause when a specific outcome is selected.
- Weighting: If this is a weighted scorecard, then you will need to add a weighting for the line item. Don’t worry about making the weighting of all line items add up to 100% at this point. When you save the scorecard, the system will sum the weightings for all line items and then divide each individual line item weighting by this sum to derive a percentage weight for each line item. In this way, the sum of the system-derived percentages will always add up to 100%. Of course, if your scorecard has percentages already assigned and you’re comfortable that they all add up to 100%, just add each line-item percentage as an integer into the field.
Once you're happy with your selections, click Add line item and you'll be taken back to the scorecard screen where you can continue adding line items.
Step 4: Add any data capture questions to you scorecard
At the end of creating a scorecard, you have the option to add data-capture (non-scored questions).

Any questions that you have configured via Quality Settings will be available for you to add to the scorecard.
Simply select the questions you wish to add to your scorecard and once the scorecard is published, all of the questions (and their respective responses) will be available to evaluators when they score contacts with that scorecard.
Step 5: Preview you scorecard
During the process of building a scorecard, you can preview it and check that it looks as you expect, calculates results as you expect, and presents outcomes and scores as you expect - it's simple - just click the Preview scorecard button

You'll be taken to the scorecard in preview mode, where you can review guidelines, check questions and line items and scoring options. With the exception of the yellow banner that reminds you that you are in preview mode, the scorecard will look and act exactly as if it were published.
You can complete the evaluation process and click preview to see a pop-up screen of results.
You can close the pop-up window, change the scores on the scorecard and then check the results again by simply pressing the preview button again. You can keep doing this to ensure the scorecard is calculating results as you expect.
If you want to edit the scorecard, simply exit preview mode by clicking back to the scorecard builder where you can continue editing the scorecard.
Step 6: Publish your scorecard
Once you’re happy with your scorecard, you can publish it and make it available for evaluators to use.
Before you can publish the scorecard, a number of validation checks are made to ensure that the scorecard is fully complete and not missing any scorecard-parameters. For example, if the scorecard is weighted then all line items must have a weighting assigned before the scorecard can be activated.
To publish the scorecard, click the Publish scorecard button.

When activating/publishing a scorecard, you have three options:

Option 1: Publish now: The scorecard becomes active straight away
Option 2: Publish later: You’ll be prompted to enter a date and time when the scorecard will become active.
Option 3: Optionally deactivate an active scorecard
If you wish that the scorecard you are activating should replace a currently active scorecard, then simply select the scorecard you wish to replace from the drop-down list of currently active scorecards.
When you've made this final choice, click Publish scorecard and the system will activate the scorecard based on the options you have selected and it will become available to evaluators to use.