Evaluating an end-to-end customer experience
Introduction
Our Customer Experience (CX) feature enables you to measure the performance of end-to-end customer experiences which typically involve multiple contacts from a customer. Using this feature, you'll be able to:
- Link multiple contacts together via a unique CX case.
- Configure how you want to score CX case outcomes.
- Evaluate all of the contacts in a CX case and then assign an overall CX case outcome. A CX case outcome reflects the performance of the customer's overall end-to-end experience with your organisation.
- Configure your own CX labels to describe your core customer experiences. For example, if you were a retail-bank, your customer experiences may be described using CX labels such as: Applying for a current account; Securing a mortgage; Requesting a new credit card, etc.
- Assign a CX label to each CX case so that, as well as being able to access and report the performance of each individual case, you can filter results to report the performance of your key customer experiences.
Step 1: Configure your CX labels
To configure CX labels:
- Go to SETTINGS
- Select Quality settings
- Click on the Labels tab
Follow the navigation prompt and scroll to the bottom of the screen where you'll see the heading: Customer experience (CX) labels. From here, you can begin adding new labels in the input box and clicking "Add CX Label" to add them to the list.

Step 2: Viewing CX cases
Once you have at least one active CX label:
- Go to EVALUATE
- Click CX cases to evaluate
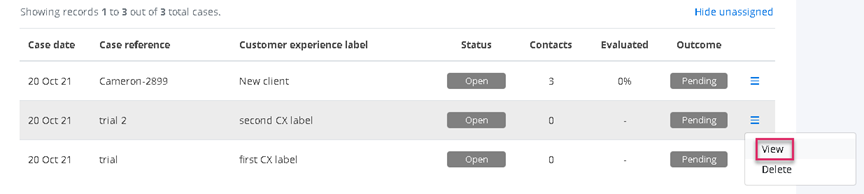
By following the navigation prompt, you'll be directed to the following screen which will typically contain a list of all the CX cases on your Puzzel QA system, and allows to create and manage new cases.

The CX cases table contains the following headings:
- Case date: This is simply a reference date that enables cases to be filtered based on reporting date ranges. The date could be based on any reference point (E.g. Date of first or last contact in the case).
- Case reference: A unique reference for the CX case.
- Customer Experience label: The CX label that has been tagged to the CX case.
- Status: A case can either be Open or Closed.
- Contacts: How many contacts are attached to the case.
- Evaluated: The percentage of those contacts that have been evaluated
- Outcome: Once all contacts in a case have been evaluated, you'll be able to assign an outcome to the case.
- Menu: From the menu, you can view the CX case detail page, or delete the case from your system.
Step 3: Create a CX Case
To create a CX case, click on the New Case button, fill out the required details in the modal and click Create case.
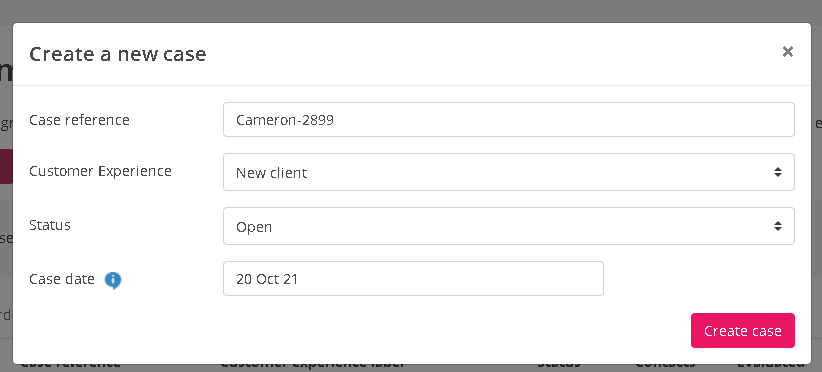
You can still create brand new cases during the create contact process. These cases will still appear in the table, but their case date and customer experience label will not be set.
Step 4: View the details of a CX Case
To access a specific CX case, simply Click View on the relevant row of the table.
The top half of the CX Case View provides a summary of the CX case, as well as the outcome details.
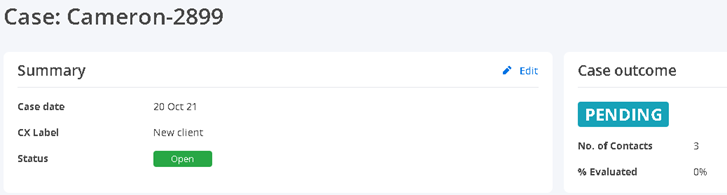
By clicking Edit on the summary, you can change any details for this CX case.
Below is the list of unevaluated contacts and completed evaluations attached to this CX case.
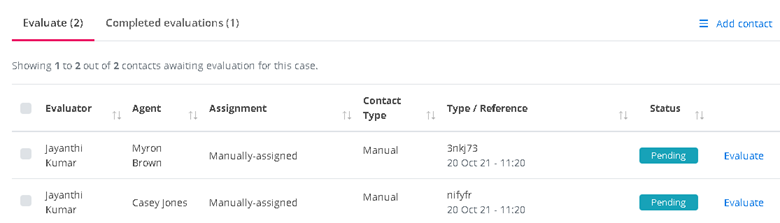
The evaluations are separated into two tabs - Evaluate & Completed evaluations, showing a count for the numbers in each table.
Both tables operate exactly the same as the main Contacts to Evaluate and Completed Evaluations tables, but in this scenario, will only ever show contact and evaluations linked to this specific CX case.
Step 5: Add new contacts to your CX case
To add a new contact, click on the Add contact link and select "Create new contact for case".

You'll be presented with the standard Add a contact screen. As you are adding a new contact to a specific CX case, the case reference field is locked and you also have the ability to return directly to the referring case (via a link at the top of the screen) in this scenario.
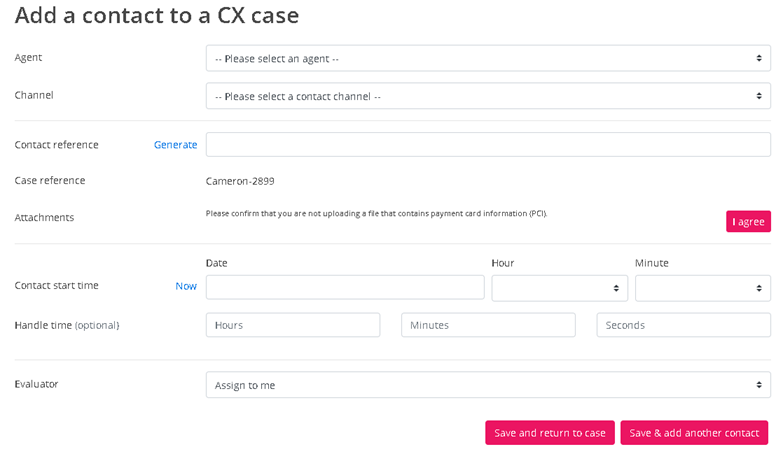
When you've completed the form, you have two options.
- Save and return to case - adds the contact to your CX case and returns you to the CX case detail view; or,
- Save & add another contact - adds the contact to your CX case and resets the form, allowing you to add another contact to the case.
Step 6: Add any existing contacts to your CX case
To add a new contact, click on the Add contact link and select "Add existing contact". You'll be presented with a modal prompting you to search for the contact that you wish to add.
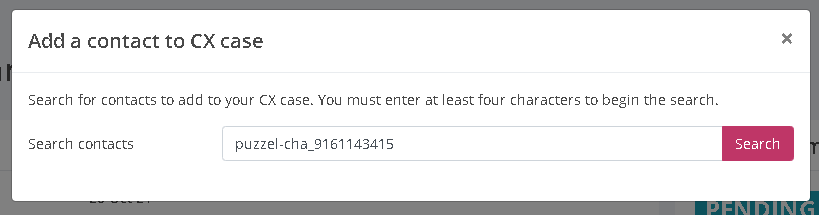
If the searched contact reference exists on your system, you'll see some details about the contact and an Add contact to case button, which, when pressed will attach the contact to your CX case.
If the contact has not been evaluated, it will be added too the Case's Evaluate table. Otherwise, it will added to the Case's Completed evaluations table.

If you select an evaluation that already belongs to an existing CX case, you will receive a warning letting you know that it cannot be attached to your CX case.
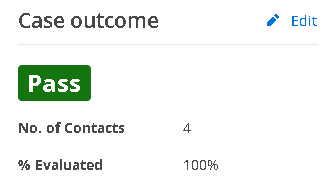
Step 7: Scoring a completed CX case
A CX case is ONLY ready to be scored when 100% of attached contacts have been completely evaluated. Until it has been scored, it will be in a pending state and will not be reportable. To select a score, select Edit.
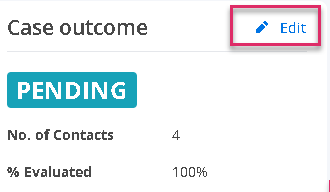
In the outcome modal, you simply need to select an outcome.
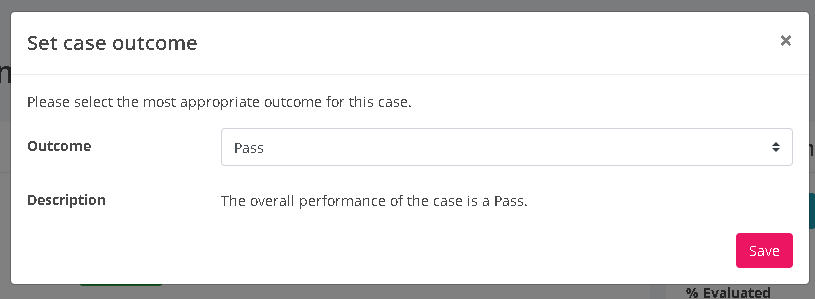
A scored case will automatically be updated to the Closed state, and you will then be able to view it in your CX Performance reporting.