Configuring product access with Puzzel ID Rule Engine (Users enablement 2/2)
Please note this article covers the process of assigning product access, which comes as Part 2 of the overall users enablement process. Part 1 you must have already done before that, is to provision your users from Entra ID to Puzzel ID so they exist as users there in the first place. You can refer to this article, a prerequisite for the lines below, via this link: Provisioning Puzzel ID users and groups with Entra ID (Users enablement 1/2)
The Puzzel ID rule engine is an add-on to the Entra ID synchronization for controlling user access to Puzzel products. It lets customer administrators configure additional events based on SCIM events. SCIM events can be e.g., “create user”, “update user”, “update group” etc. Based on conditional logic defined by the customer administrator, one or more actions can be performed on the back of such events such as giving access to Puzzel products (PCC, PCM etc.) or assigning a specific role to a Puzzel ID user.
A visual interface for managing the rules is provided as through the Organisation Settings portal, a Puzzel ID user with “Admin”, “Partner” or CustomerGroupAdministrator” role is needed to access this portal.
The following illustration shows the high-level architecture for the provisioning features as a whole:
Activating the Puzzel ID Rule Engine
By default, the Puzzel ID rule engine is deactivated. To activate it you need to go to the “Settings” sections in the Organisation Settings portal and find the setting named “Enable auto provisioning users”:
Set this to “Enabled” and return to the Organsiation Settings home page, you should now see a new icon named “Provisioning Rules”: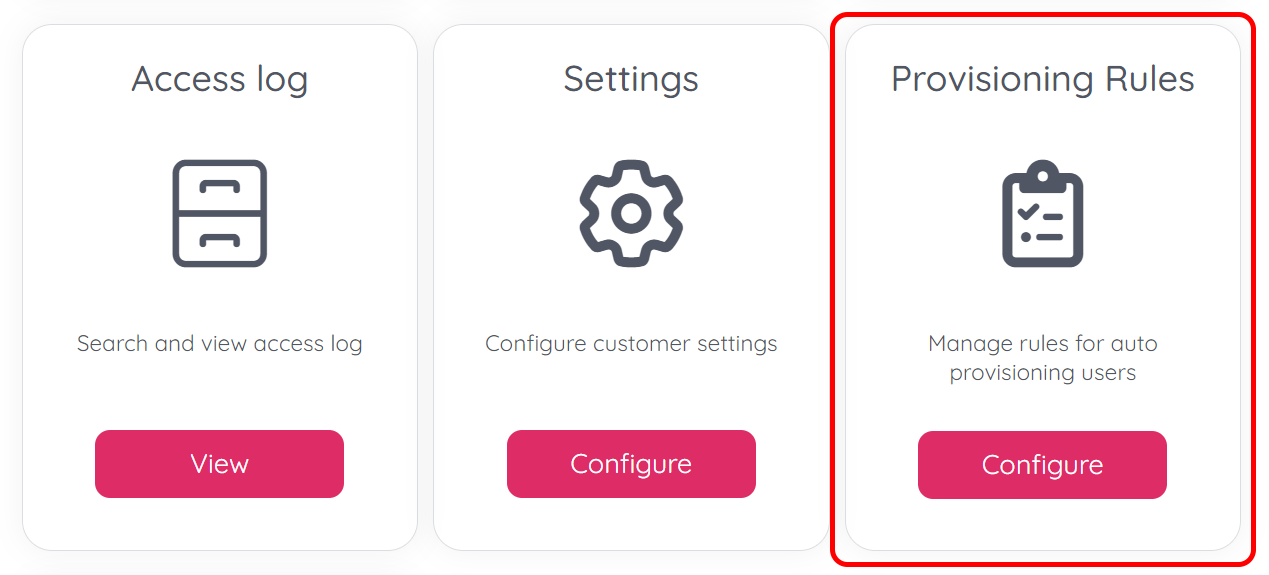
Managing Provisioning Rules
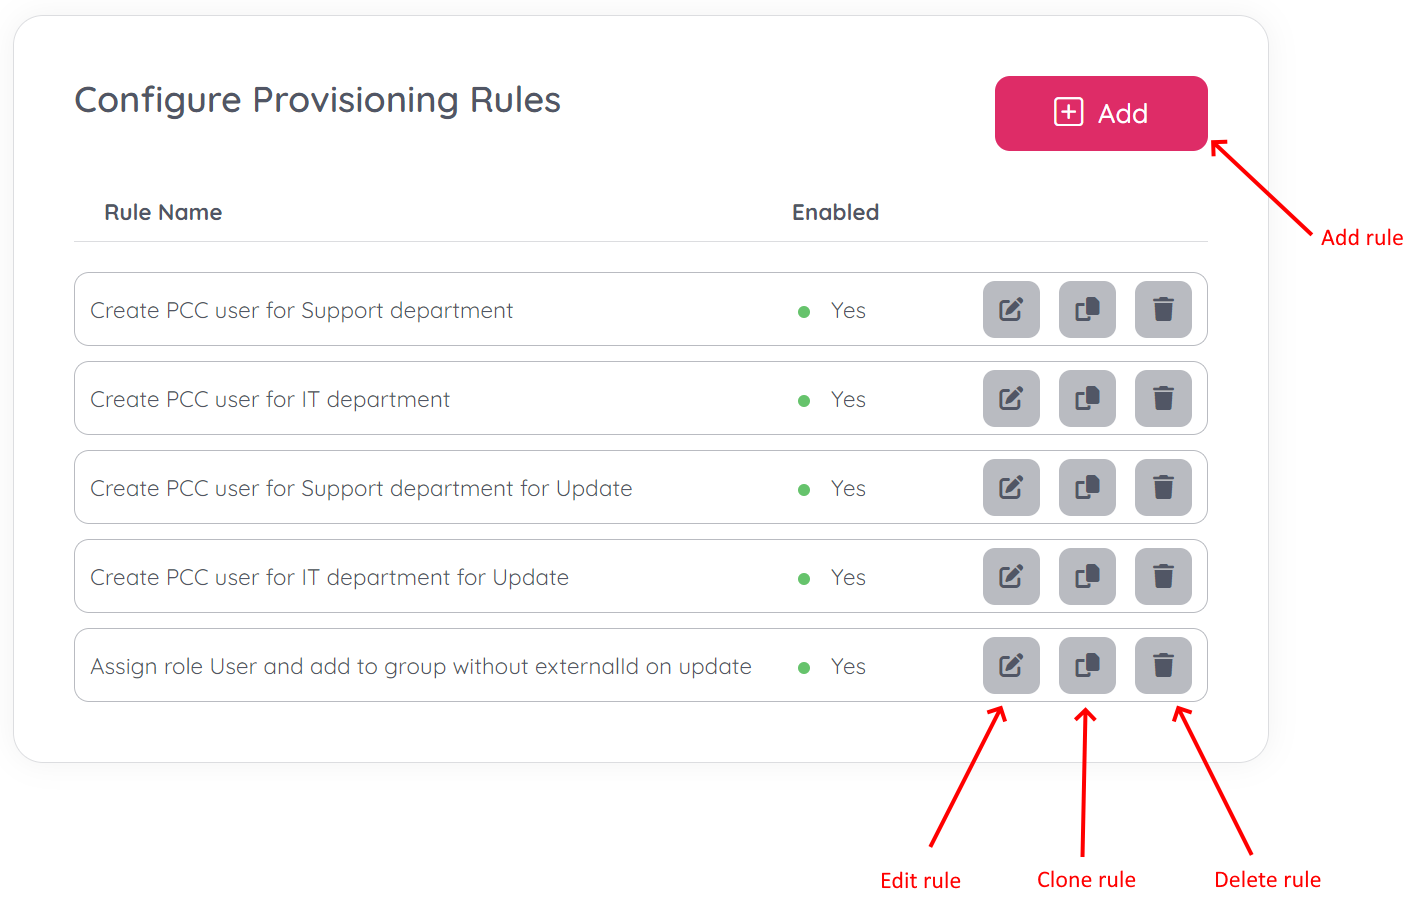
From the landing page of the “Provisioning Rules” section you can add, edit, clone and delete rules. You will also get an overview of the existing rules including their state (enabled / disabled). If you hover over a rule name you will get a popup showing the rule description.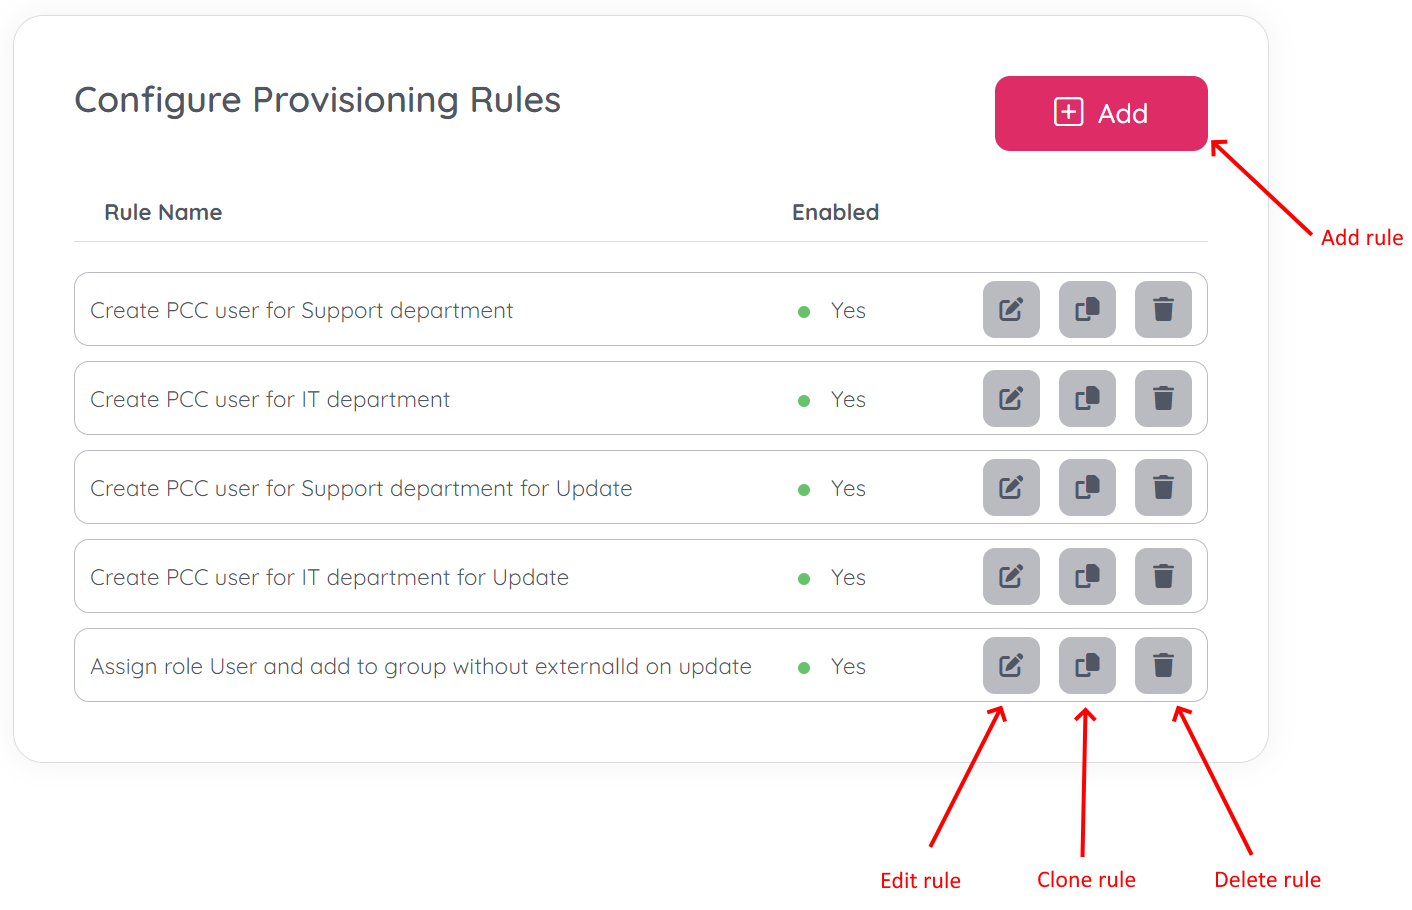
Adding a rule
To add a new provisioning click the “Add” button on the top of the “Configure Provisioning Rules” page. You will be taken to a new screen with four main sections:
“Create rule” -> General information (rule name and description)
“When” -> information about what SCIM event this rule should be triggered on
“If” -> Conditions that needs to evaluate to true if the rule action(s) are to execute
“Then” → Actions to execute if conditions evaluate to true
Triggers
Triggers are the “When” section of creating a provisioning rule. This is where you define which trigger your rule should apply for.
There are two parts of the trigger section, represented as two dropdown boxes:
First you select the type of operation the rule should trigger on. Currently “Create” and “Update” is supported. “Delete” is also an operation that is supported by the system, but for security reasons it has been decided to leave it out as an operation to trigger rules with as of now. “Create” is similar to the HTTP verb / method “POST” and “Update” is similar to HTTP PUT or PATCH.
Next, you choose the object for the trigger, there are two options available, “User” (Entra ID user) and “Group” (Entra ID group). So, as an example, if you want a rule to execute when a new user is created you would chose “Create” + ”User” as trigger.
Conditions
Conditions represent the “If” section of creating a provisioning rule. Here you can create conditional expressions joined by operators.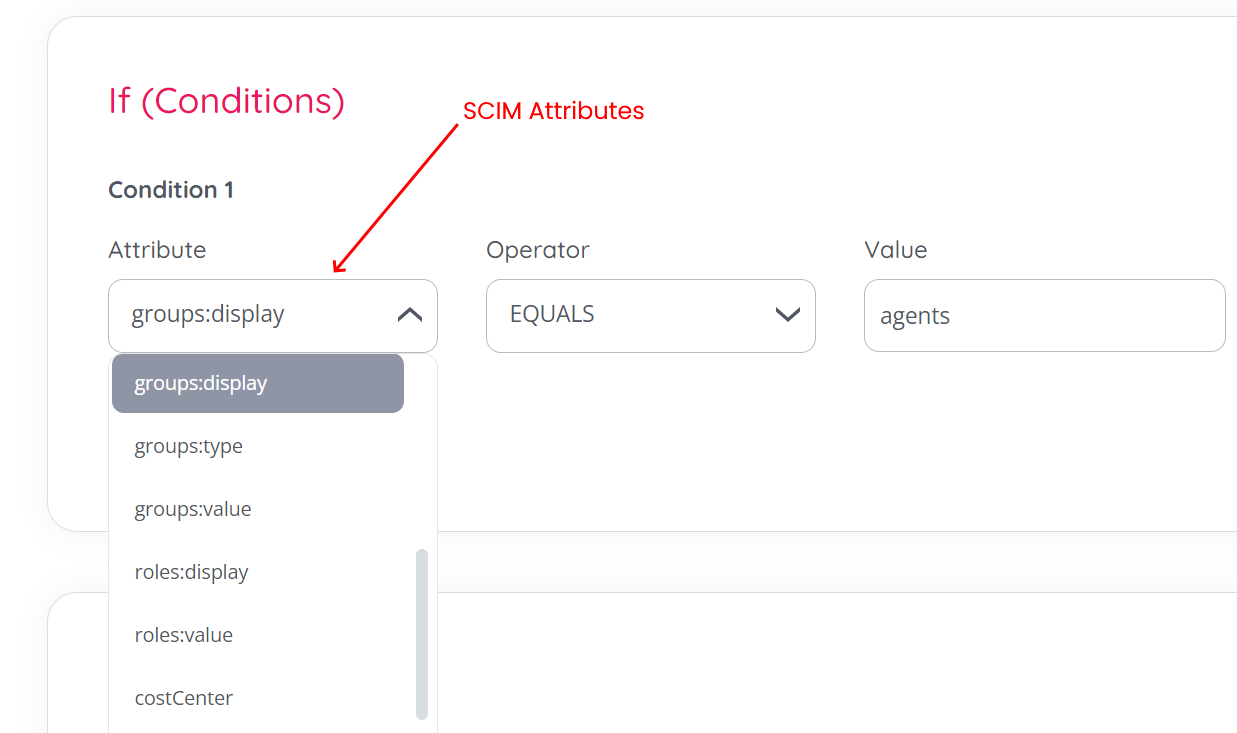
In the “Attribute” dropdown, all SCIM attributes are shown, including the attributes from the enterprise extension. Choose the attribute that your conditional expression should evaluate, if you need more information on the SCIM attributes, please refer to RFC7643 Section 4.
Next chose the operator for the conditional logic, the following operators are supported:
Equals (exact string match)
Not Equals (exact string match)
Contains (at least a substring of the value must match)
Not Contains (at least a substring of the value must match)
Starts With (attribute string begins with the value)
Ends With (attribute string ends with the value)
Next, type the value to evaluate the condition towards in the “Value” field.
If you want to add another condition, press the “Add” button below the attributes field: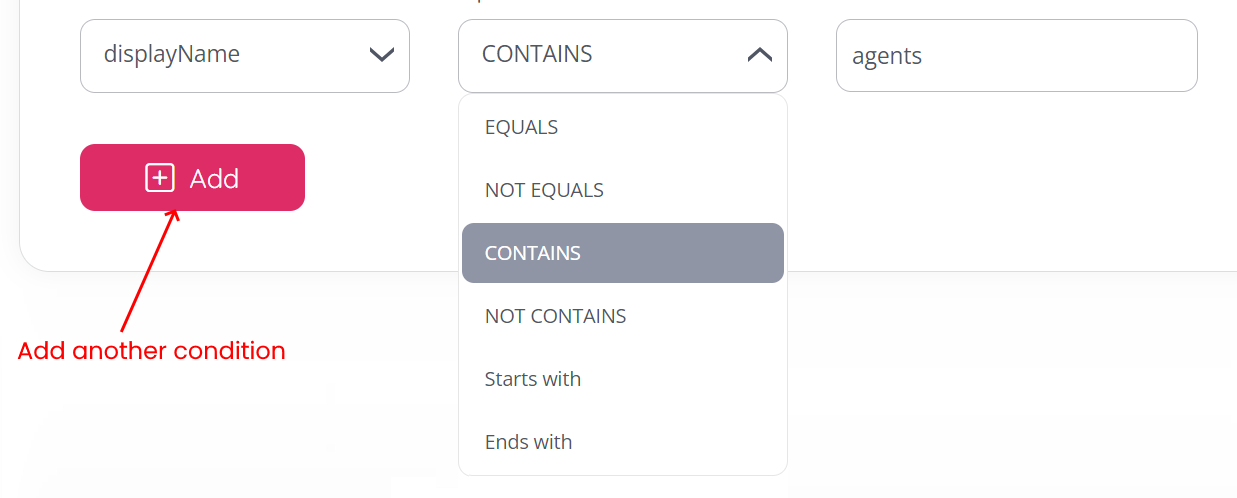
You can choose between the “And” and “Or” operators when adding / chaining multiple conditional expressions. If you want to remove an existing condition, use the small “minus” icon. 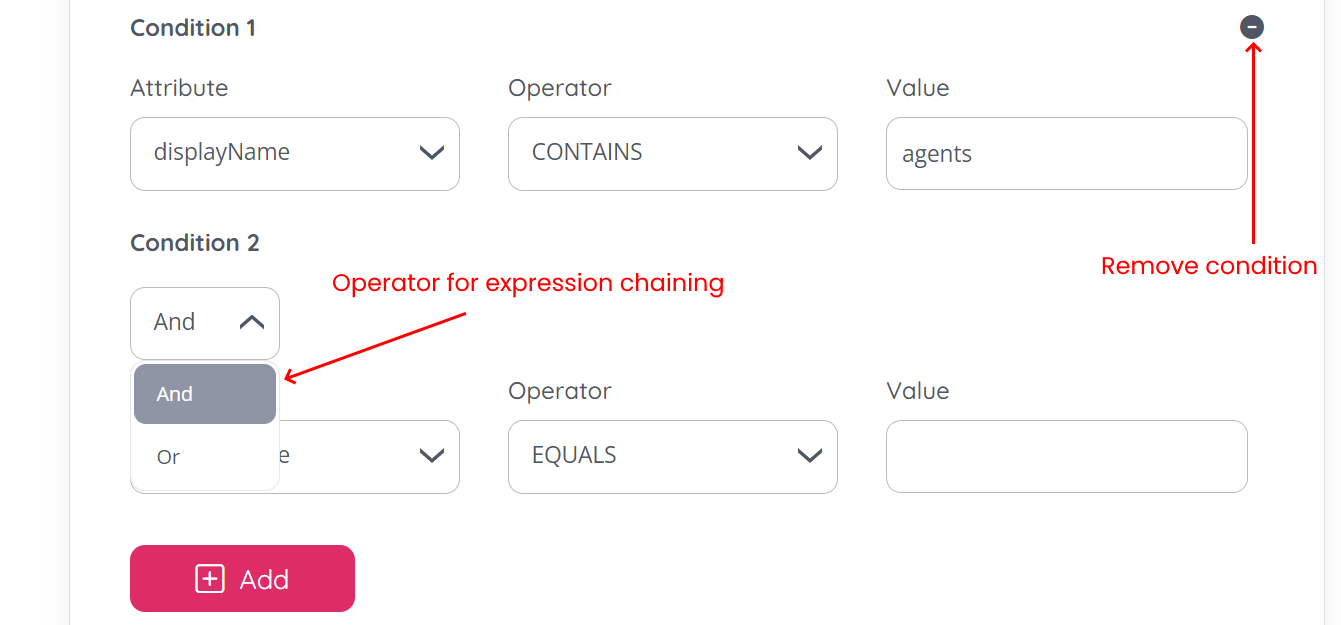
Actions
Actions represent the “Then” part of a rule, they define what action(s) to take if a rule triggers and the condition defined evaluates to true.
The Puzzel ID provisioning rule engine defines multiple types of actions that can be executed, and a rule can also execute multiple actions.
Currently the following actions are supported:
Action Name | Description |
|---|---|
Add Solution User | A “solution user” is a user in one of the Puzzel products:
In short, adding a solution user grants product access for a Puzzel ID user. |
Remove Solution User | Similar to above, but this action is to remove access. |
Assign Role | Assigns a specific role to the Puzzel ID user this event triggered for. See below for an explanation of the roles available. |
Remove Role | Similar to above, this action is to remove a role |
Add to Group | Adds the Puzzel ID user this event triggered for to a specific Puzzel ID group. |
Remove from Group | Similar to above, this action is to remove group access. |
Add PCC User | This action is similar to “Add Solution User” → PCC and will at some stage be deprecated. Kept for compatibility reasons, use “Add Solution User” instead. |
Action - Add Solution User
As mentioned above, “Add Solution User” grants a Puzzel ID user product access to Puzzel products.
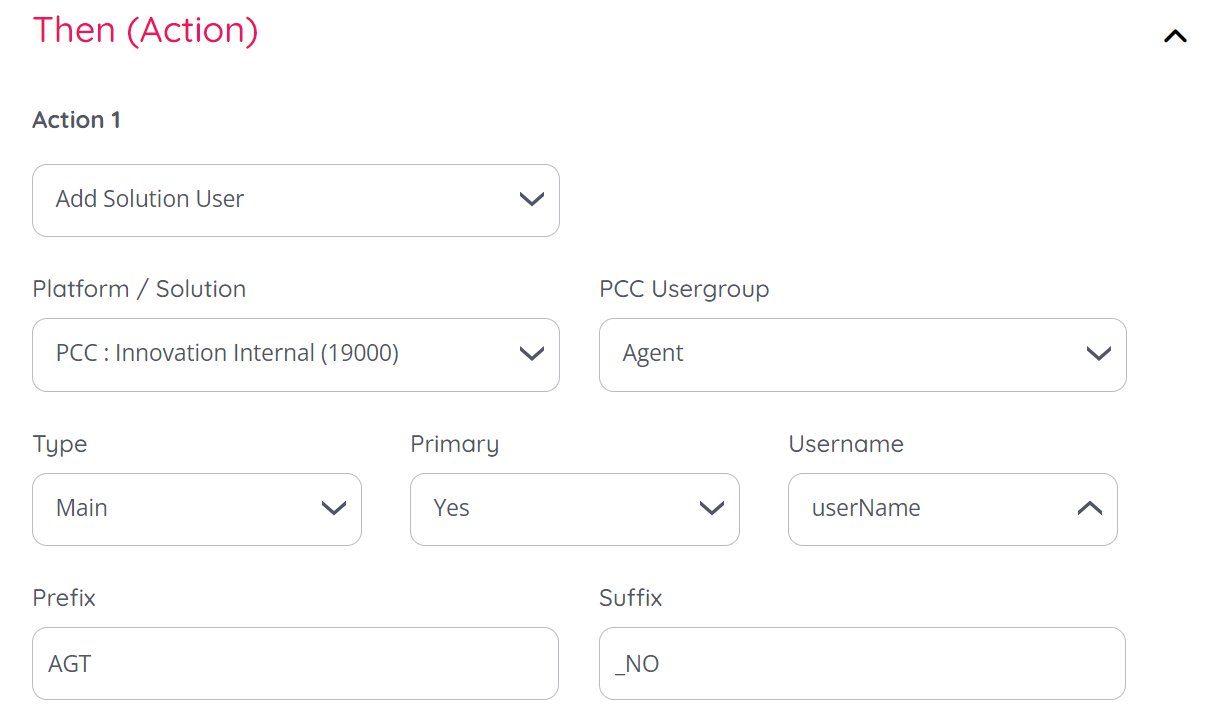
The fields involved in adding a solution user is as follows:
Field | Description |
|---|---|
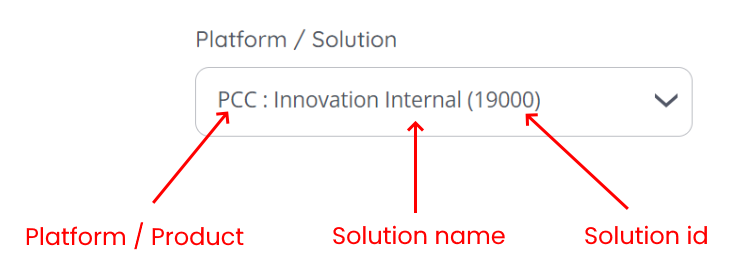
Platform / Solution | The solutions available for your customer account will be displayed here. The values in this dropdown consists of three sections. The first section is separated by a colon “:” and indicates the name of the platform the solution belongs to in abbriviated form as follows:
The second part of the values in this dropdown is the actual name of the solution and the last part in parentheses shows the identifier of the solution in the Puzzel platform.
|
PCC Usergroup | This field is only displayed if a PCC solution is selected. A PCC user needs to be created within a usergroup. This field will be populated with the existing user groups for the PCC solution selected. PCC user groups needs to be managened through PCC adminweb. |
Type | A label indicating the solution’s purpose or usage. Canonical values: ‘main’, ‘admin', ‘demo’, 'test’. This field is more for general classifications, what you choose here will not have any functional effects as of now. |
Primary | Indicating if this user should be the primary user for the given platform / product or not. This only has effect if there is more than one solution user linked to a Puzzel ID for a given platform. Then primary is the default solution user you will be logged in as when logging in with Puzzel ID. |
Username | This field instructs the rule engine how to create the username for the new solution user. The following options exist:
|
Prefix | Adds a prefix to the solution username, so if AGENT_ is added here, usernames for solution users will be created with this as a prefix. E.g., AGENT_john.doe. |
Suffix | Adds a suffix to the solution username, so if _NO is added here, usernames for solution users will be created with this as a suffix. E.g., john.doe_NO. |
Action - Remove Solution User
When triggered, this action removes a solution user by matching the solution users username.
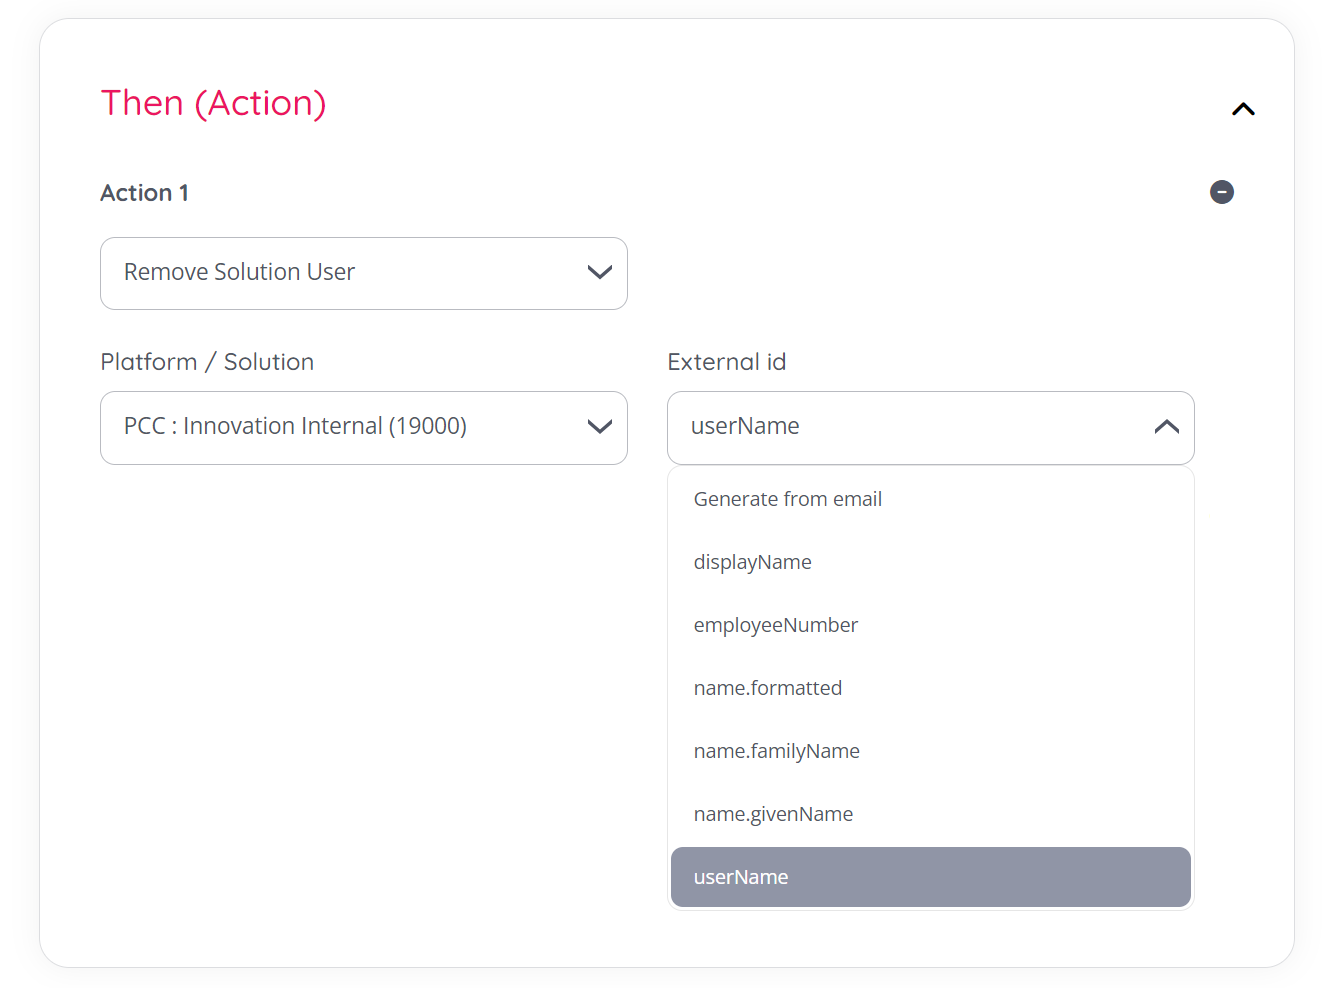
The fields involved in remove a solution user is as follows:
Field | Description |
|---|---|
Platform / Solution | The solutions available for your customer account will be displayed here. The values in this dropdown consists of three sections. The first section is separated by a colon “:” and indicates the name of the platform the solution belongs to in abbriviated form as follows:
The second part of the values in this dropdown is the actual name of the solution and the last part in parentheses shows the identifier of the solution in the Puzzel platform |
Externalid | This field is the username of the solution user. What is chosen here will need to match the username of the solution user you want to delete.
|
Action: Assign role
This action adds a role to a Puzzel ID user. The following roles are available:
Role | Description |
|---|---|
User | A normal user in the Puzzel ecosystem, typically an agent |
Admin | A customer administrator with access to administer own solutions (under the customerid the Puzzel ID user belongs to). This will grant access to the Organisation Settings portal. |
Visitor | A visitor to the Puzzel ecosystem. Currently not in use. |
Partner | A partner user with access to the customers managed by the partner agreement. |
KnowledgebaseAdmin | Grants access to the Knowledgebase system as an administrator. |
Action: Remove role assignment
This action removes a role from a Puzzel ID user. The following roles are available:
Role | Description |
|---|---|
User | A normal user in the Puzzel ecosystem, typically an agent |
Admin | A customer administrator with access to administer own solutions (under the customerid the Puzzel ID user belongs to). This will grant access to the Organisation Settings portal. |
Visitor | A visitor to the Puzzel ecosystem. Currently not in use. |
Partner | A partner user with access to the customers managed by the partner agreement. |
KnowledgebaseAdmin | Grants access to the Knowledgebase system as an administrator. |
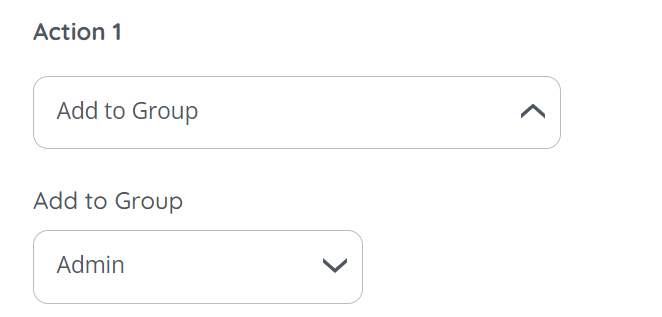
Action: Add to Group
This action can add a Puzzel ID user to a specified Puzzel ID group.
Action: Remove from Group
This action is similar to the above action only that it removes a Puzzel ID user from a specified group instead.
Executing multiple actions for a rule
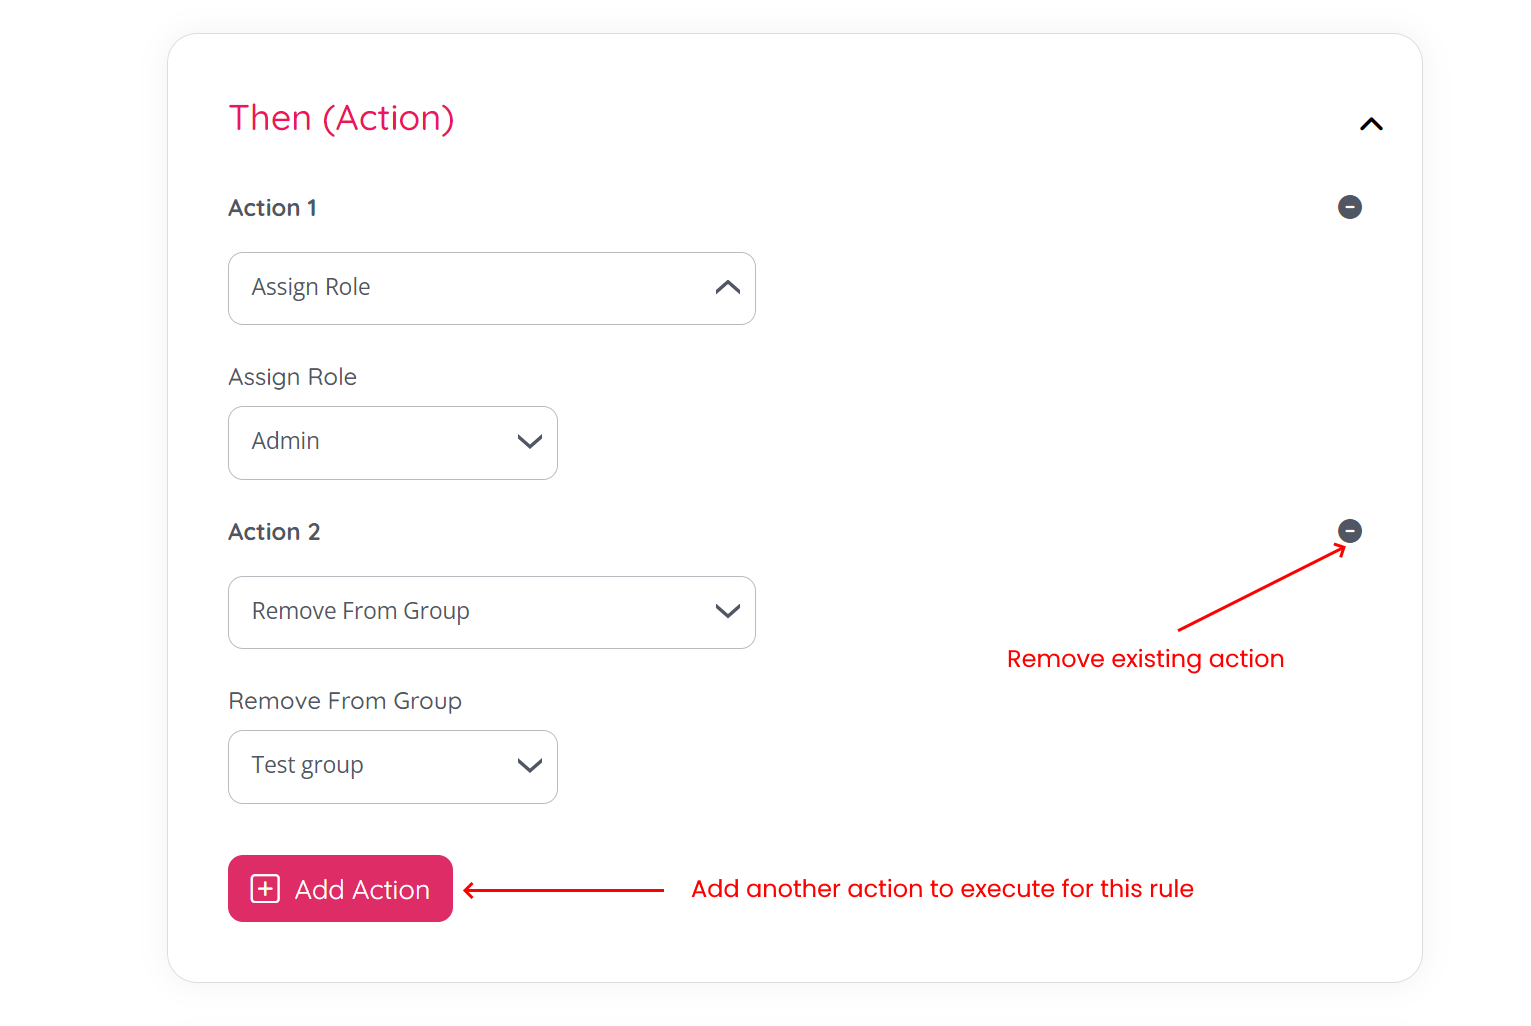
It is possible to execute multiple actions for a rule. To do so use the “Add action” button. Existing actions can also be deleted using the “minus” icon as illustrated below:
Enabling / disabling a rule
A rule can be enabled / disabled through a toggle switch at the bottom of page:

From here you can also save any changes you made to the rule or cancel to exit without saving.
Editing a rule
From the “Provisioning rules” main page you can also edit existing rules. This will give the exact same options as when creating a rule documented above.
Cloning a rule
It is possible to create a new rule based off an existing rule. This is typically useful when you have several rules that do almost the same thing. Say as an example that you have a rule that adds a new PCC solution user to the “Supervisor” PCC user group based on certain AD groups. You can then create a rule that does this for the first AD group, then clone this rule and just change the AD group value in the conditions for the subsequent AD groups.
Deleting a rule
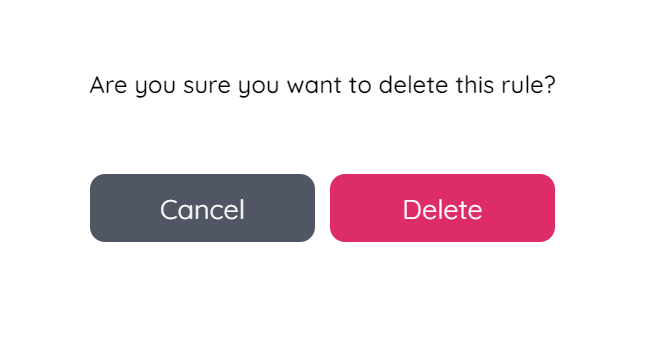
A rule can be deleted using the trashcan icon from the list of provisioning rules. The deletion needs to be confirmed by an additional click in a modal window.
