Input fields
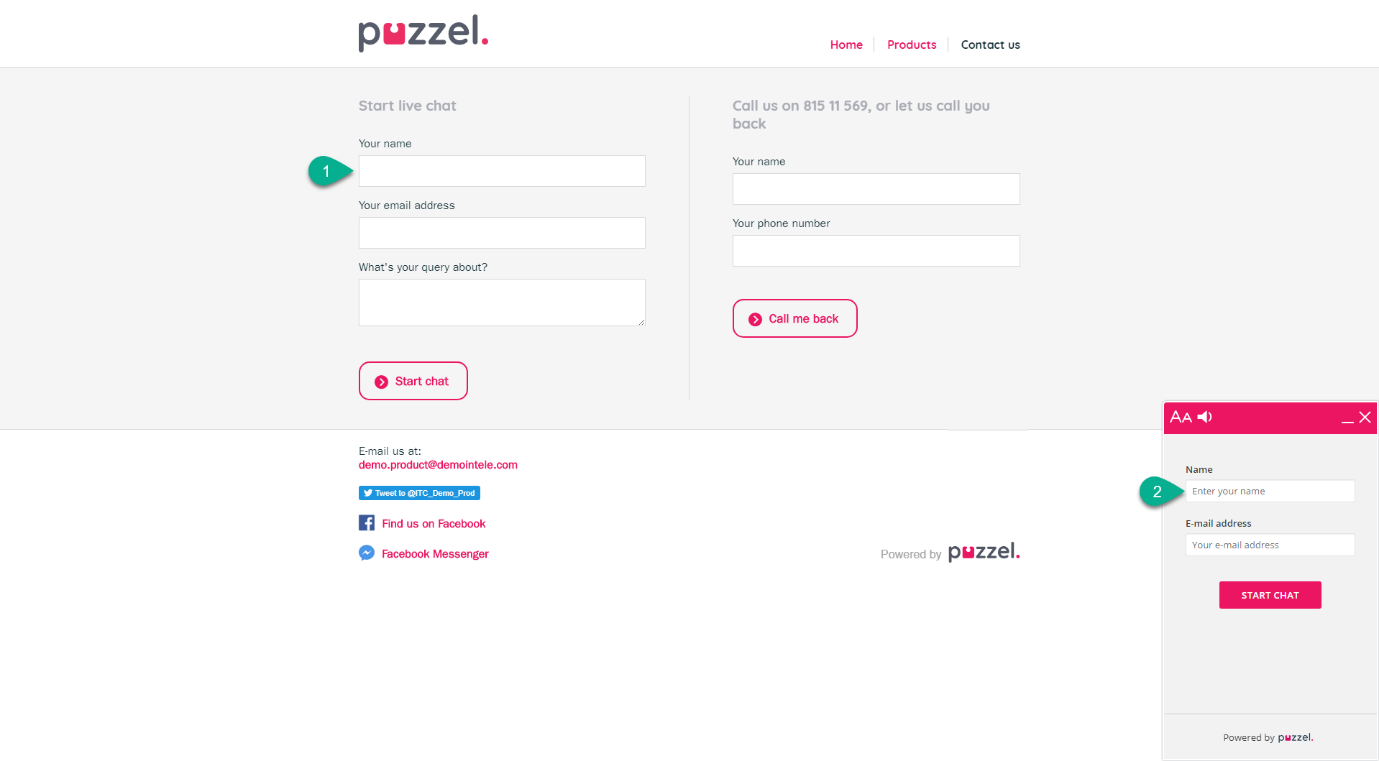
When using a traditional chat button, you can add a variety of input fields on your web page, and prompt chatters to enter relevant information before starting the chat (1). The input fields are included in the chat, as variables.
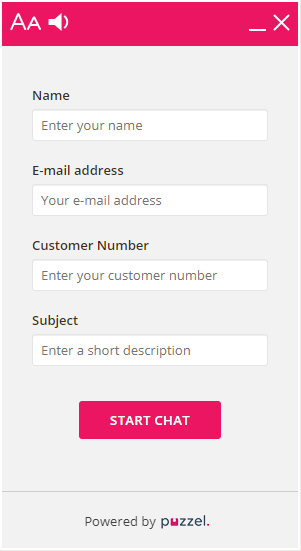
However, when using the chat starter circle, the input fields are placed in the chat window itself, called the chat form, and appears after having started the chat (2). By default, the chatter is prompted for the name and e-mail address, and the fields are non-mandatory.
Customised Input Fields
As an alternative to these default input fields in the chat form (2), you can make your own customized input fields e.g. if you need more/other input fields, or if you need to make them mandatory. These input fields are also included in the chat, as variables.
For input fields in the chat form, the following HTML5 attributes can be set (per input field):
- inputLabel = Label or title over inputfield. Default = ""
- inputVariableName = The variable name you want to enter the input as.
- There are already three reserved "system variable" names, where the first two are used in our backend to identify the chatter in statistics and the Administration Portal Archive and are therefore mandatory for name and e-mail input fields.
- enteredFormName -> nickname (displayed as "Name").
- enteredChatId -> chatId (displayed as "E-mail address").
- enteredFormIssue -> chatIssue (displayed as "Note").
- inputPlaceholder = Placeholder (guiding) text in inputfield when it's empty. Default = ""
- inputType = Inputfield type e.g. text, email, number, datetime-local, password. Default = "text".
- inputMaxlength = Maximum number of characters allowed in the input field. Default = ""
- inputRequired = Wheter the input is mandatory or not before starting chat. Default = "false".
- inputValue = A default value thet can be specified and prewieved in the field, e.g. a customer number or e-mail address fetched from a database. This value replaces the inputPlaceholder text. Default = ""
Denying the chat from being archived
For privacy matters, it is possible to allow the chatter to deny the chat transcript from being archived. If denied, the chat transcript will not be archived in the admin portal’s “Archive” section. In addition, the chatter will not be able to receive a copy of the chat transcript on his or her e-mail address.
There are two parameters you can use when activating this feature:
showDenyArchiving: true, (default false – shows the checkbox in the chat form)
denyArchiving: true, (default false – decides if the checkbox should be default ticked or not)

Input fields with a dropdown list
In addition to adding static input fields in the web chat form, it is possible to add input fields with dropdown lists. This enables the chatter to choose between system variables like “queueKey” or “chatIssue” (displayed as "Note"), or other options like “Favorite Color”.
This will enable web developers to set up chat for several queues on the same page, instead of having to code separate chat setups on separate web pages. In many cases a dropdown lists will make input fields on the web page obsolete.
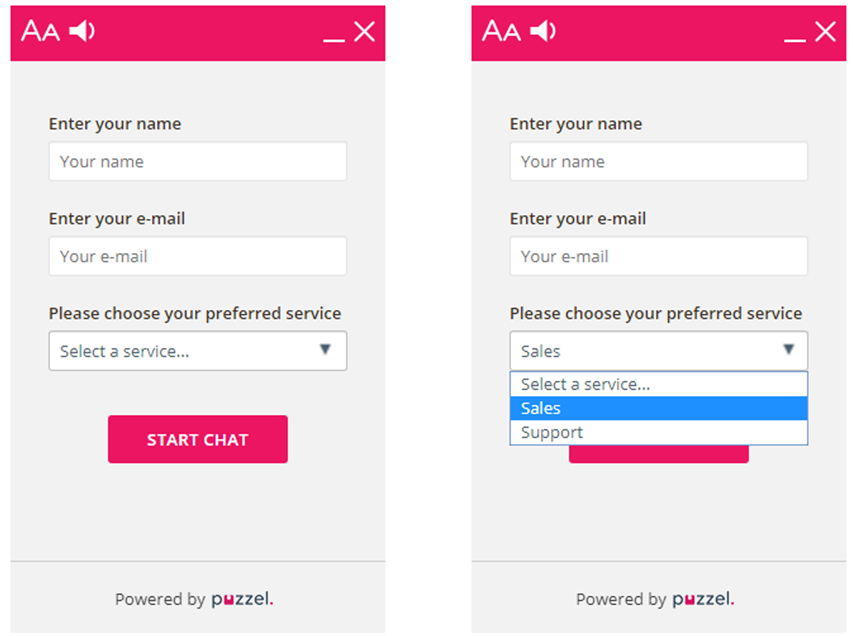
There are a couple of ways to add such a dropdown list. You can either add a dropdown list below the name and e-mail address input field, using our standard variables “queueKey” and/or “chatIssue”, or you can set a dropdown list using any kind of variable (like “Favourite Color”), in the same code as setting up customized input fields.
Change default size of chat window
If you have more than three input fields in the chat form, you should make the height of your chat window slightly higher, i.e. by entering the following CSS class in a stylesheet below our stylesheet in a header tag like this:
<style>
.intelecomchatdialog {height: 530px;}
</style>
If necessary, you can also change the default width of the chat window like this:
<style>
.intelecomchatdialog {width: 330px;}
</style>
Below is an example of a heightened chat window with customised input fields in the chat form.