
Using the Puzzel Entra ID (Azure AD) Gallery application
This article describes configuring single sign-on (SSO) to Puzzel by installing the Puzzel app from the Entra Gallery. If you prefer a manual SSO setup, please refer to this guide.
Step 1 - Find and add Puzzel application from Entra Gallery
See What is application management? - Microsoft Entra ID for more details on managing Entra ID apps.
Once Microsoft opens up for new provisioning requests of the Entra ID Gallery application, a separate application will be available for uk.puzzel.com.
To configure the integration of Puzzel into Entra ID for Single Sign-On, you need to add Puzzel from the gallery to your list of managed SaaS apps.
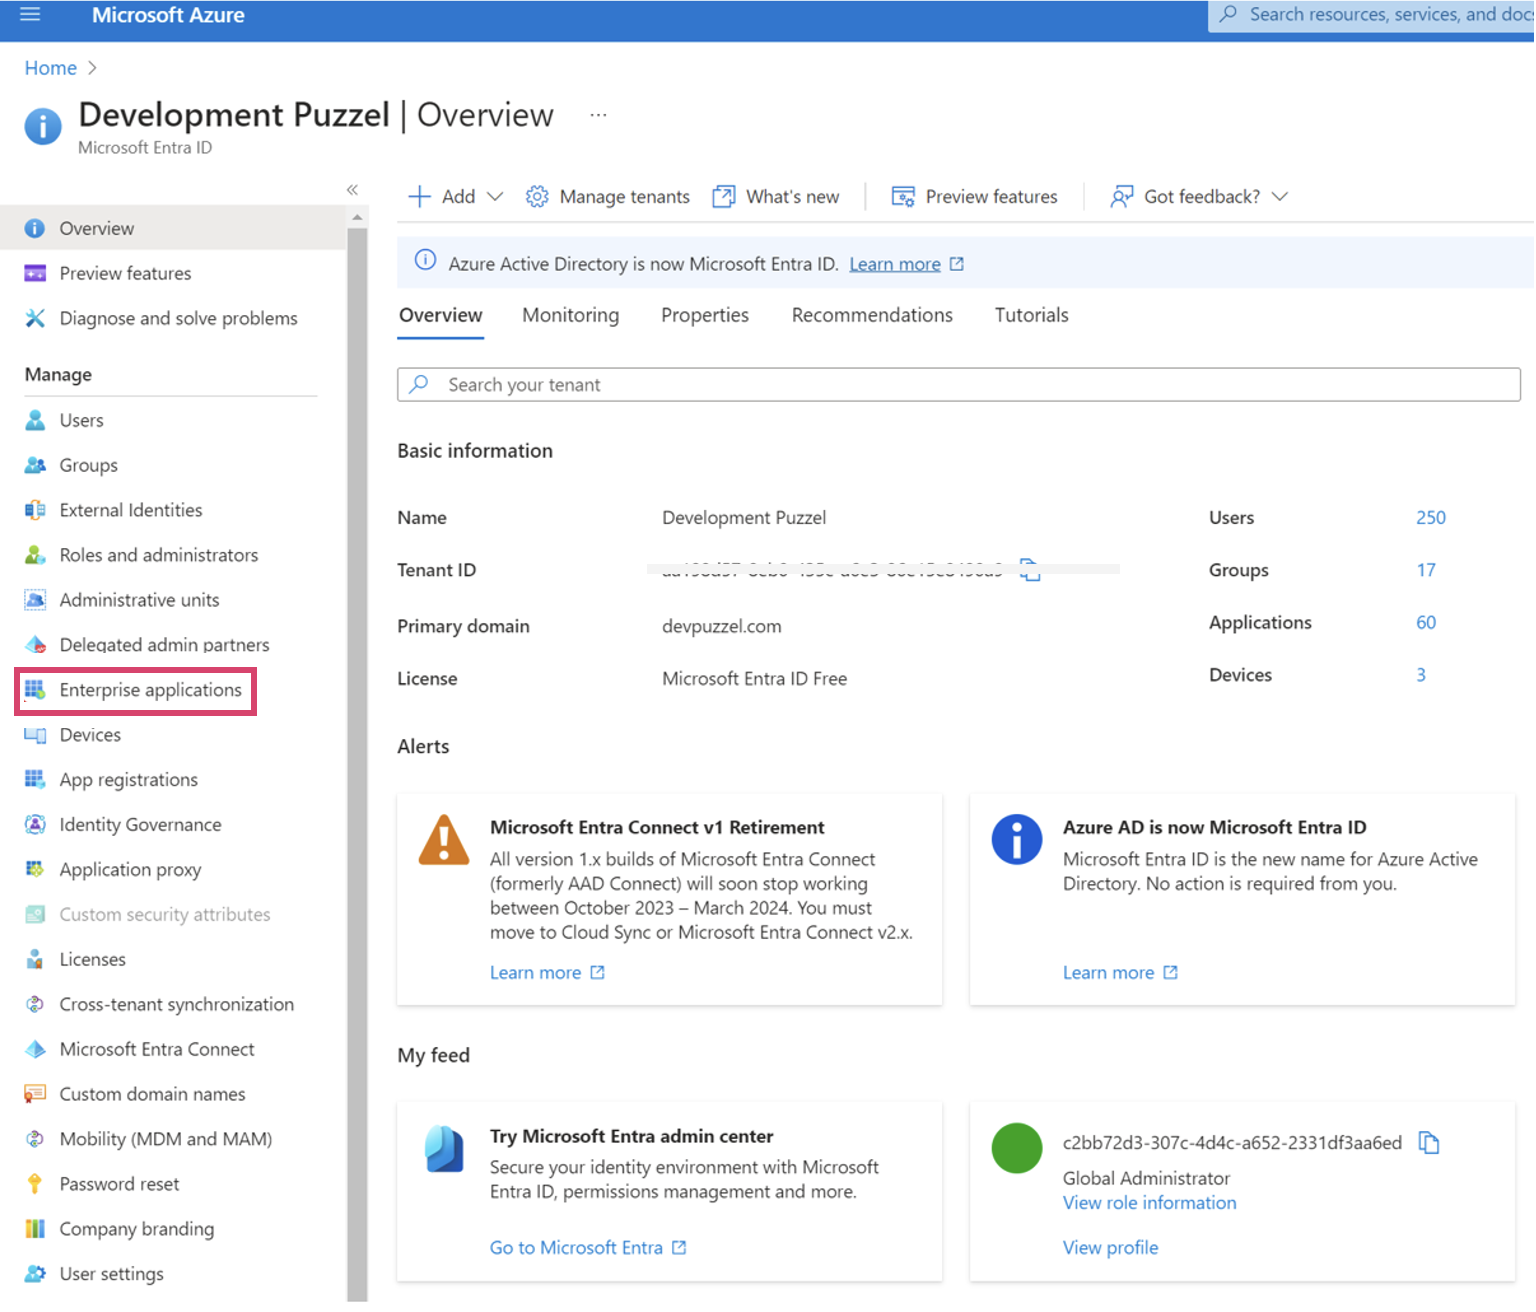
Log on to the Entra ID portal, and in the left side menu, select “Enterprise applications”.
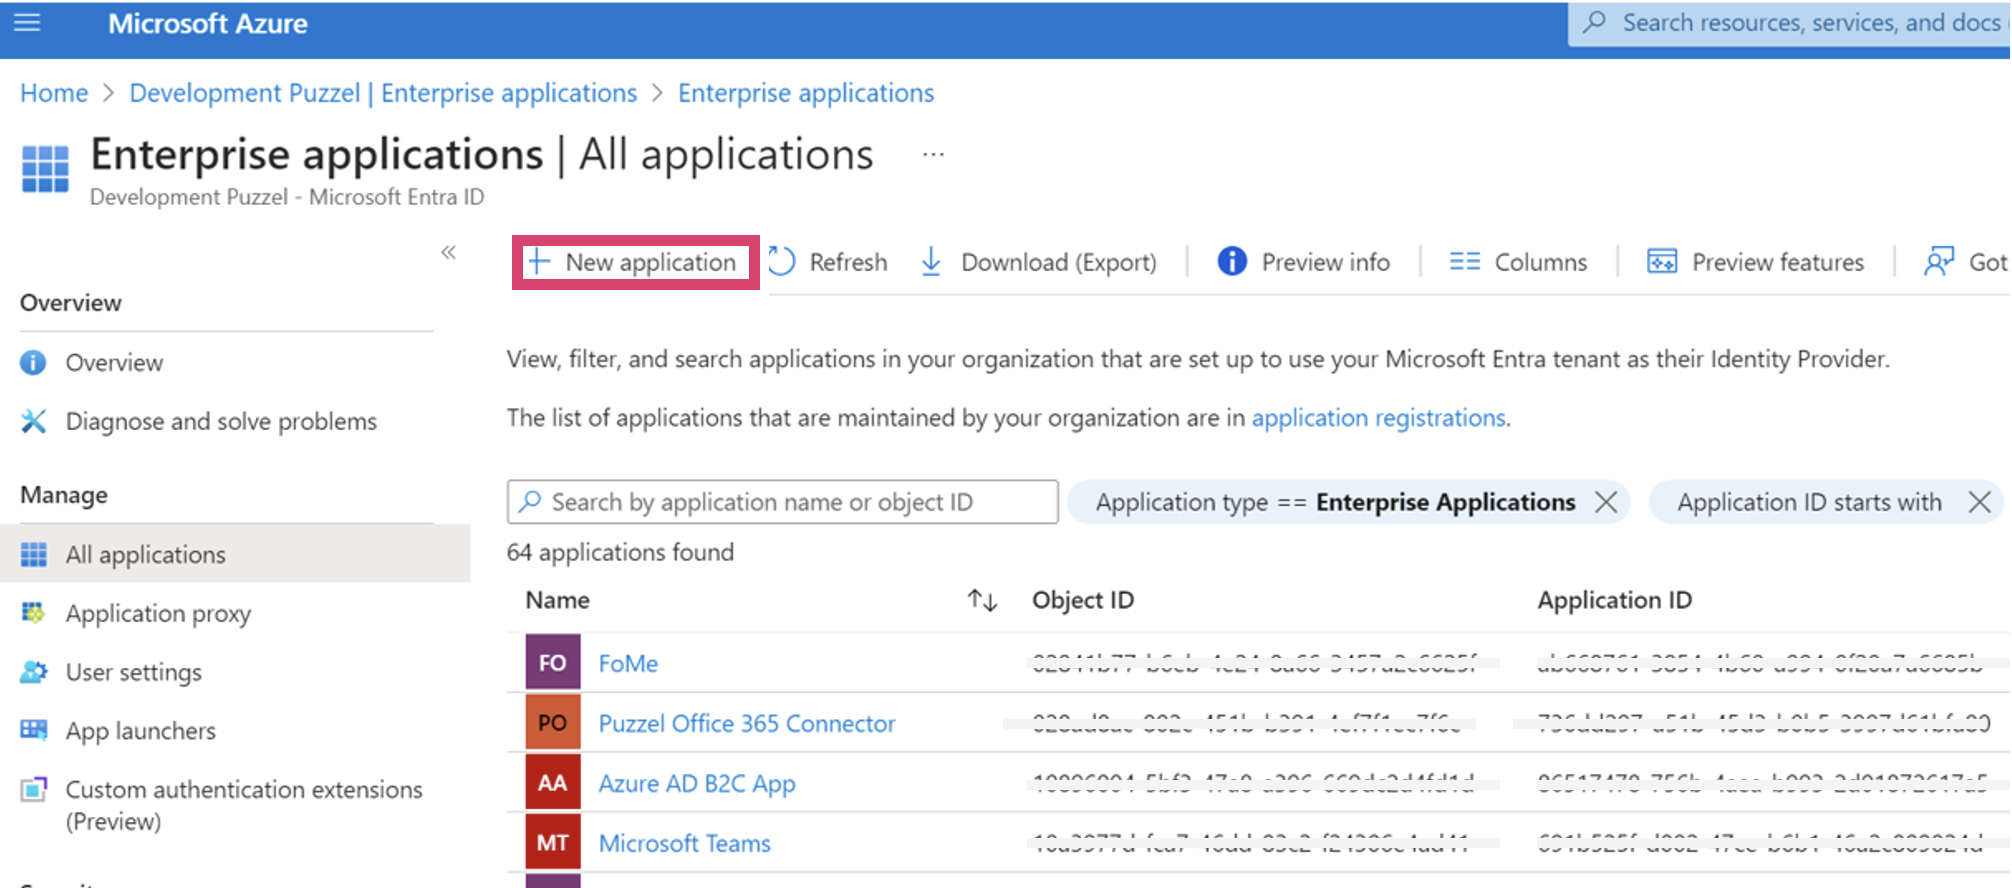
On the next screen, click “New application”:
In the search bar, search for “Puzzel” and you should find this app from Puzzel AS:
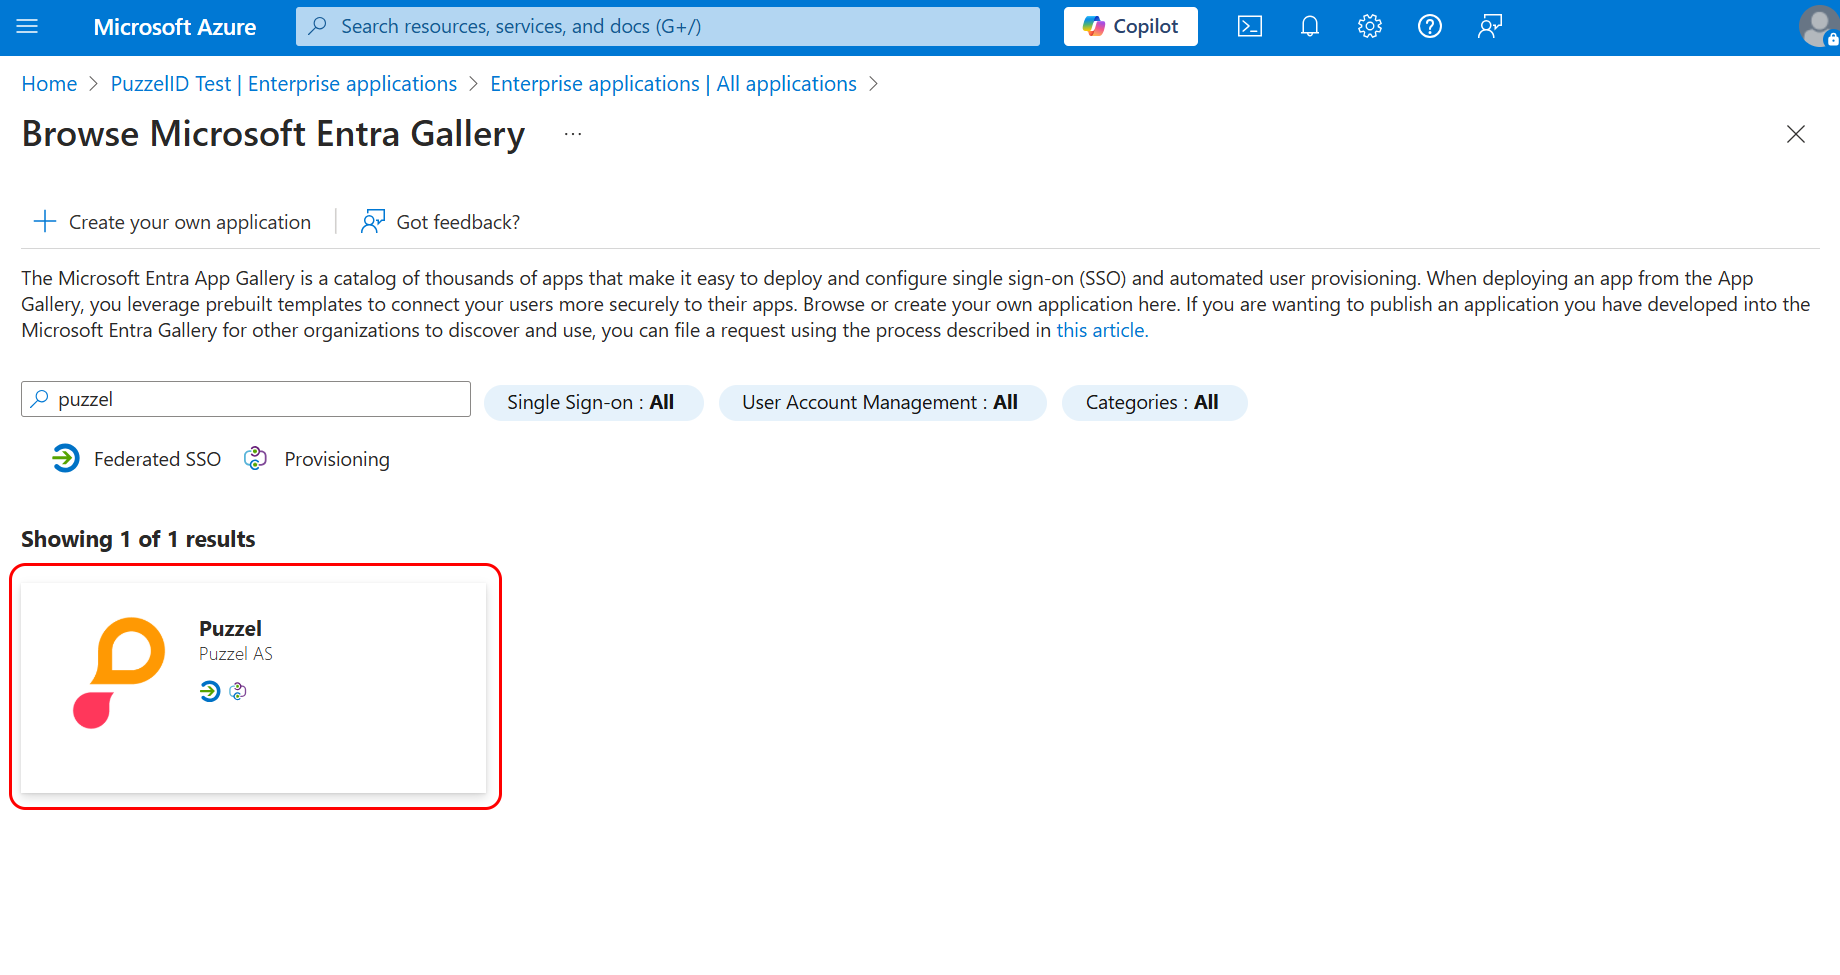
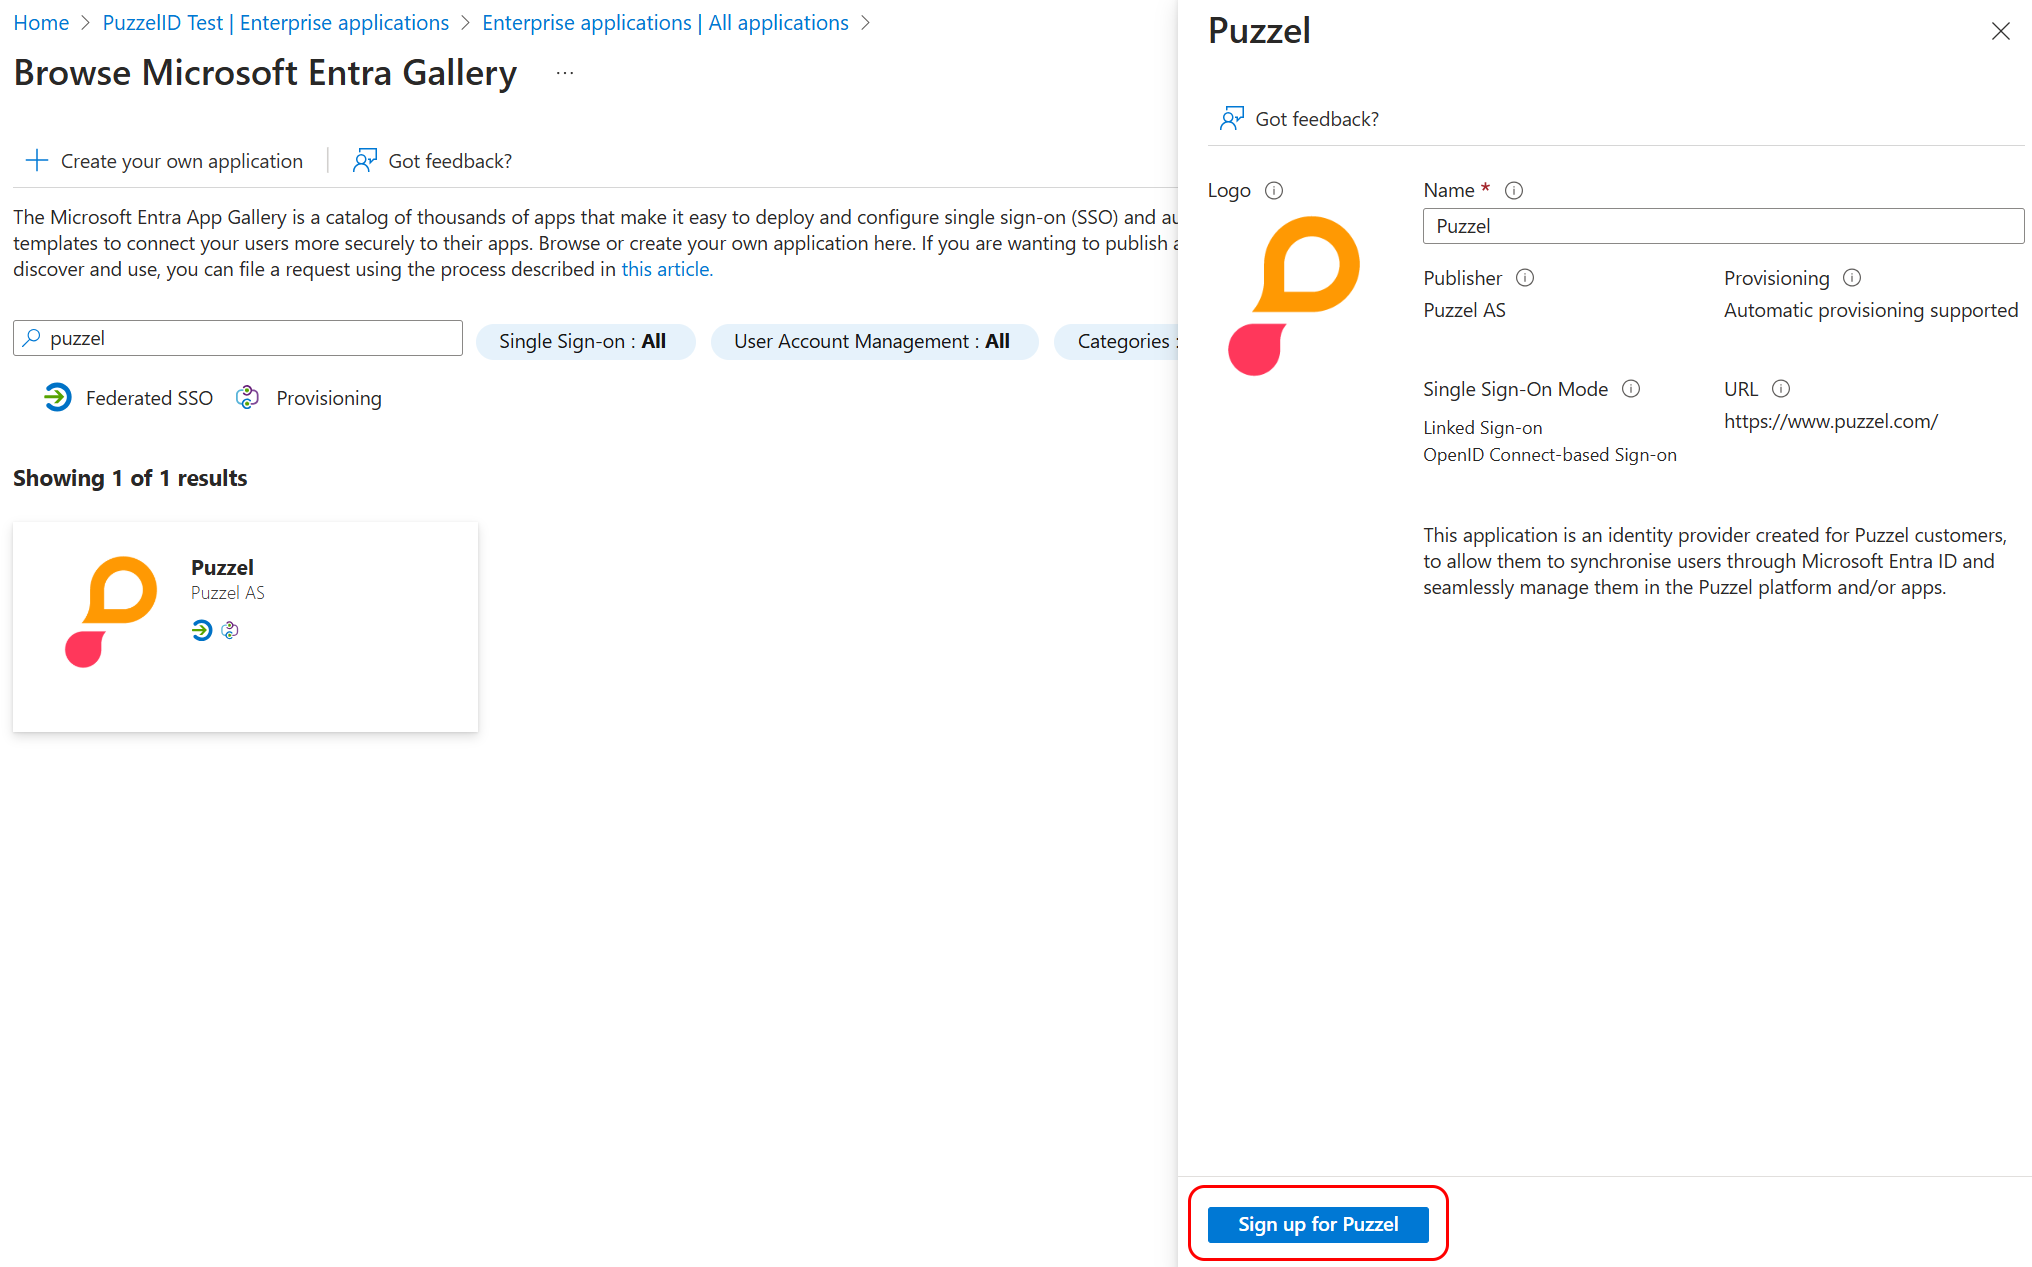
Click on the search result and you should see a screen on the right where you can choose to “Sign up for Puzzel”:
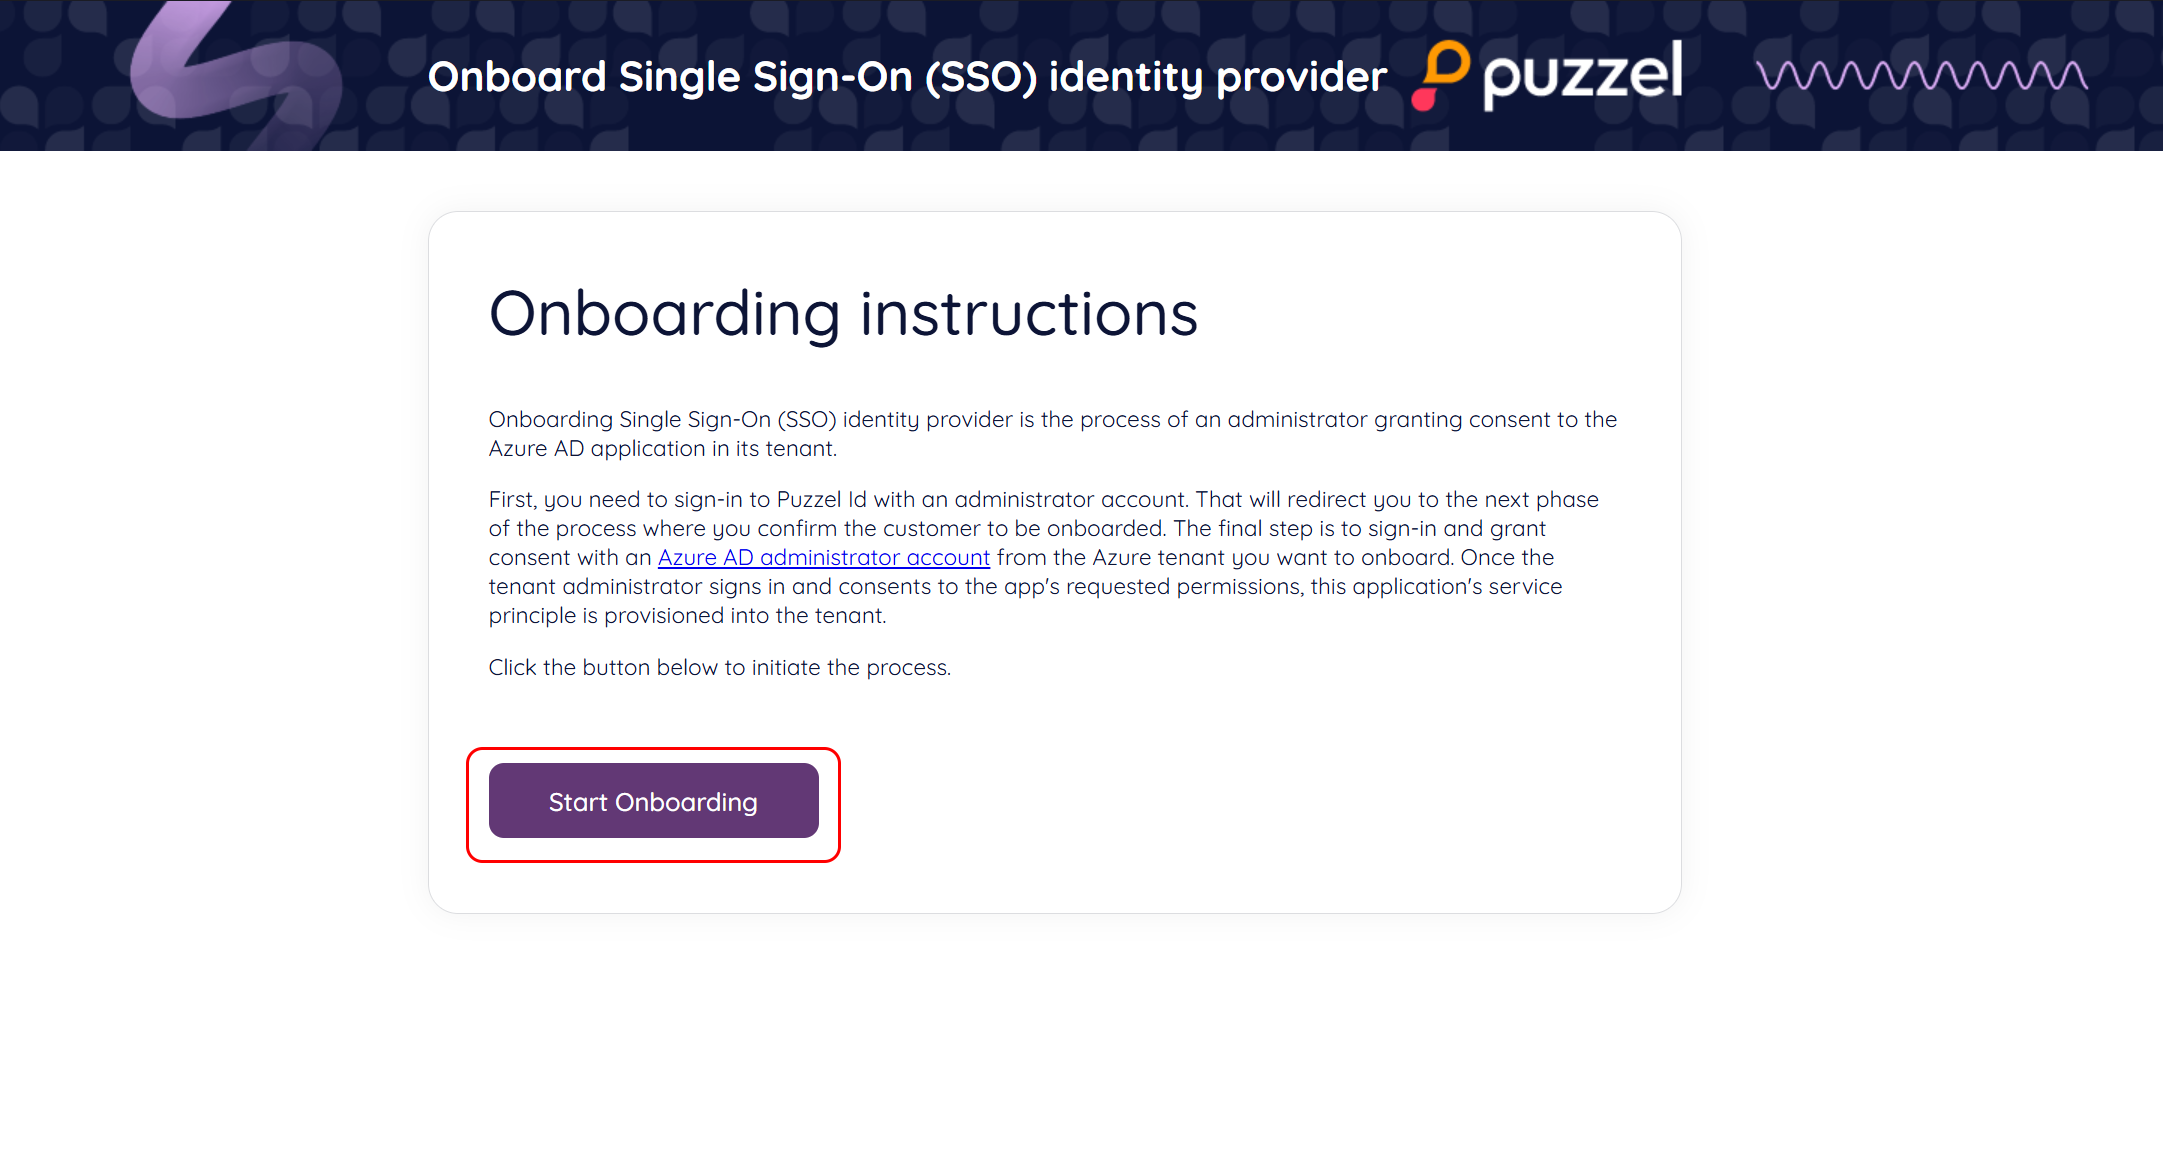
Step 2 - Onboarding SSO identity
When clicking “Sign up for Puzzel”, you are taken to the screen shown below. Click “Start Onboarding” to start the process.
Next, verify that the customer name is correct (this is shown) right above the “Onboard SSO” button; click this button to continue the process.
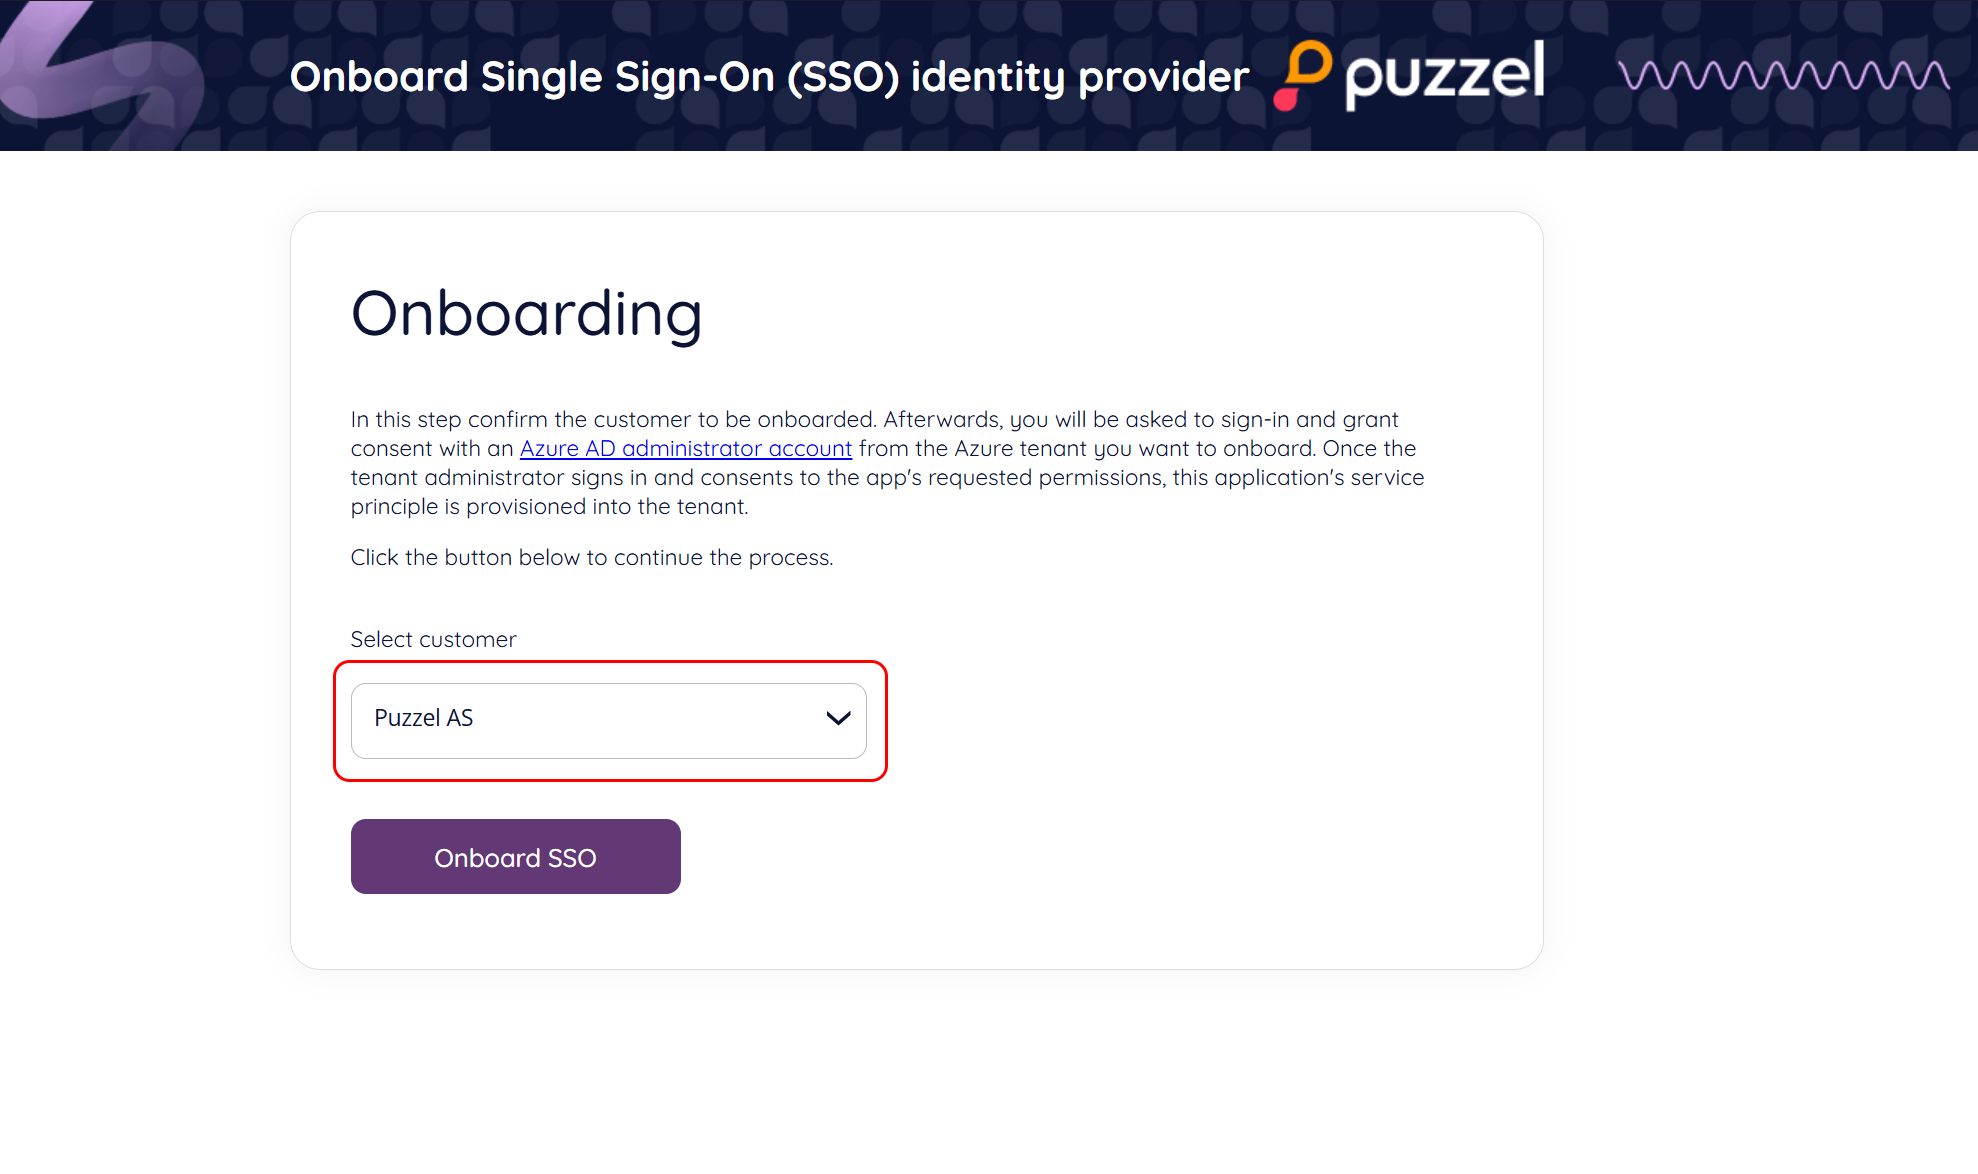
Next, you will be asked to sign in and grant consent with an Entra iD (Azure AD) administrator account from the Azure tenant you want to onboard.
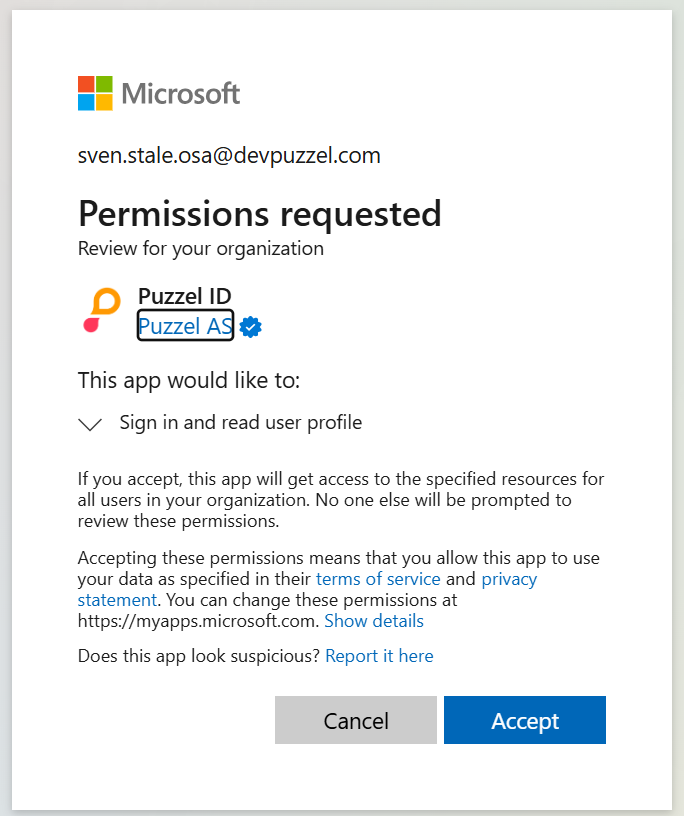
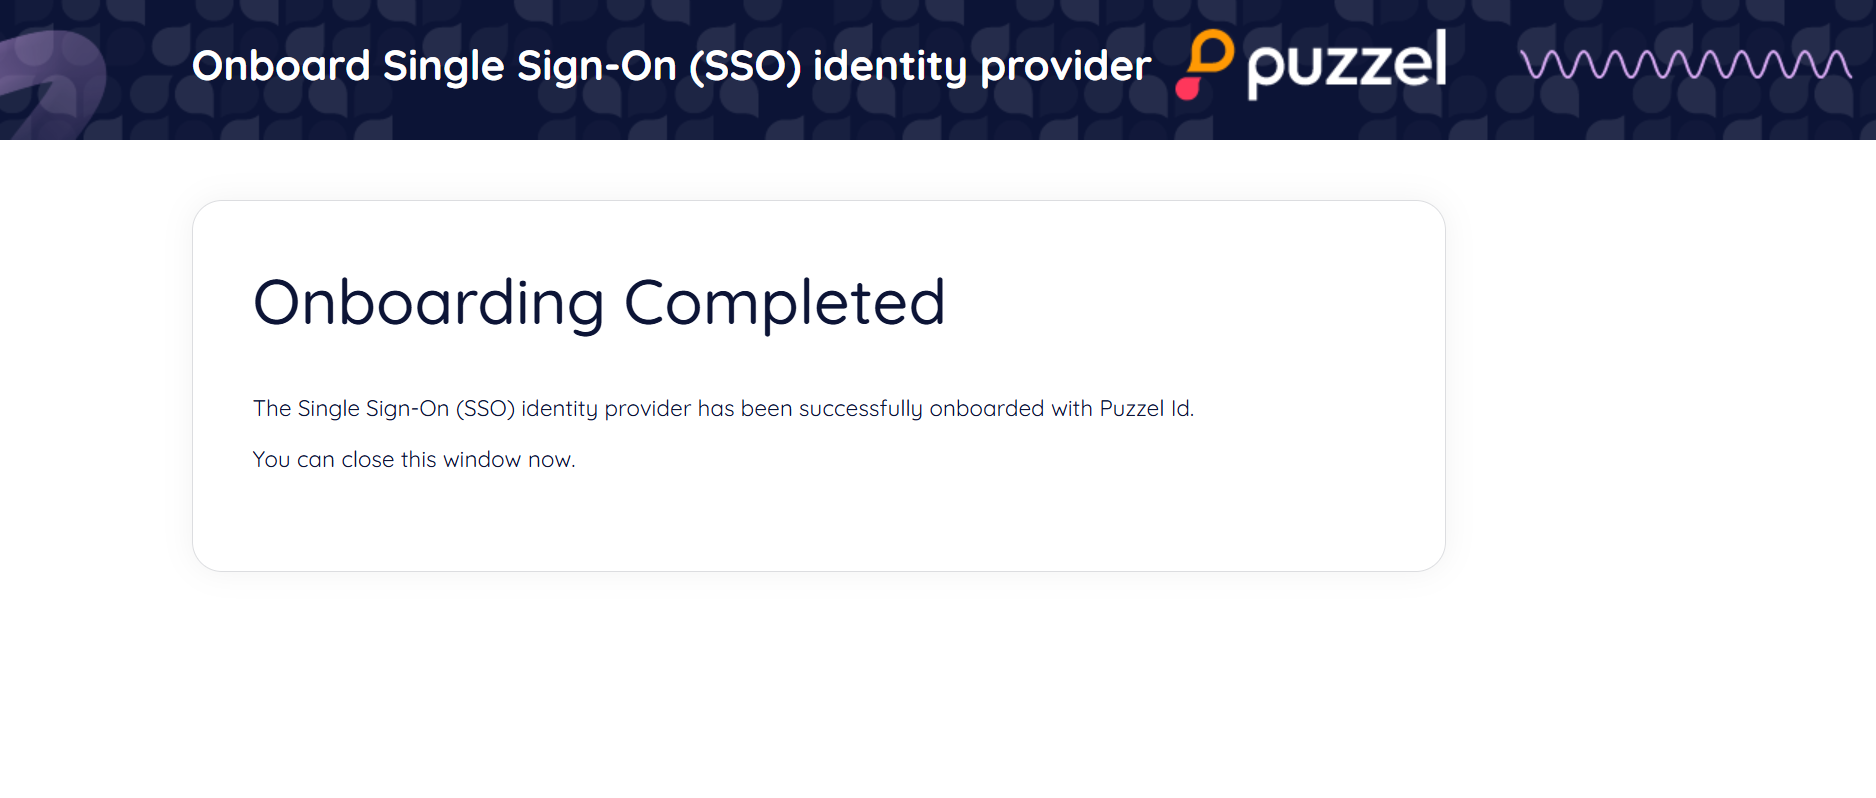
Once accepted, the applications' service principle is now provisioned into the tenant and you should see the “onboarding completed” page:
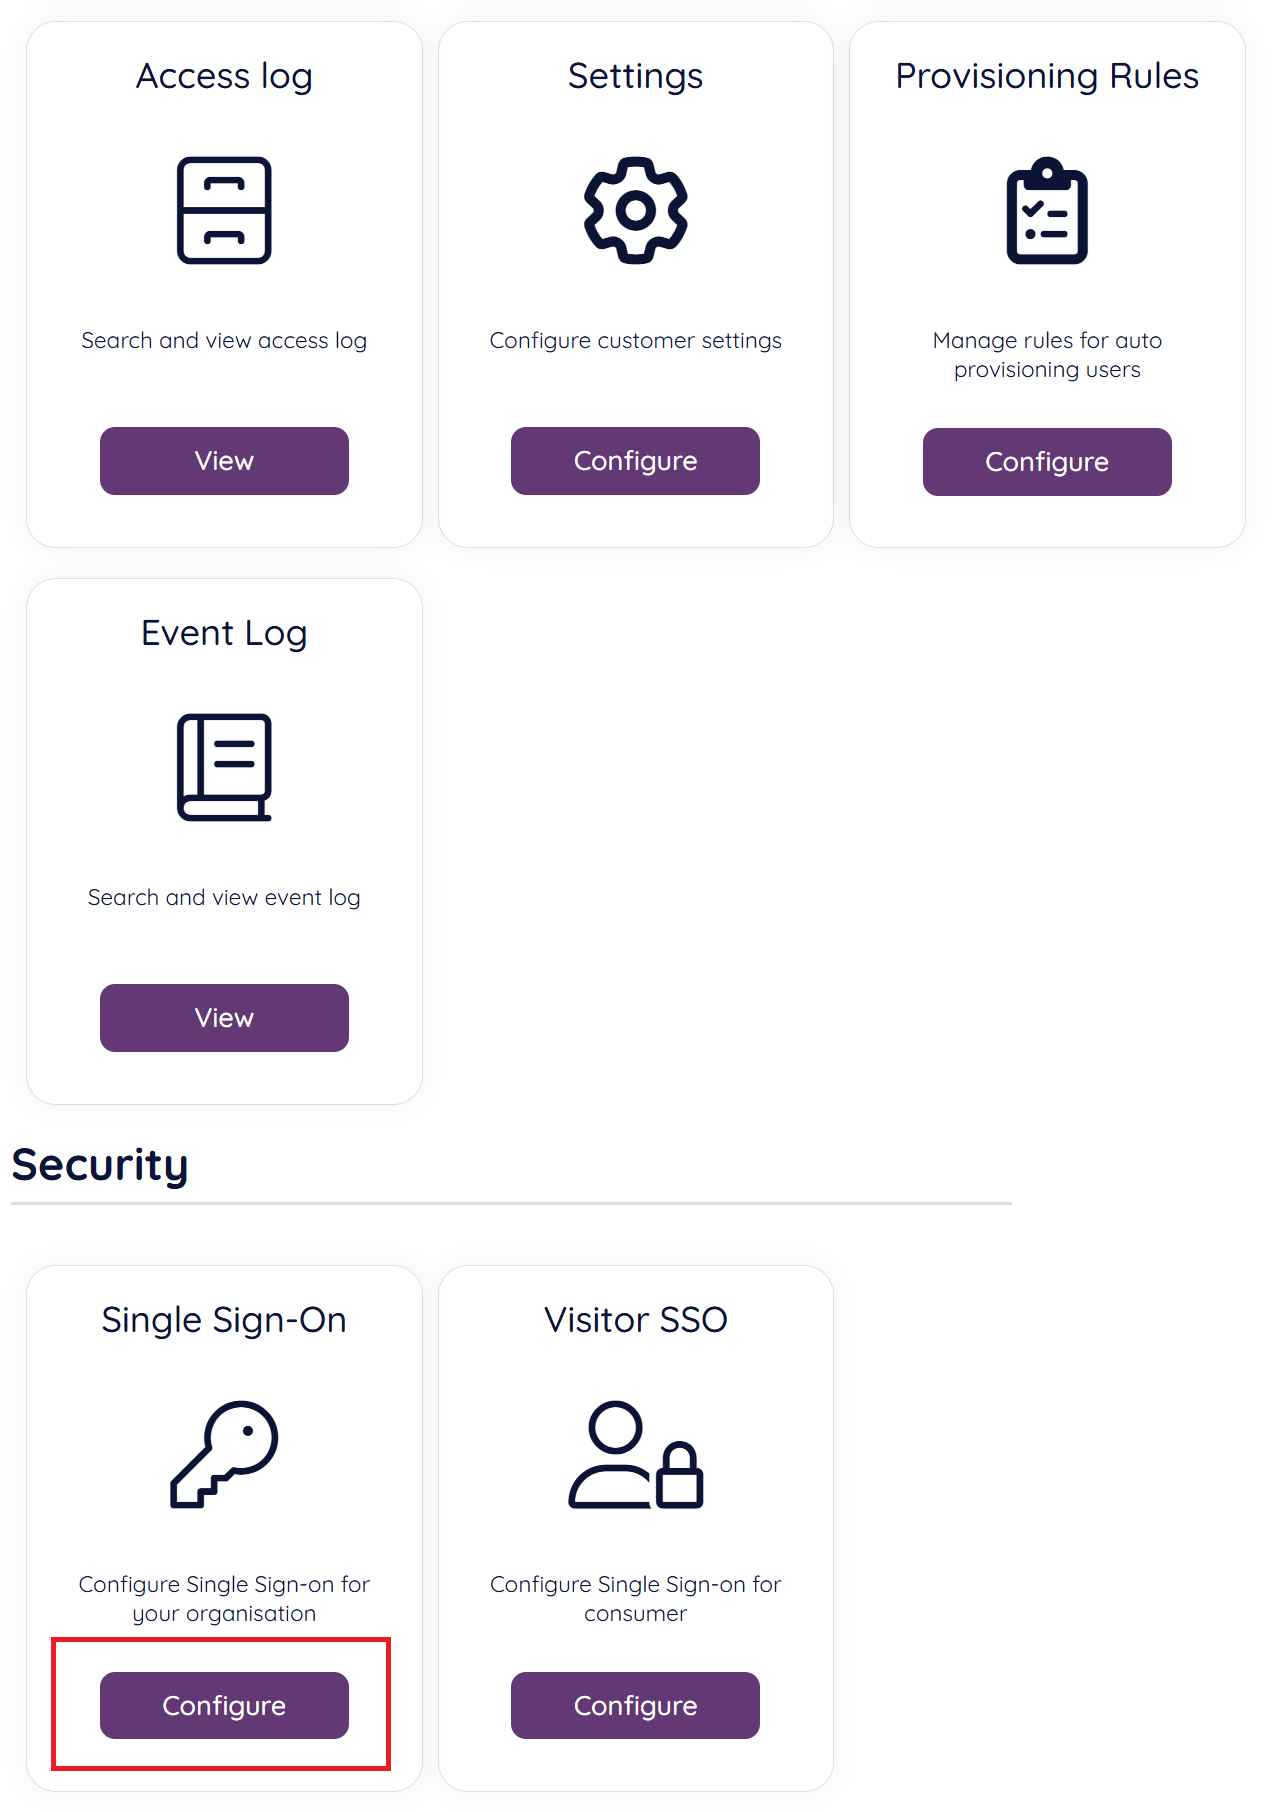
Step 3 - Managing an onboarded identity provider
After initial configuration, a connection can be disabled / enabled in the Organisation Settings portal. Choose the “Configure” option in the Single Sign-On option.
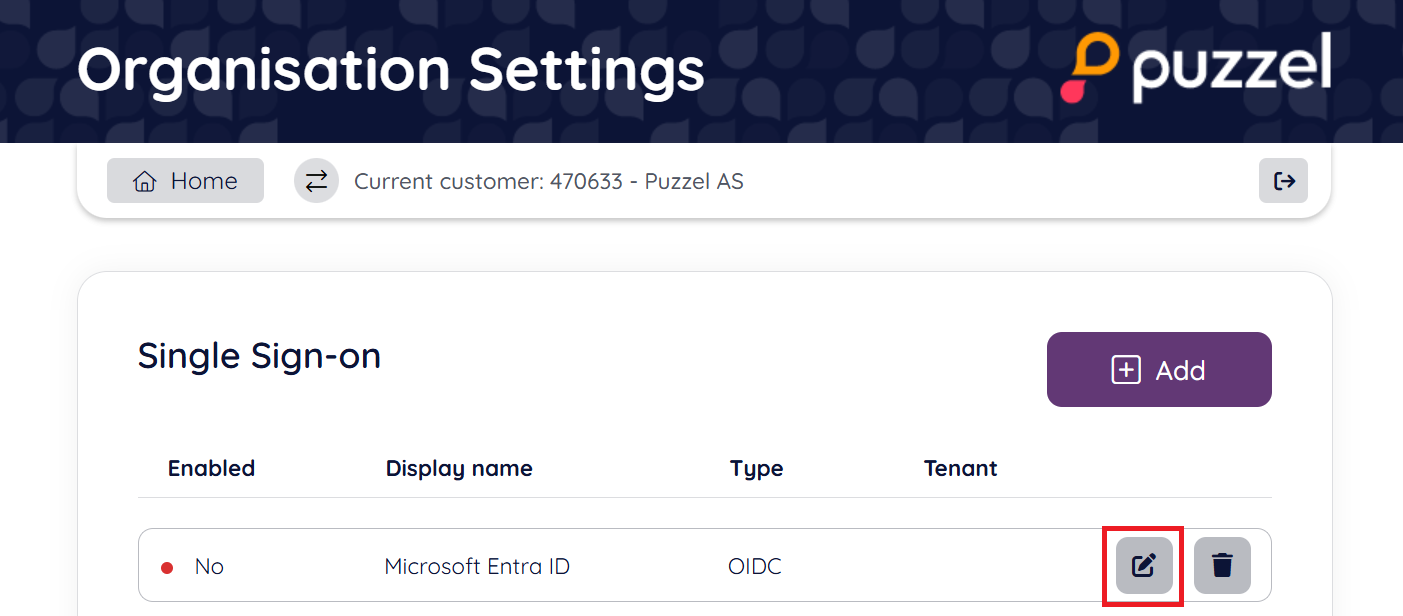
Next you should find the configured connection looking similar to the below screenshot, from this view, choose the “edit” icon.
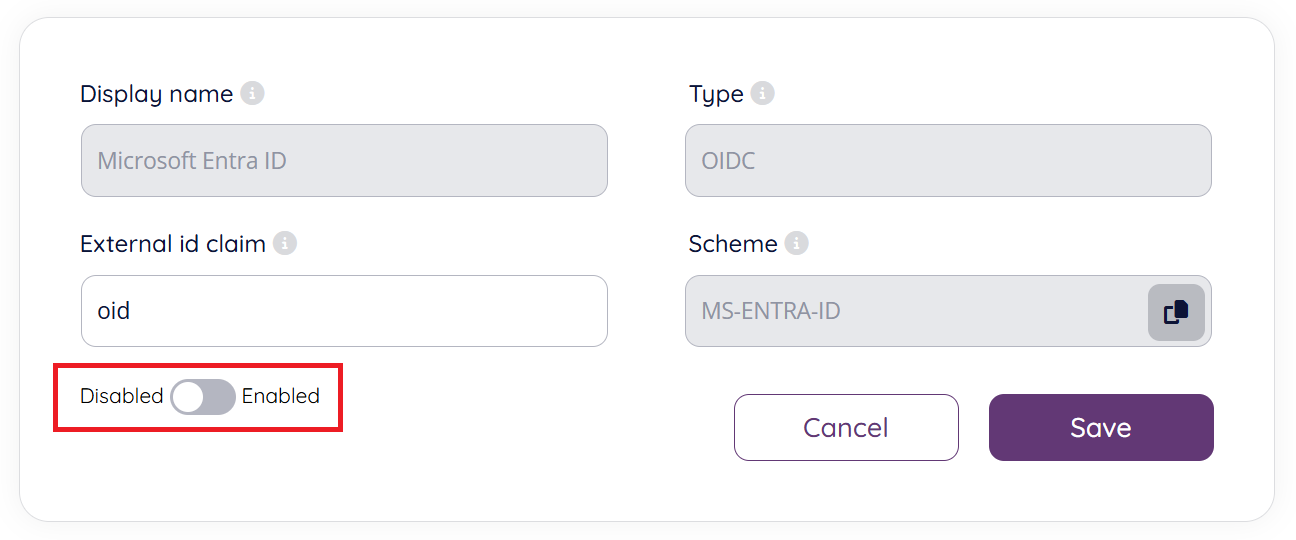
From the next screen it is possible to disable / enable the SSO connection. It is also possible to change which external id claim to use (e.g., change to use "udp").
Step 4 - Configure externalid for your users that are to use the SSO configuration
By default, the provider configuration behind the Puzzel Entra ID application uses the oid claim as external id claim to map the user to Puzzel ID.
This means that each user that is to use the configured SSO connection will need their respective Entra ID objectid added to their externalid field. Or if you changed External id claim to e.g, upn then you need to add UserPrincipalName from Azure (typically email address).
See the chapter “Validate users using external id” for more information.