
Configure Single Sign-On with Entra ID (Azure AD) manually
This guide details the steps required to configure SSO with Entra ID / Azure AD manually. An alternative to using the method using the Azure AD Galley app described in this guide.
Step 1 - Create a new Azure AD Application
For this step you need access to your company’s Azure Active Directory in the Azure portal, if you are not an IT administrator for your company you would typically need help from one in order to complete this step.
See What is application management? - Microsoft Entra ID for more details on managing Azure AD apps.
On the left side menu:
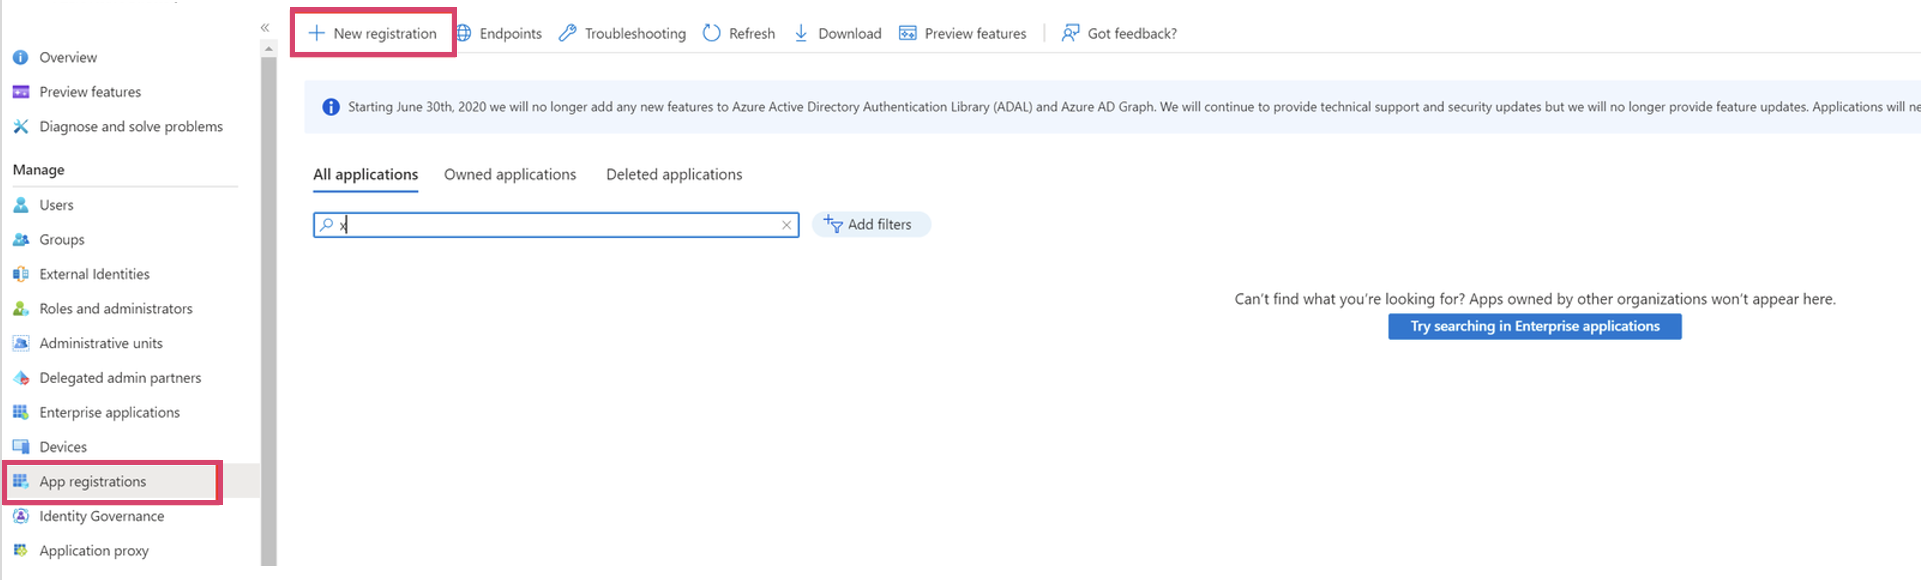
i. Navigate to “App Registration”
ii. Choose “New application”
iii. Enter a name for the application
iv. Under “Supported account types”, select “Accounts in this organisational directory only (Single tenant)”
v. Leave the Redirect URI part empty for now, we will add that in the step below.
vi. Click “Register”

Step 2 - Find and add redirect URLs for your SSO configuration
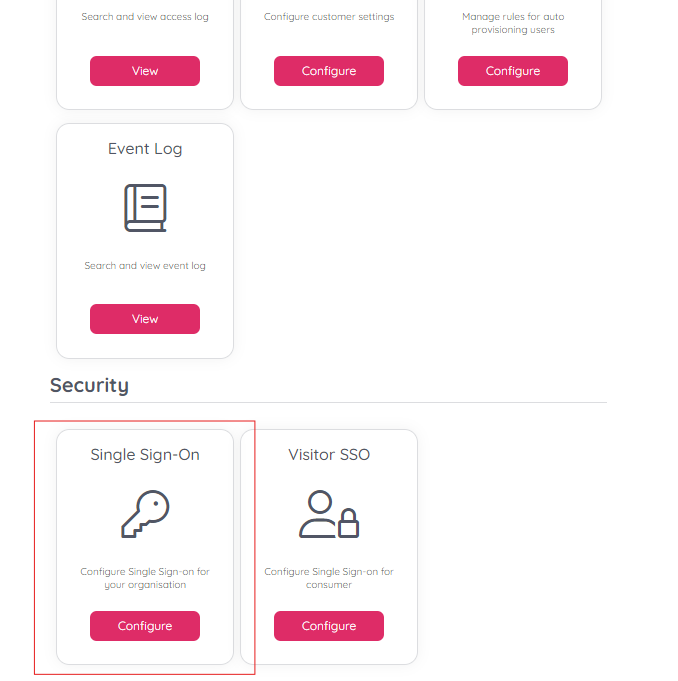
i. From the Organisation Settings home page, click on the “Single Sign-On” icon as shown below:
ii. Depending on whether you have added SSO configurations previously or not you should either see a list of current configurations, or just an empty list. Either way, you should also have the “Add” button displayed on the top right.
iii. Click on the “Add” button and choose “OIDC” as illustrated below:

iv. On the next screen you will be presented with two fields which you need to add to your Azure AD application configuration, “Redirect URI” and “Front-channel logout URL”. See screenshot below:
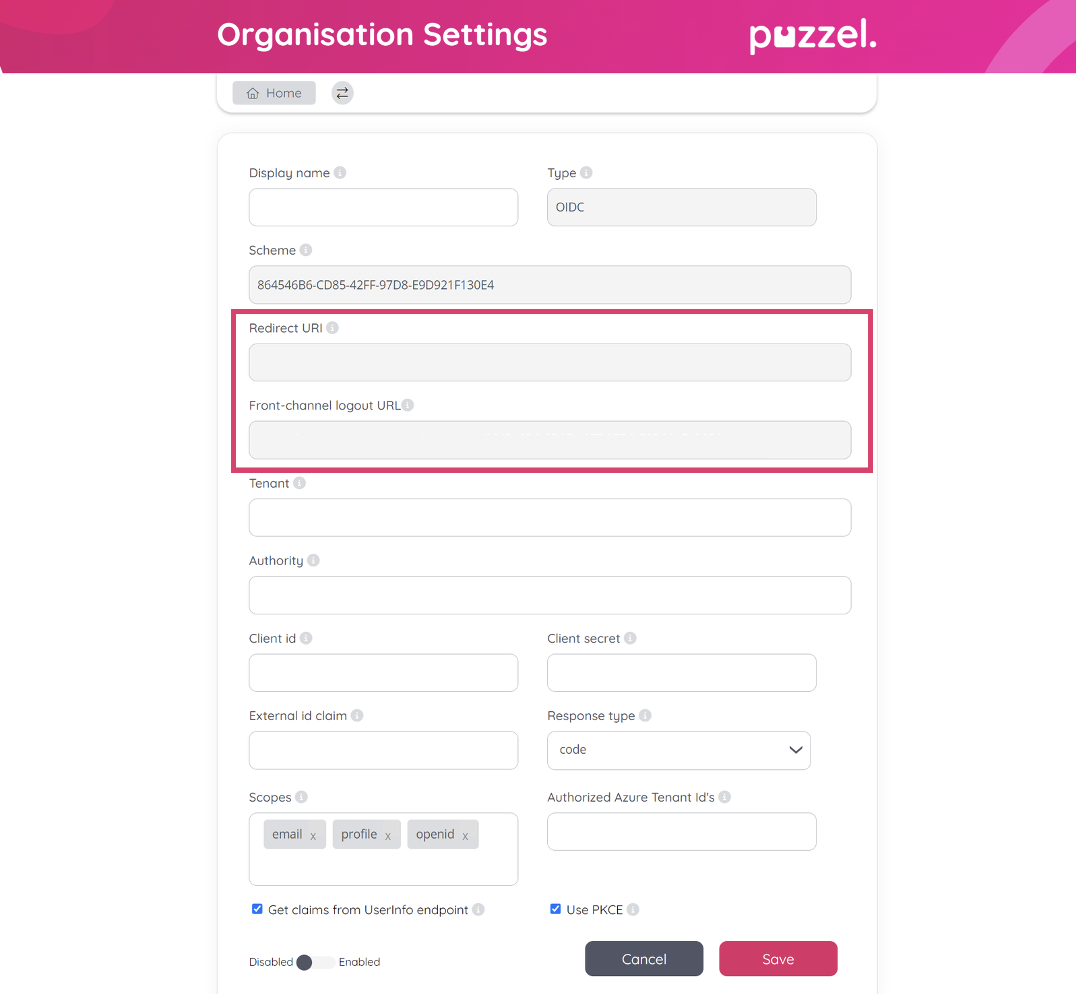
v. Copy the value of “Redirect URI” and navigate back to the Azure AD application page.
vi. From the overview page, choose “Add a Redirect URI” as shown below:

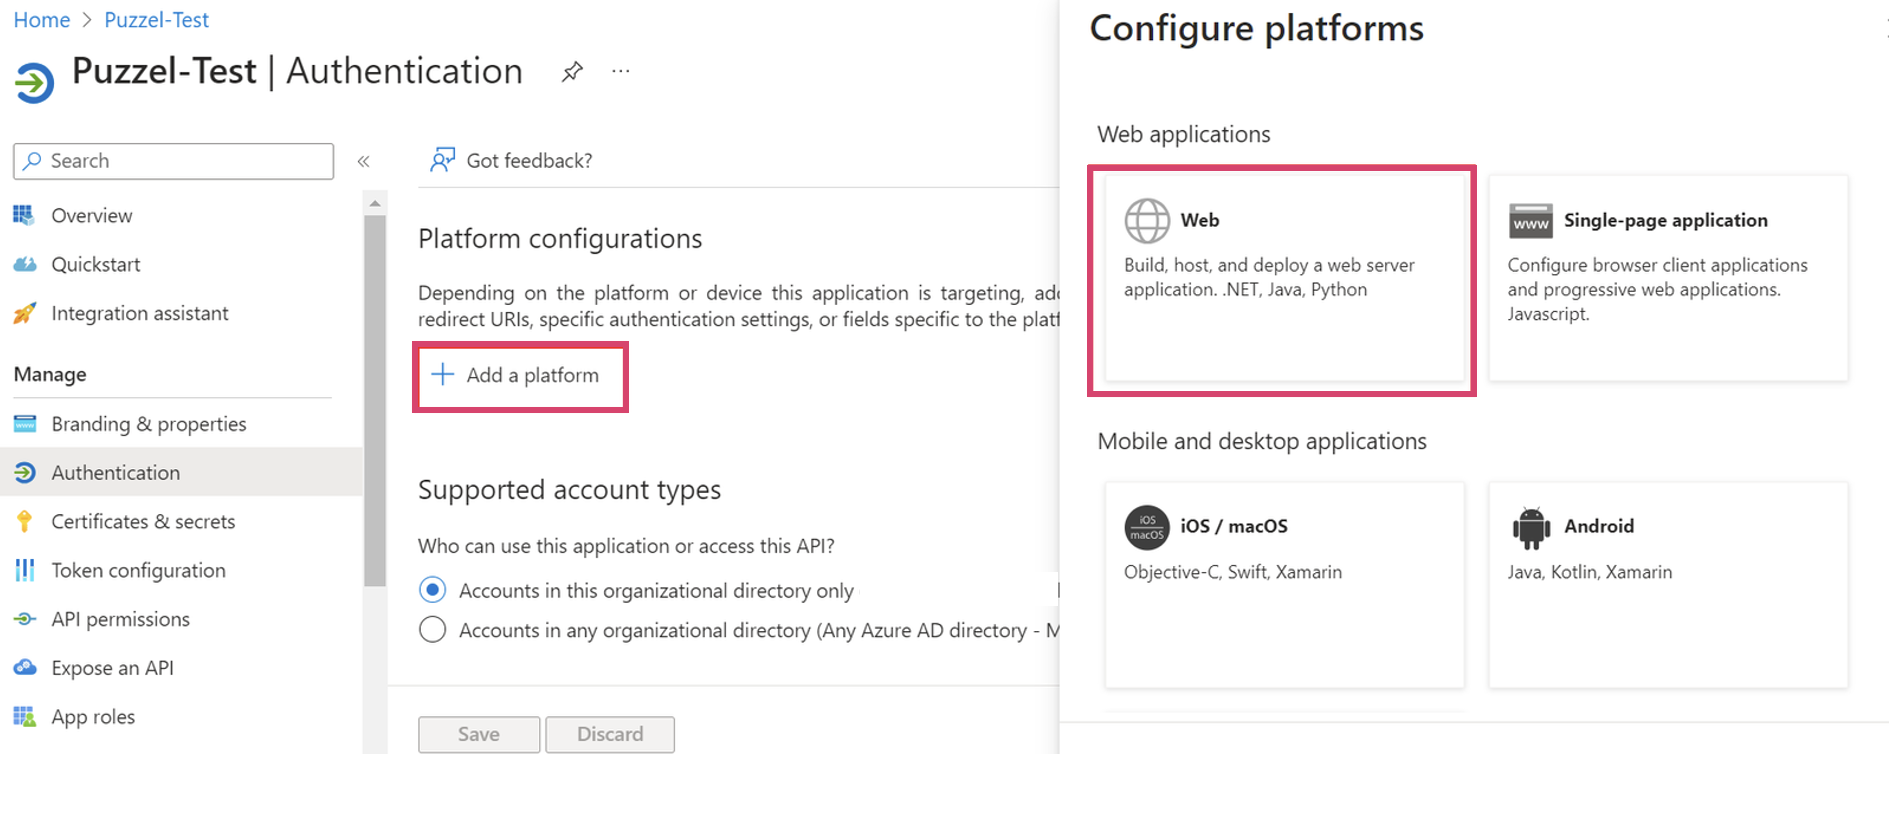
vii. On the next screen click “Add a platform” and then choose “Web” from the right-side popup screen.
viii. Paste the content you copied from “Redirect URI” previously into the “Redirect URIs” field.
ix. Go back to the Organisation Settings portal and copy the content of the “Front-channel logout URL”
x. Then paste it into the corresponding field in the Azure AD application page as shown below. Make sure “ID tokens” is checked then click “Configure” button.

Step 3 - Add necessary information to SSO External Identity Provider configuration
Next we need to add a client secret to the Azure AD application.
i. To do this, go to the left-side menu option “Certificates & secrets”.
ii. Next click “New client secret”
iii. Fill in a description and choose an expiry date for the secret (note that you can also enter a custom date here).
iv. Click the “Add” button to generate the client secret. These steps are shown below:
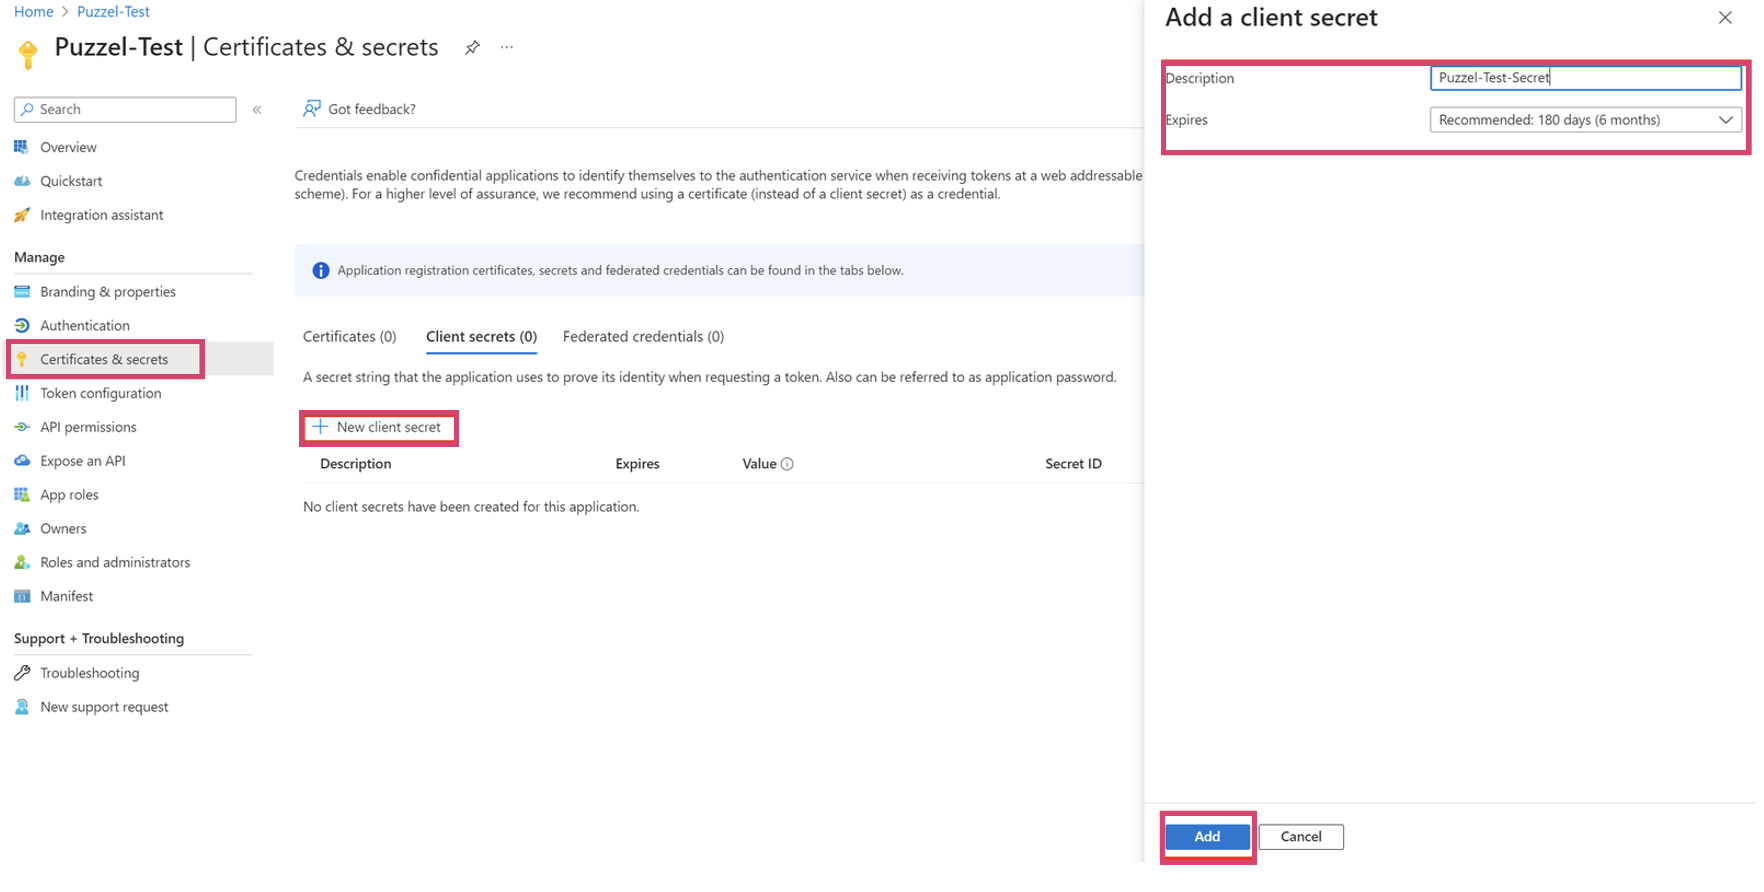
When the secret has been generated, it will only be visible once, so at this step it is very important to copy its value to the clipboard. If you miss this you will need to generate another secret.
v. Next, switch back to the organisation settings portal
vi. Paste the value of the secret into the field “Client Secret”.

vii. In the Azure AD application page, go back to “Overview” and copy value of the “Application (client) ID” as shown below:
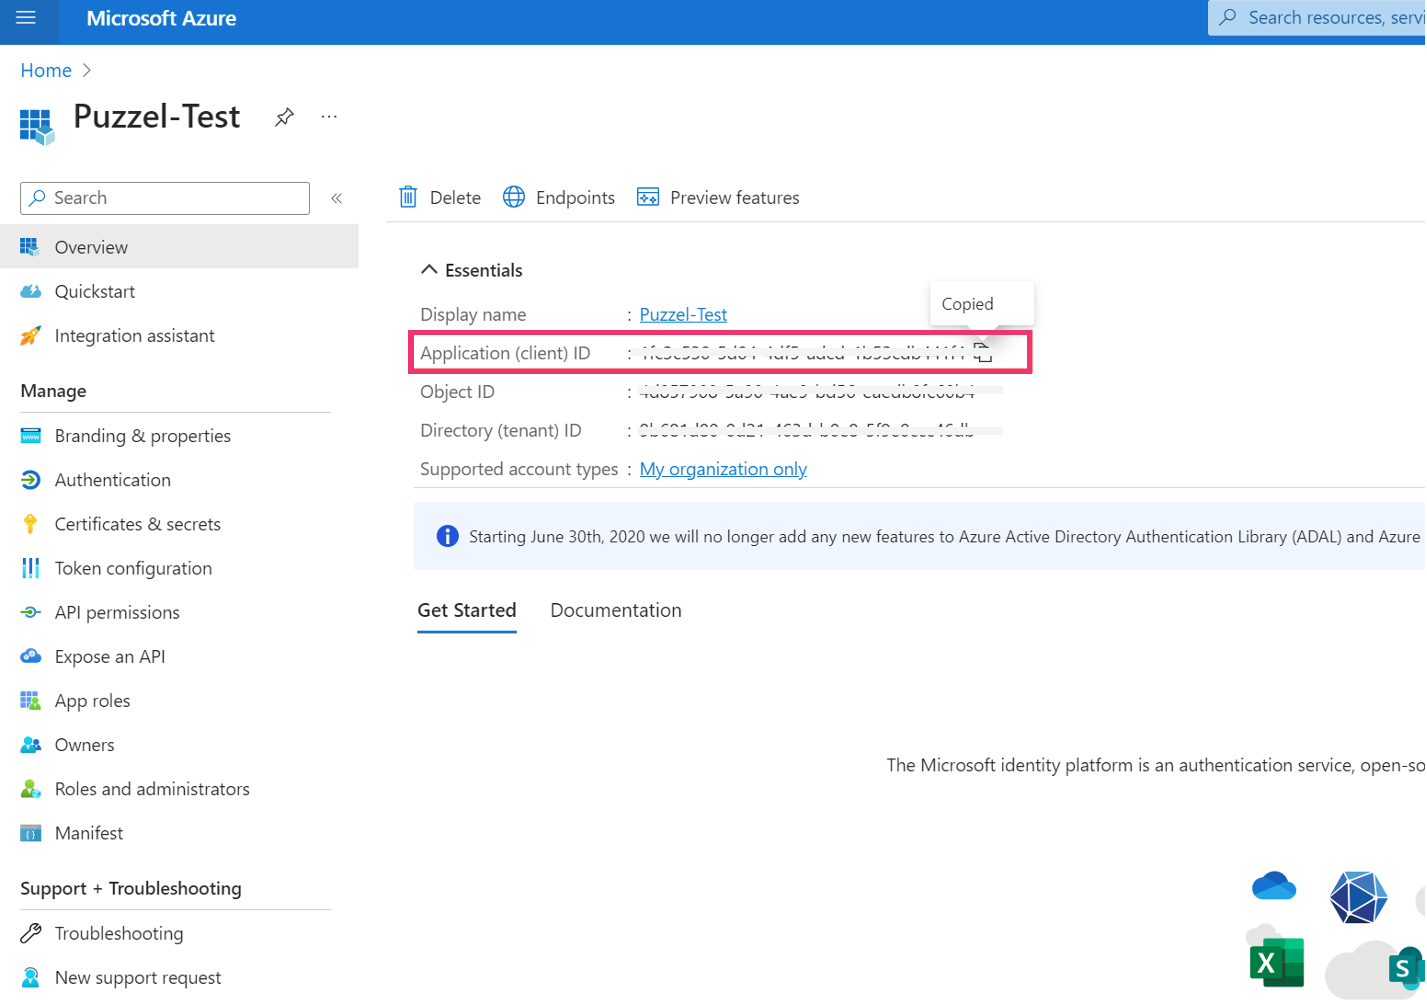
viii. Switch to the organisation settings page and paste the value of the “Application (client) ID” into the field “Client id”.
ix. Go back to the Azure AD application page and copy the value of “Directory (tenant) ID”:
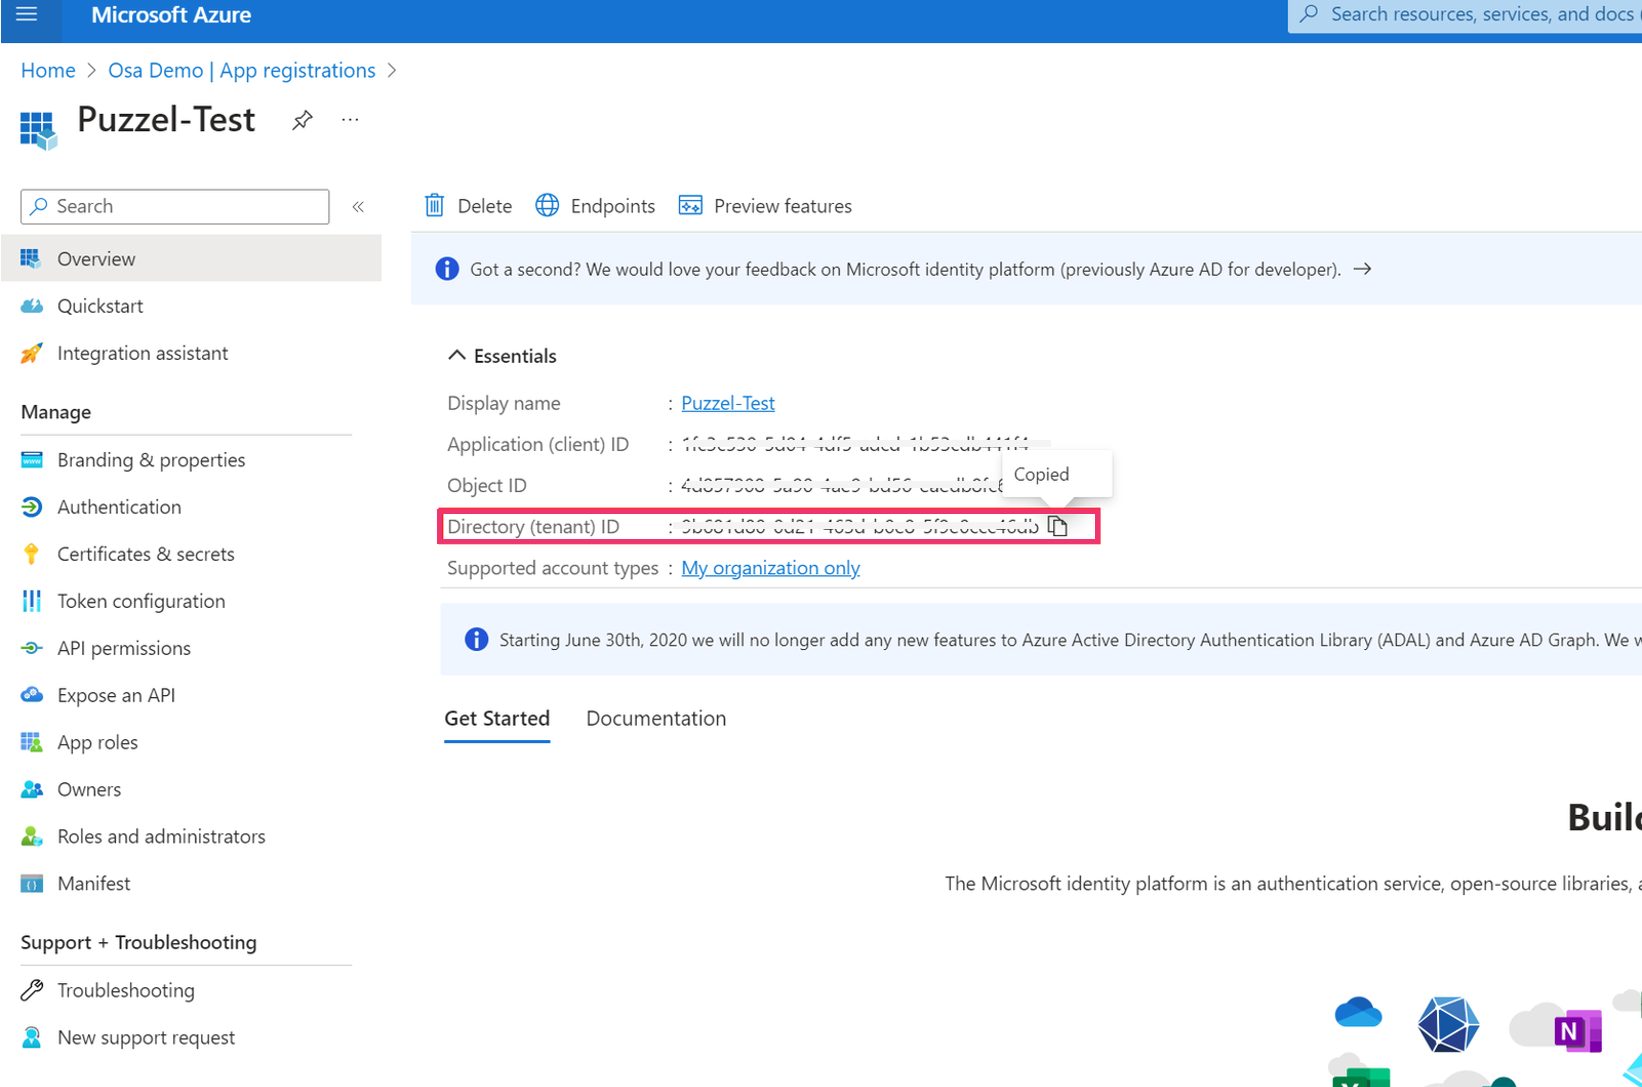
x. Back in the organisation settings page, paste the “Directory (tenant) ID” into the field “Authority”, then move the cursor to the start of the input field and paste “https://login.microsoftonline.com/” in front of it. This should now make out a URL in the following format (using the example directory ID shown above): https://login.microsoftonline.com/9b681d80-0d21-463d-b0e8-5f9e0ccc46db
Staying in the organisation settings page now add the following information :
Display name (enter a descriptive name for your configuration)
If your organisation have more than one tenant add your domain name in the field “Tenant”, this could be e.g. “puzzel.com” or “mycompany.biz” - this is to be able automatically route users to the correct SSO configuration based on their email address domain if you have more than one SSO configuration active.
Step 4 - External id claim
Continuing in same form as in the previous step, the field “External id claim” requires special attention. Here you need to provide a valid Azure AD claim that will be used to map the user to Puzzel ID.
It is highly recommended to not use claims like email, preferred_username or unique_name as external id claim. These claims are not unique, as they can be controllable by tenant administrators or sometimes users, which makes them unsuitable for authorisation decisions. They are only usable for display purposes.
The claims sub or oid are some of the suggested claims, below you can find a chapter of using oid as external id. upn is also a commonly used claim, but it should be noted that the upn value is also possible to change (e.g. by tenant admins) and hence it is not determined a fully safe identifier.
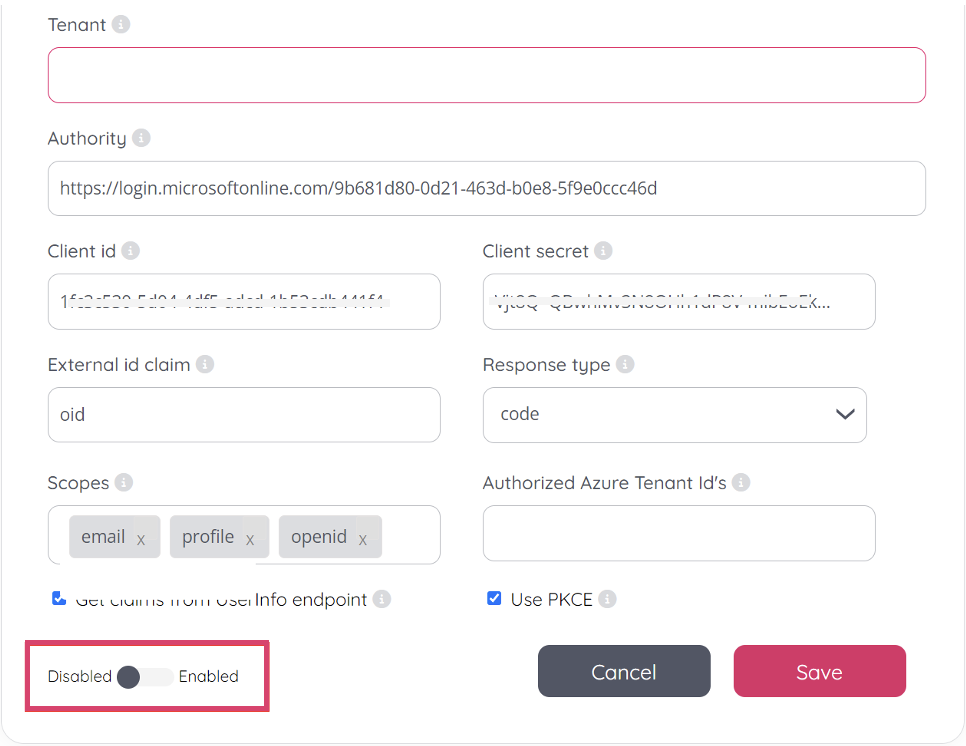
Enter your chosen claim into the “External id claim” field, the rest of the fields can be left as is. Your view should now look something similar to this:
See the following section of this article from Microsoft: Secure applications and APIs by validating claims - Microsoft identity platform
Note that the field “external id” needs to be filled out for each user that is to use SSO according to the chose claim. See the section Validate users using external id for more information.
Step 5 - Save and enable the configuration
Still in the same form as in the previous step, make sure to toggle the configuration to “Enabled” if you wish to start using the configuration right away.
Step 6 - Grant admin consent
As a final step, consider granting admin consent for the application so that users don’t get the “Need admin approval” popup when signing in. This is not a strictly mandatory step, but in most cases allows for a better user experience. See this Microsoft article for more information.
This consent is given in the “Enterprise application” section, this is actually a service principal object which defines what the app can actually do in the specific tenant, who can access the app, and what resources the app can access.
There are a couple of ways to access this section:
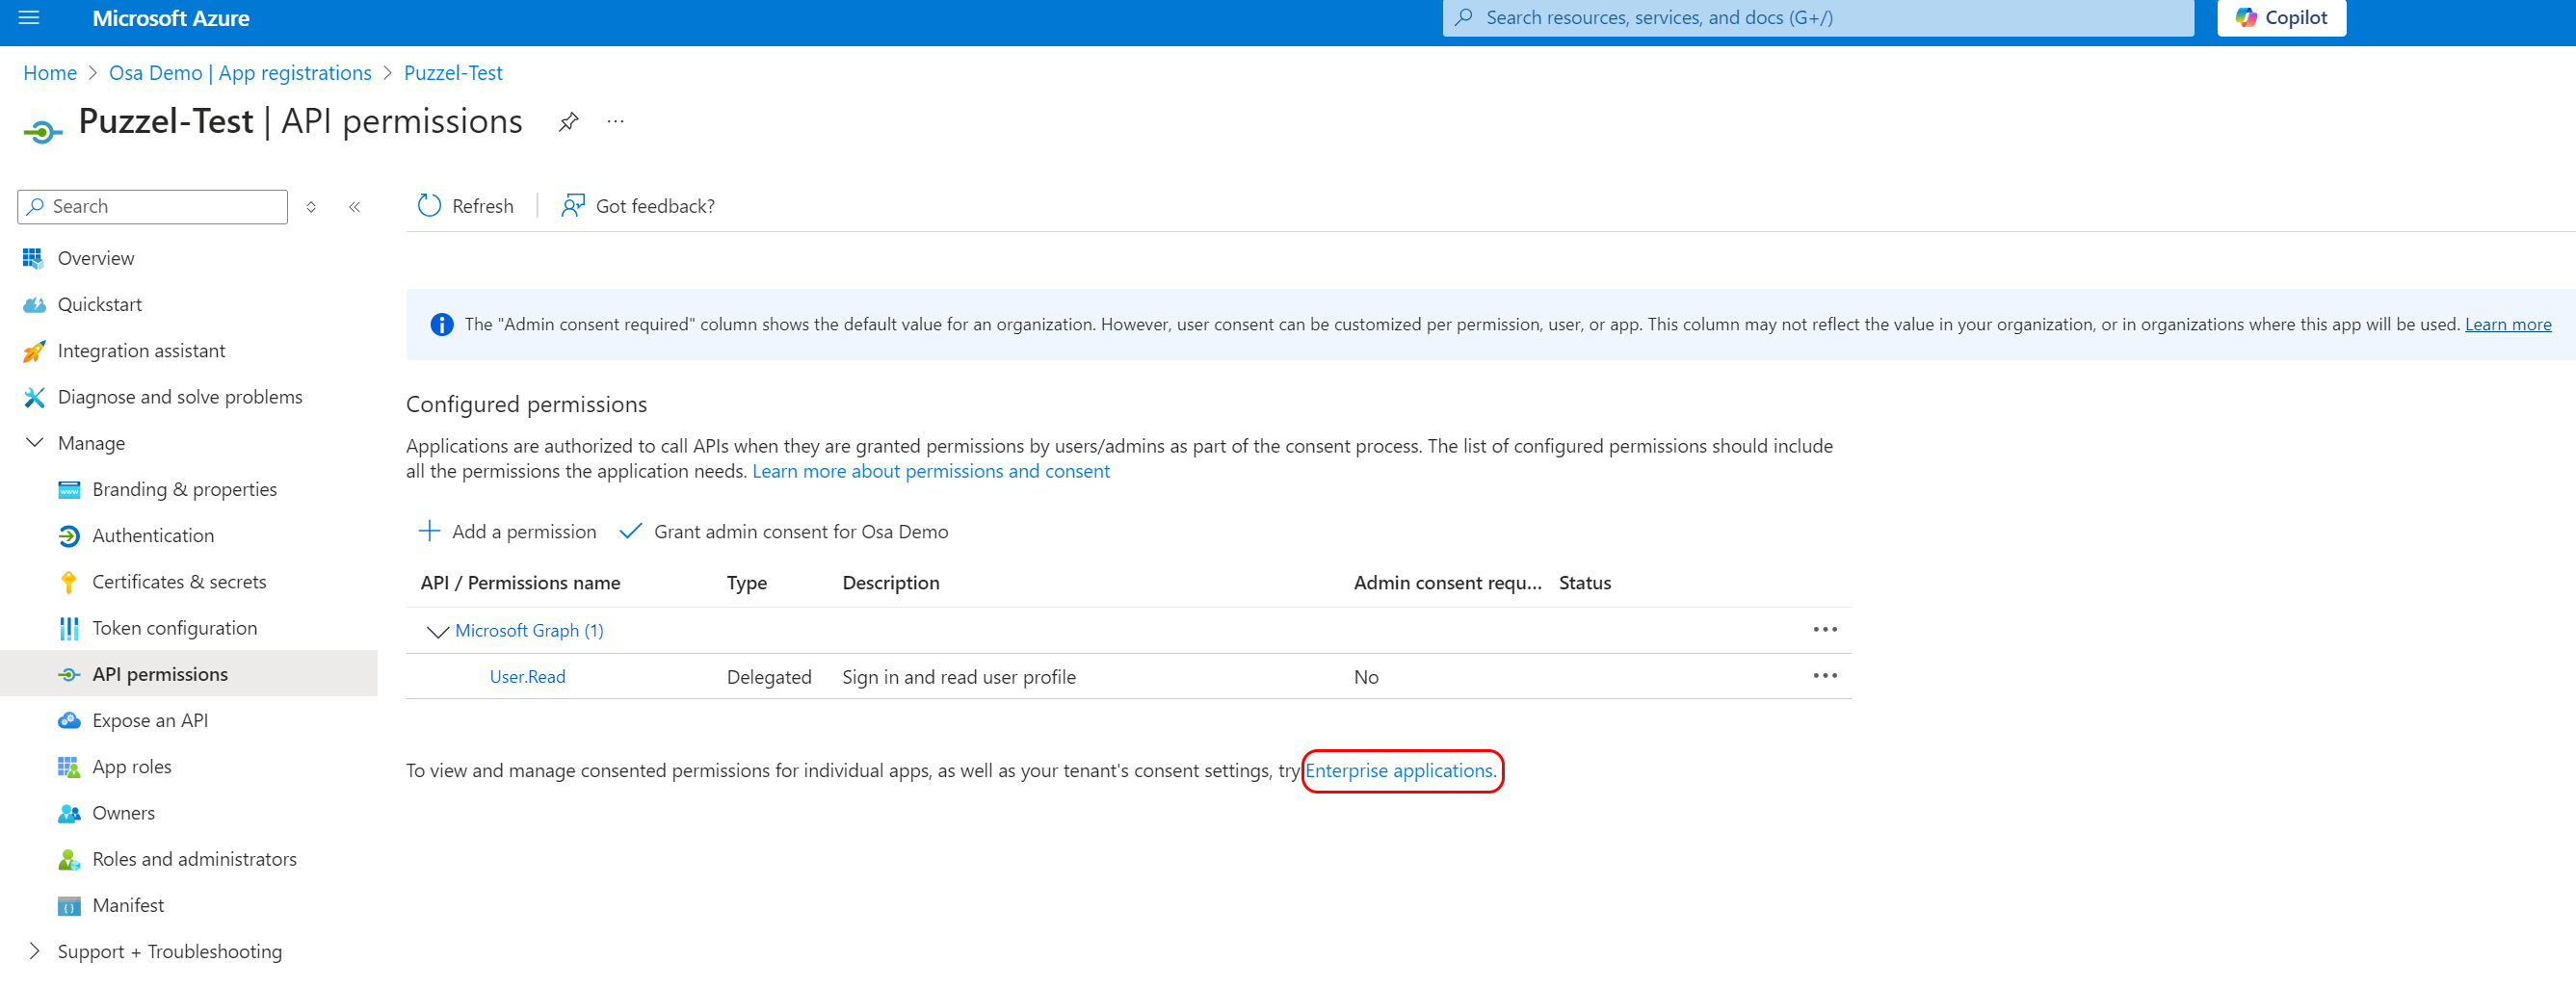
Return to the Azure AD application page and navigate to “Manage → API permissions”. Here you should find a shortcut as highlighted below where you can go directly to the page where consent can be granted:
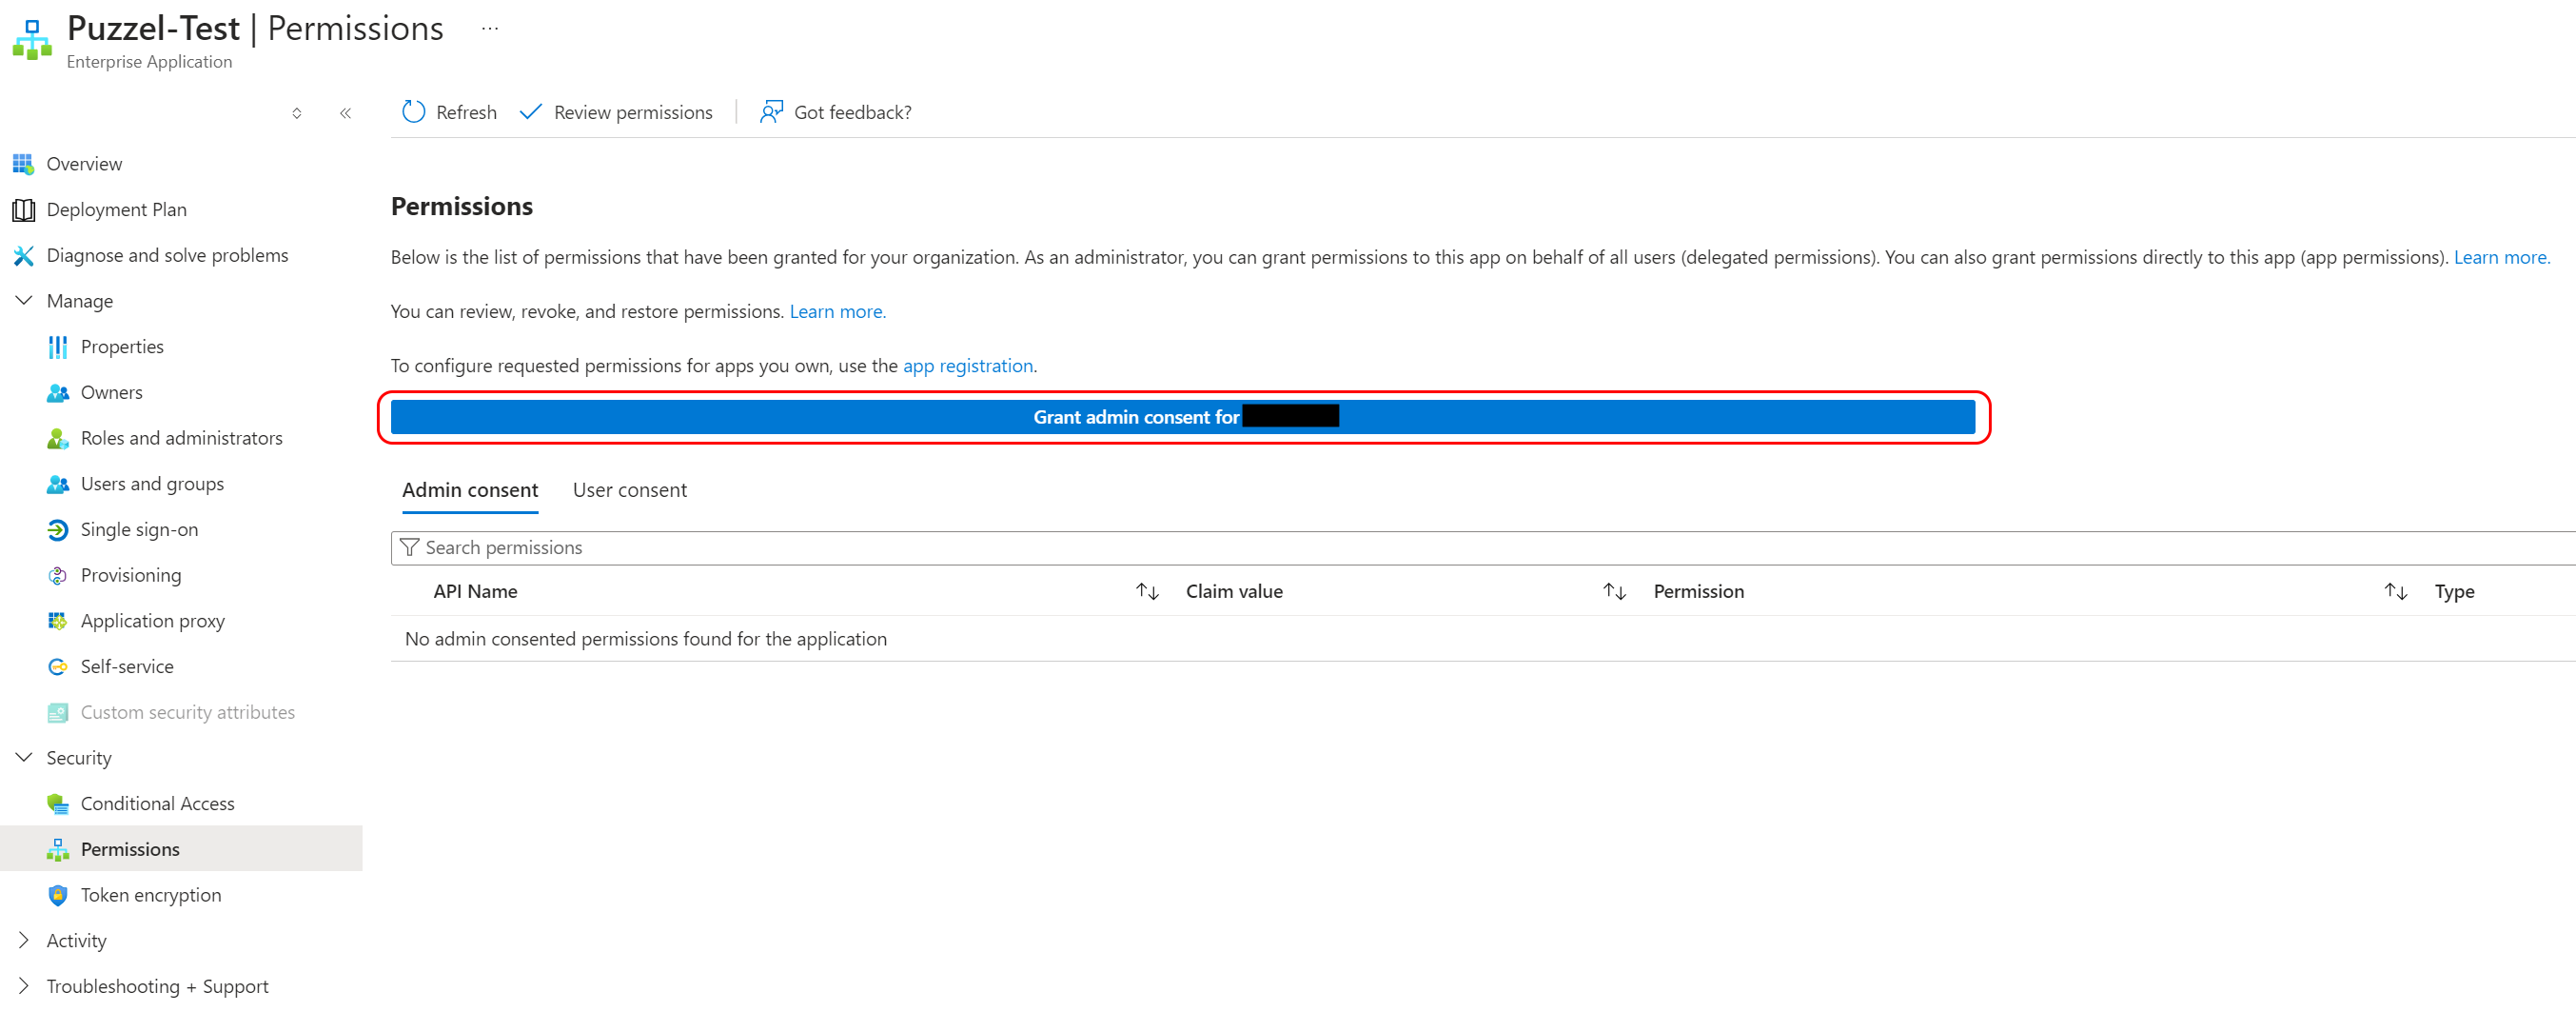
Go to Entra ID home page and choose “Manage → Enterprise Applications”. Find your application in the list and select it. From the application “home” screen, navigate to “Security → Permissions”.
From the Permissions screen click the “Grant admin consent for <your tenant>” button:
You should be asked to sign-in as a user with the right privileges, then you will see a consent screen similar to this:
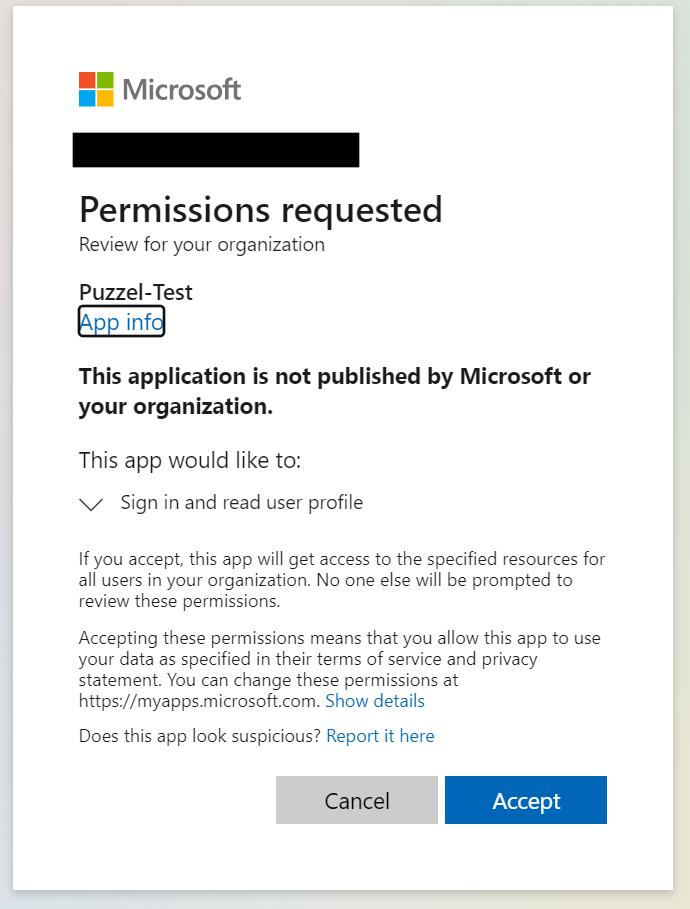
Click “Accept” and you should see a small verification message (toast notification) in the upper right confirming the grant.
Click “Save” to store your configuration. If you chose to enable the configuration, and you have completed the steps to link the users using external id, you should now be able to login using SSO with Azure AD.