
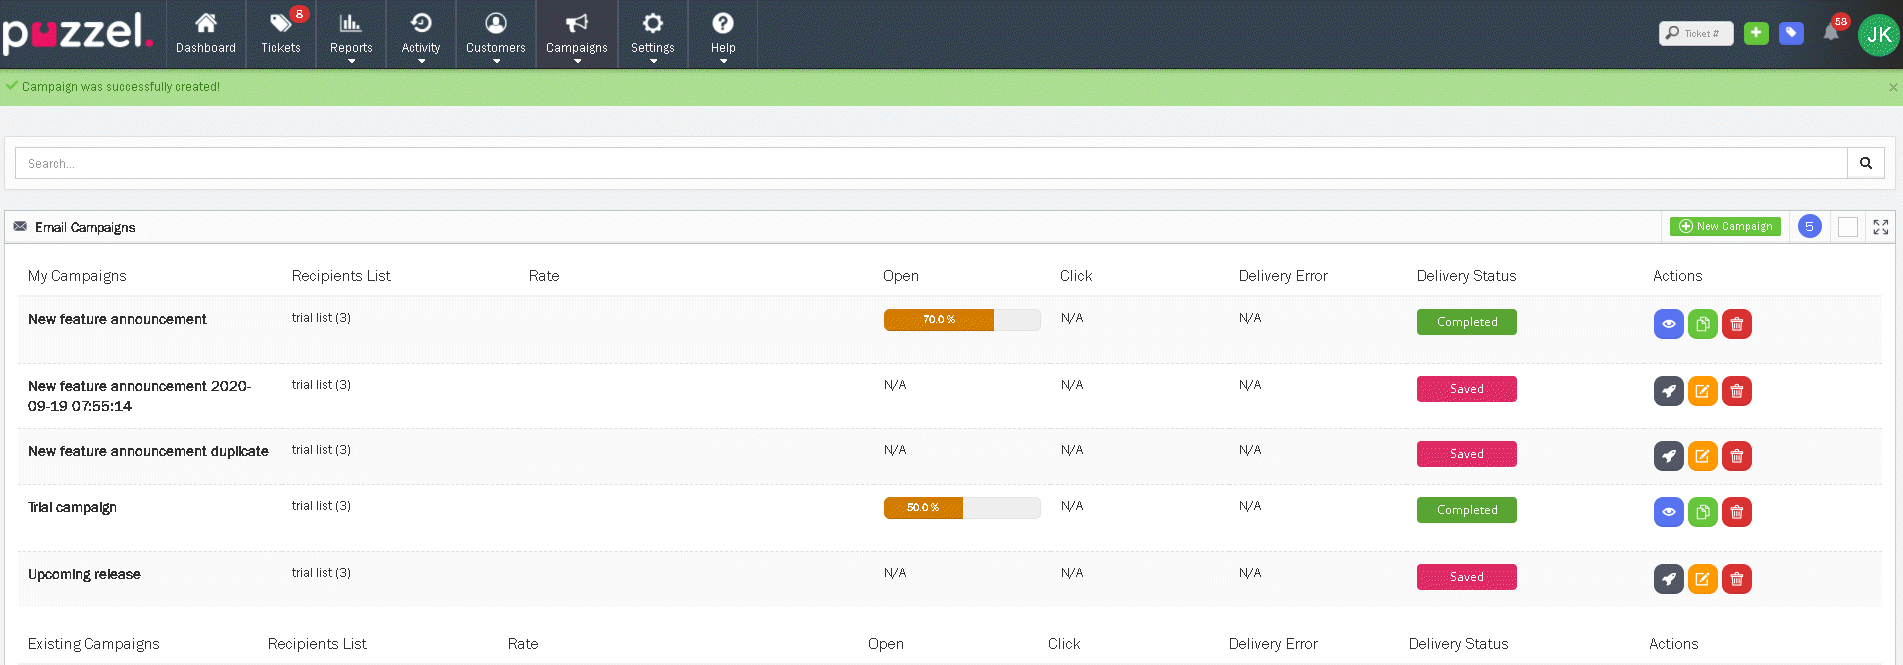
Email Campaigns
Send bulk or mass outbound e-mails to a list of recipients list. To create, view, edit an Email Campaign select the Email option under the Campaigns tab from the menu bar.

The Campaigns page will show the list of Campaigns you have access to. These are split into Campaigns you have created and Campaigns created by other Users that you can view and edit.
Creating or editing a campaign
To create a new campaign click on the ![]() icon or on
icon or on ![]() icon to edit the saved campaigns.
icon to edit the saved campaigns.
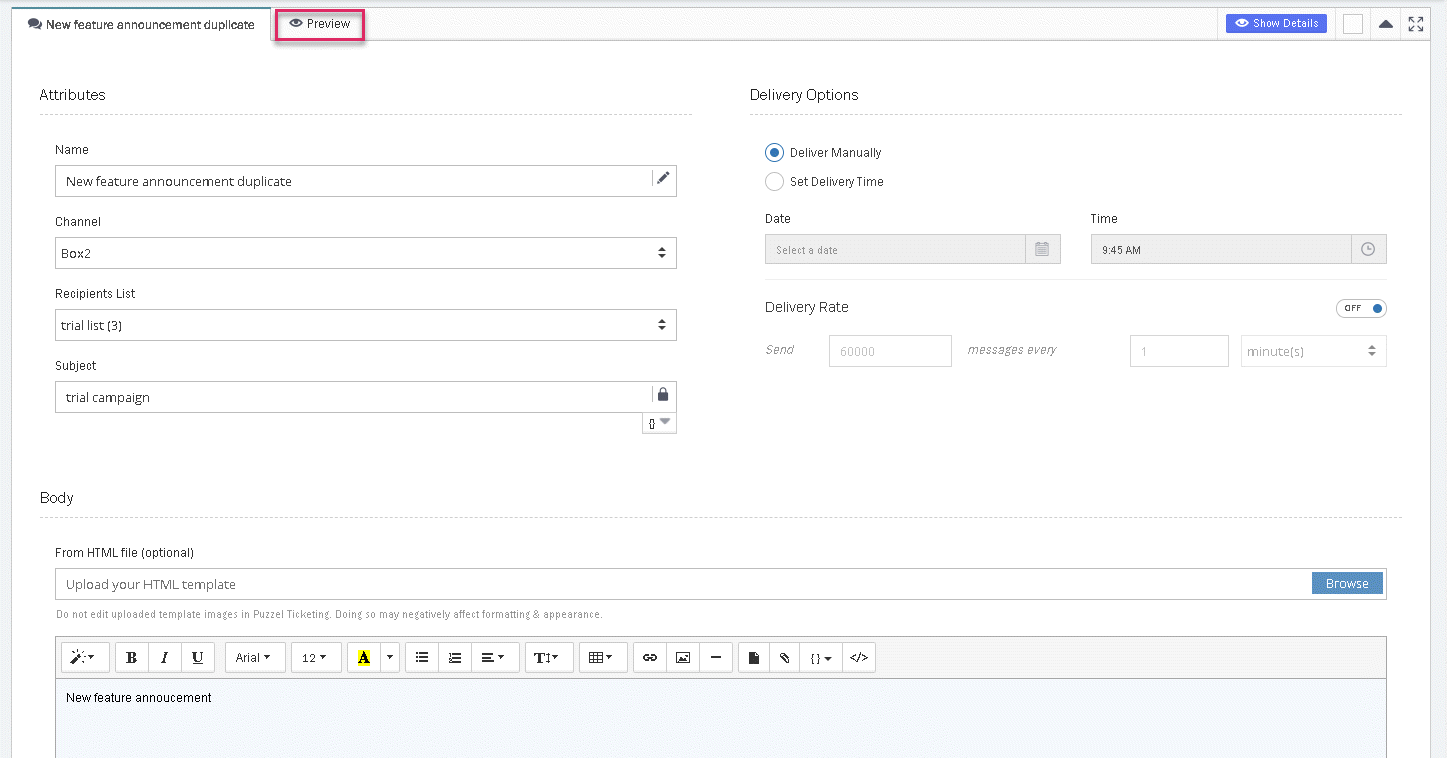
- Enter the name of the campaign and select the Email Channel you wish to send the mails from.
- Select Recipients list from the drop down, this Campaign should be sent to. Read Recipients list for more information how to add recipients to the list.
- Enter the subject line for the campaign. Placeholders can be used with the Subject line to include Customer-specific information such as their Name.
- Set the delivery options to either manual delivery or to be sent at a set date and time.
- Set the rate at which the campaign messages should be delivered. By default, this is set to 1,800 per minute. You may want to reduce this to have a better control over the rate of responses you receive.
- Enter the campaign content. This can be done in two ways.
- Upload via HTML template by selecting the file using the Browse button
- Enter the content directly in the text editor. Select the Code View option in the text toolbar to edit the content using HTML code.
- Save and Preview the campaign to see how it looks for each recipient by pressing the Preview tab at the top. Any Placeholders will load for the select Recipient from the drop-down.
- Launch the campaign by clicking on the
 icon against the campaign in the list.
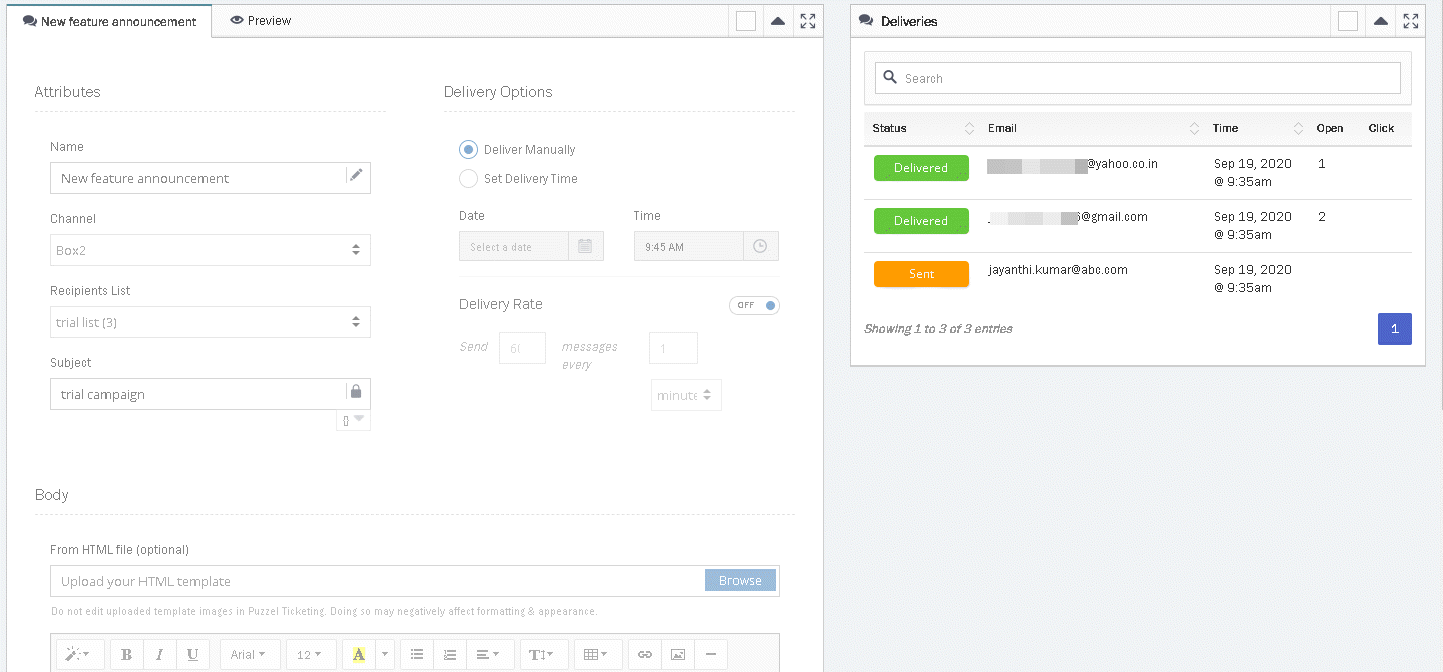
After the Campaign has been launched, a delivery report is made available which shows whether the campaign was Delivered, Bounced or Failed for each recipient as well as the number of Read and Click receipts. To see the delivery status click on the ![]() icon against the completed campaign.
icon against the completed campaign.
You can also duplicate an existing campaign by clicking on the ![]() if you wish to relaunch it with similar criteria or change it according to your requirement.To delete a campaign click on the
if you wish to relaunch it with similar criteria or change it according to your requirement.To delete a campaign click on the ![]() icon against the campaign name.
icon against the campaign name.
SUCCESSFUL CAMPAIGN EMAIL DELIVERY:
We employ Sendgrid as our primary platform for dispatching campaign emails, necessitating additional validation beyond our standard case management email configuration.
Please initiate a support ticket before you dispatch your initial email campaign. Additionally, inform our team if your monthly email volume is expected to exceed 5,000 messages. This will help us provide you with the necessary support and ensure optimal delivery of your campaigns.