Creating New Ticket rule
When a new message is received in the account, Puzzel Ticketing checks to determine if the message is part of an existing ticket. If not, a new ticket is created which is checked against the Group and Ticket Rules.
By default a rule is built into the system called Email Default Group which cannot be deleted. This has no conditions and acts as a catch all such that its actions are always applied to tickets. This is to ensure that all tickets are assigned to a team should you not create any additional rules.
It is also how to set virus and spam conditions as this will apply to all traffic.
A specific Spam Flag, Virus Flag and Blacklisted condition exists and an example of how to set this up is shown below:
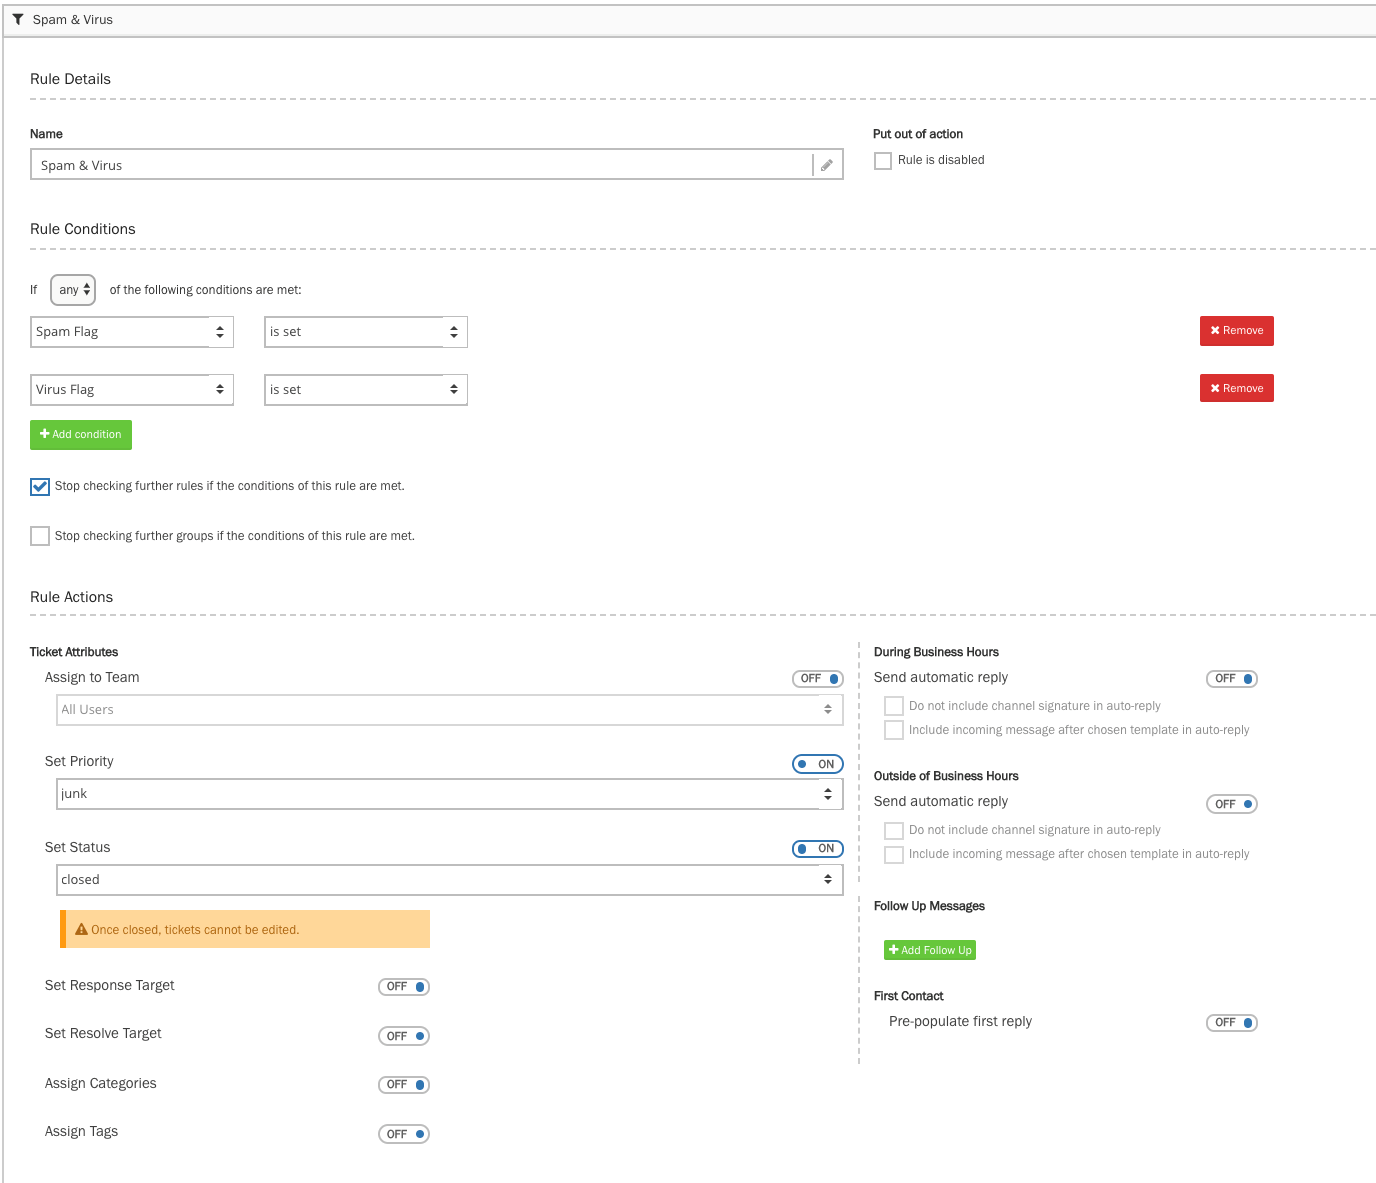
If either Spam or Virus flags are detected, no further checks are made instead the Actions are undertaken. As the ticket assignment if OFF and instead the ticket is set to Junk and Closed status. This means it will not then be picked up for work by an agent.
No SLA is set on Response or Resolve target. No Categories or Tags are assigned.
And no Auto responses are set (Business Hours, Outside Business Hours) with no Follow Up Messages or Automatic Scheduled Tasks.
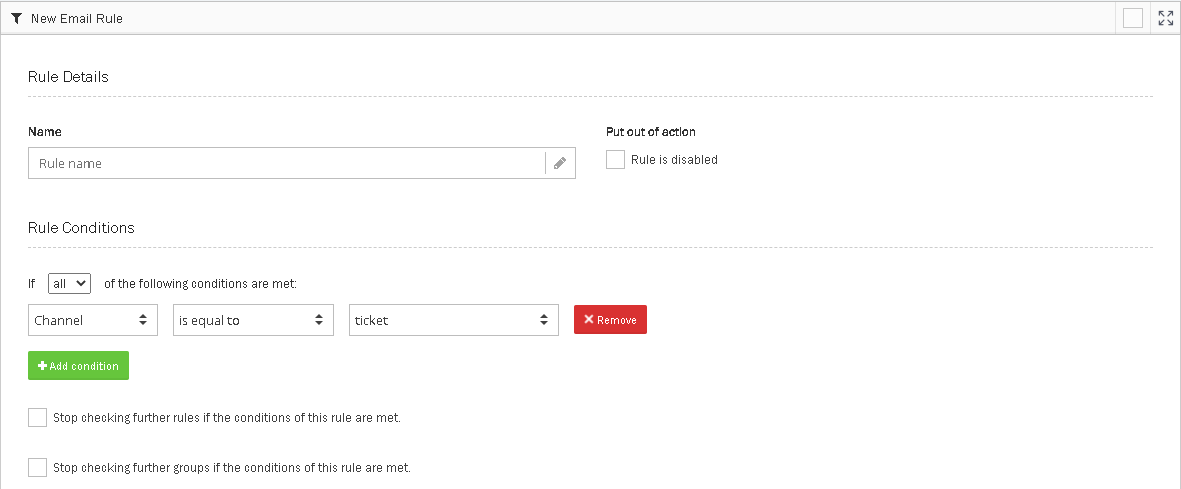
To setup or edit a rule, you need to:
- Give a name to the rule
- Select Any or All of the following conditions are met according to your requirement
- Add the condition by clicking on the
 icon and define the rule to be matched
 - Tick to stop checking for any other conditions if this rule is met

- Select the team to assign to. Can also be assigned to User depending on Channel settings.
- Set Priority of the ticket : Highest to Junk
- Set Status : Open, Pending, On-Hold, Resolved, Closed. For example tickets that will not be handled can go straight to Resolved or Closed (a Closed ticket cannot be reopened).
- Set Response and Resolve Targets based on SLA
- Set Categories and Tags : Automatically assign for high level reporting
- Set different auto responses for Business and Outside of Business Hours. Working Hours must be set for this to operate.
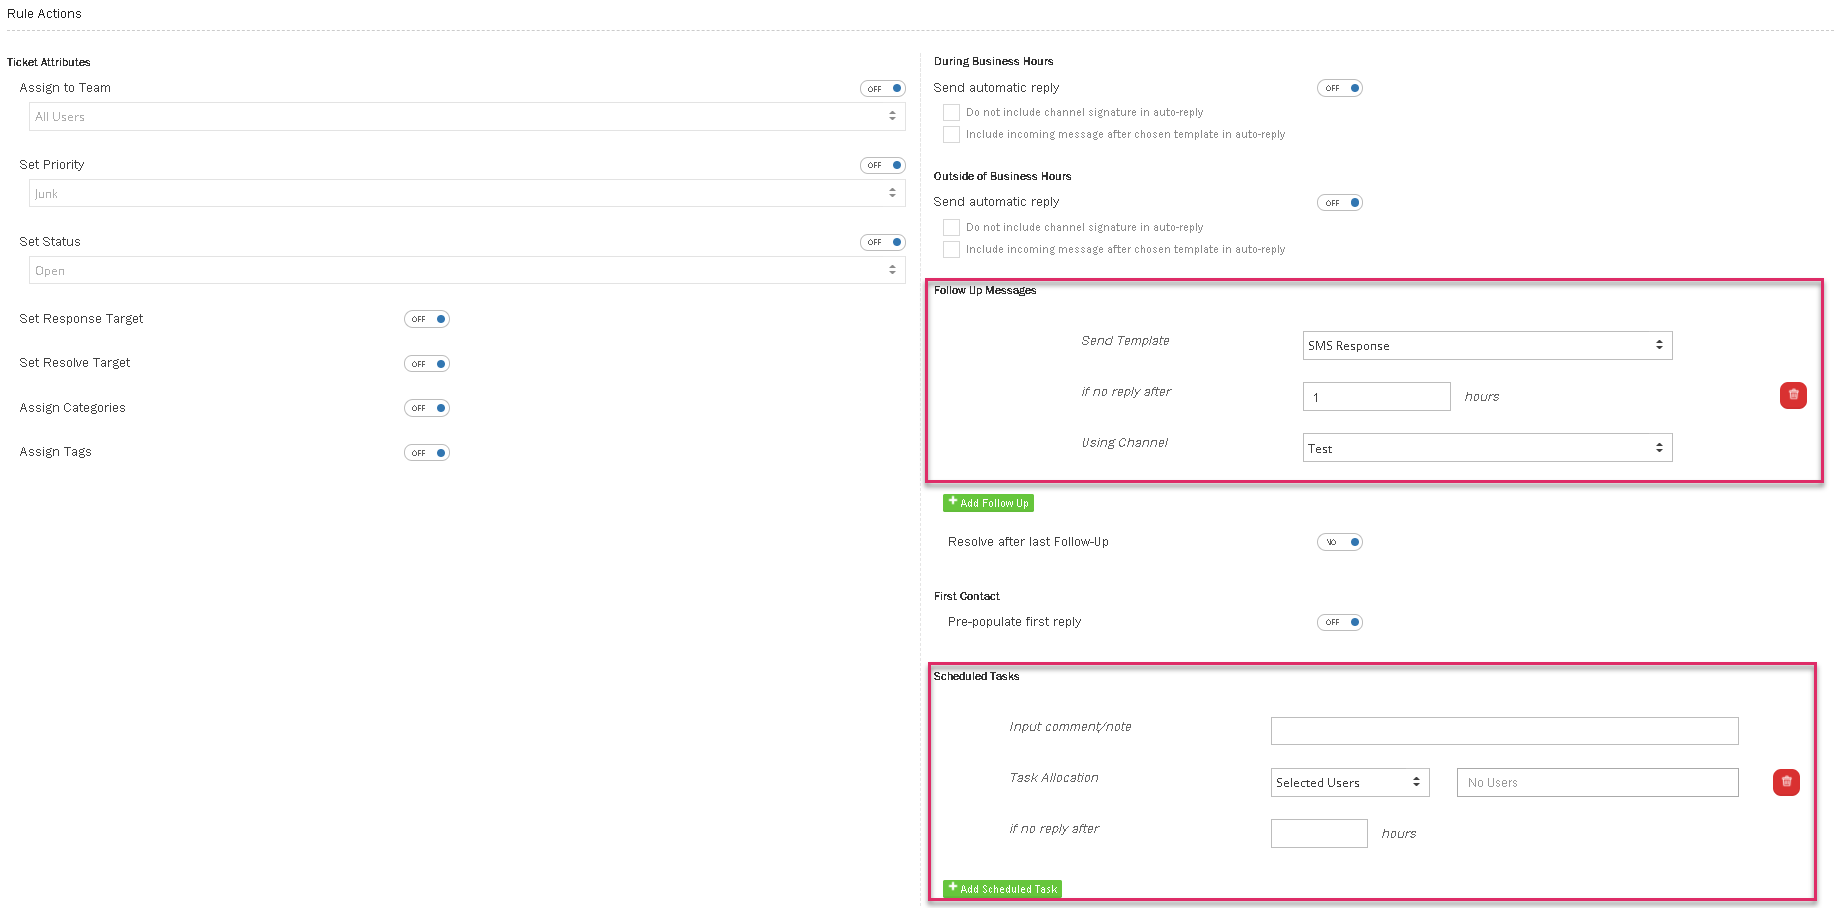
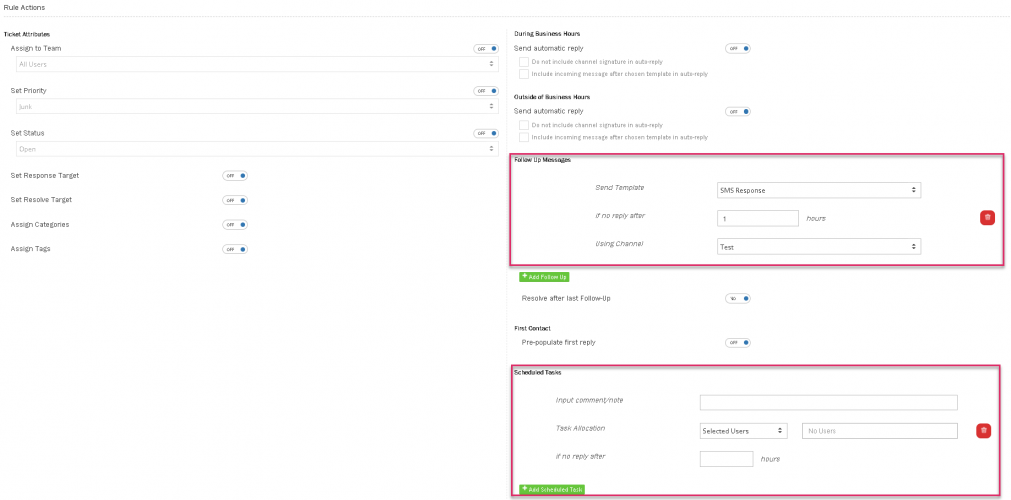
- Set up follow up messages. Read for more details on Setting up Follow up messages
- Set up Scheduled tasks.
- Click Save