
Azure AD Skype for Business Authentication Setup
Some features in Puzzel's contact centre agent application requires users (agents) to authenticate themselves in Microsoft Entra ID (Azure AD). The authentication is amongst others used to enable search for contacts in Skype for Business but can also be used for authentication towards custom/external widgets.
This document shows a step by step description on how to configure Microsoft Entra ID (Azure AD) to get the required App ID URI required by the agent application in order to authenticate the user (agent) towards Skype for Business.
Configuring Skype for Business App
Follow the below steps for enabling Microsoft Entra ID (Azure AD) authentication used by Puzzel. After setting up the app in Azure, you must enable S4B in the admin portal described in a separate chapter
Puzzel has made changes to the Application registration process from the first version to be in line with Microsoft recommendation for registering an app. We have support for user authentication with Authorisation Code Flow with PKCE according to Microsoft guidance. If you have registered with the old method we advise you to migrate to latest method as soon as possible as described below.
For more details on MSAL update from Microsoft read here.
Setup for Skype for Business App in Azure
Step 1:
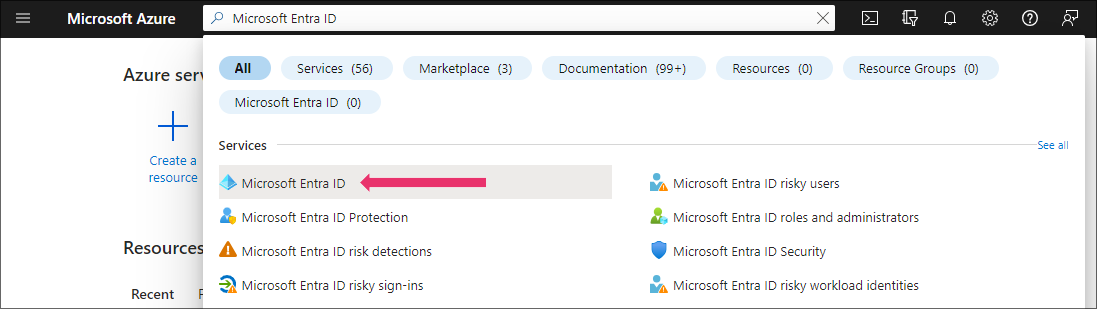
Go to https://portal.azure.com and login with the Global Admin for your domain. Select “Microsoft Entra ID”.
Step 2:
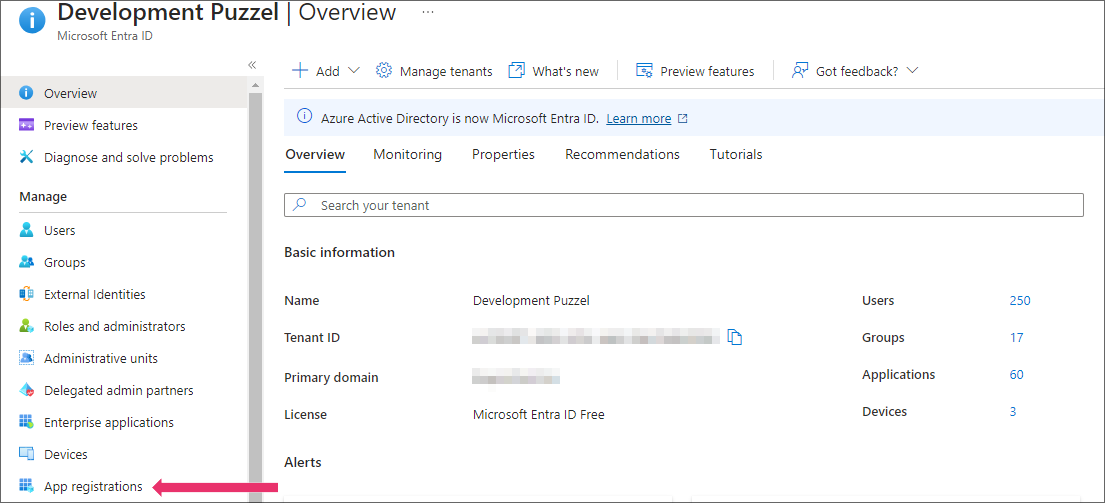
Choose App registrations
Step 3:
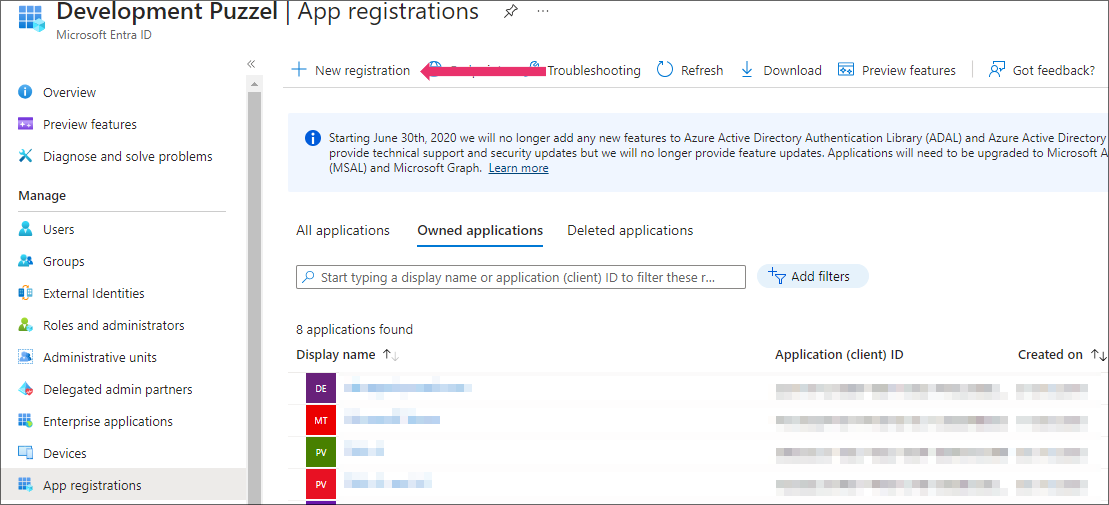
Click on the New registration option
Step 4:
Fill in the following 3 sections:
- Name - Choose a name for the application (e.g. “Puzzel S4B Connector)
- Supported account types – Choose the option that is relevant for you. The recommended option is “Accounts in this organisational directory only (<directory name>)
- Redirect URI (optional) – Choose "Single-page application" and ”https://app.puzzel.com/agent/" OR "https://uk.puzzel.com/agentapp/" for UK
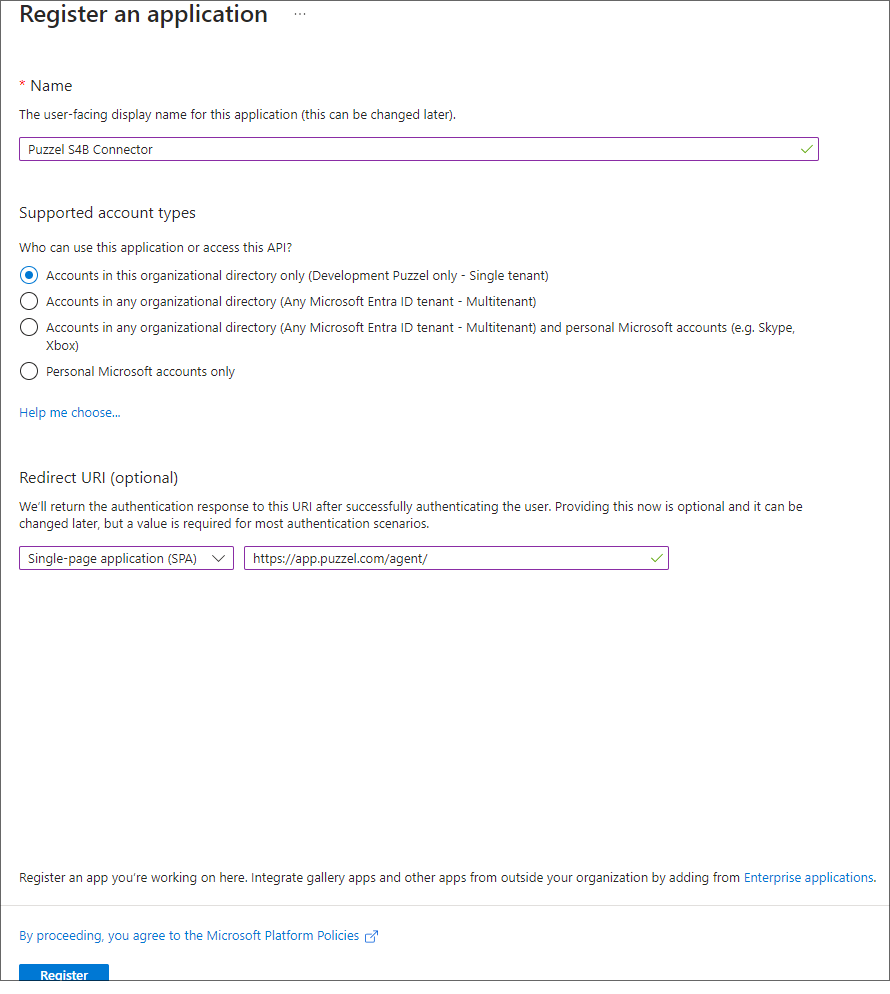
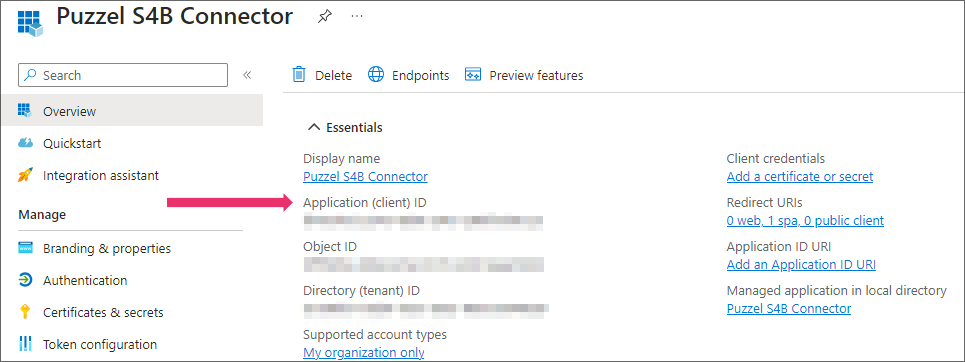
Click on the Register button and you should be able to see the given Application (client) ID you need for the admin portal later.
Step 5:
Choose “API permissions, click on the «Add a permission» button and choose «Skype for Business» in the rightmost pane.

Choose «Delegated permissions» and tick the following check boxes and click on the Add permissions button
- Contacts.ReadWrite
- Conversations.Receive
- Conversations.Initiate
- User.ReadWrite

Step 6:
Choose API permissions, click on the Add a permission button and choose Azure Active Directory Graph in the right pane.
Choose Delegated permissions and tick the User.Read check box and click on the Add permissions button.

Step 7:
Choose API permissions, click on the Add a permission button and choose Exchange in the right pane.
Choose Delegated permissions and tick the Calendars.Read.All check box and click on the Add permissions button.

Step 8:
Click on the Grant admin consent for <directory name> and click Yes to confirm

You should see a “Successfully granted admin consent for the requested permissions” confirmation at the top of the screen.

Step 9:
The last thing to do is to choose “Authentication” in the menu and add a Redirect URI if you are not yet using the agent application with Puzzel ID. Add "https://agent.puzzel.com" OR "https://uk.puzzel.com/agent/" for UK.
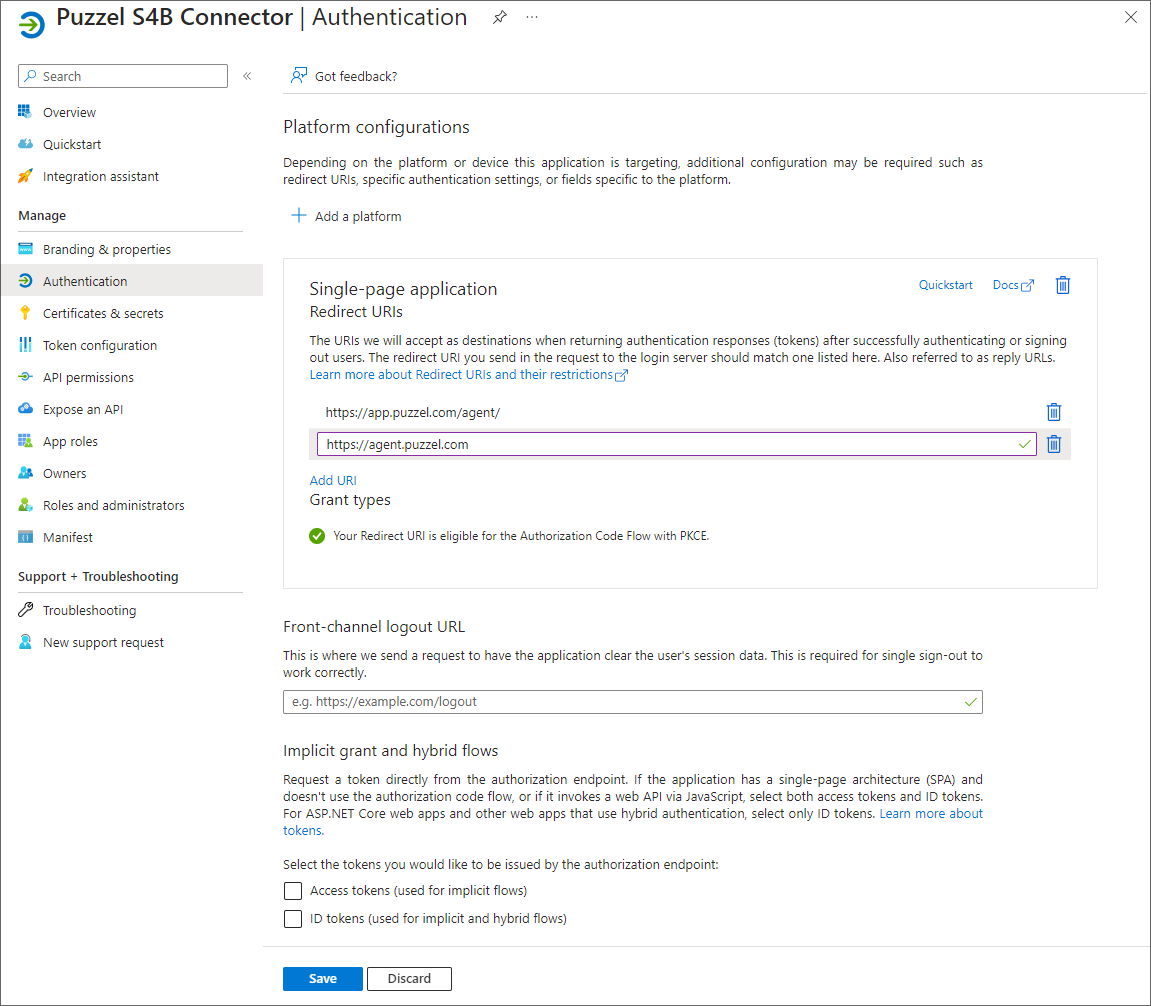
Click on Save on the bottom.
Migration from old method to latest method authentication:
As mentioned above we highly recommend our customers to migrate to latest authentication process. It can be done fairly easily by following the 4 steps listed below:
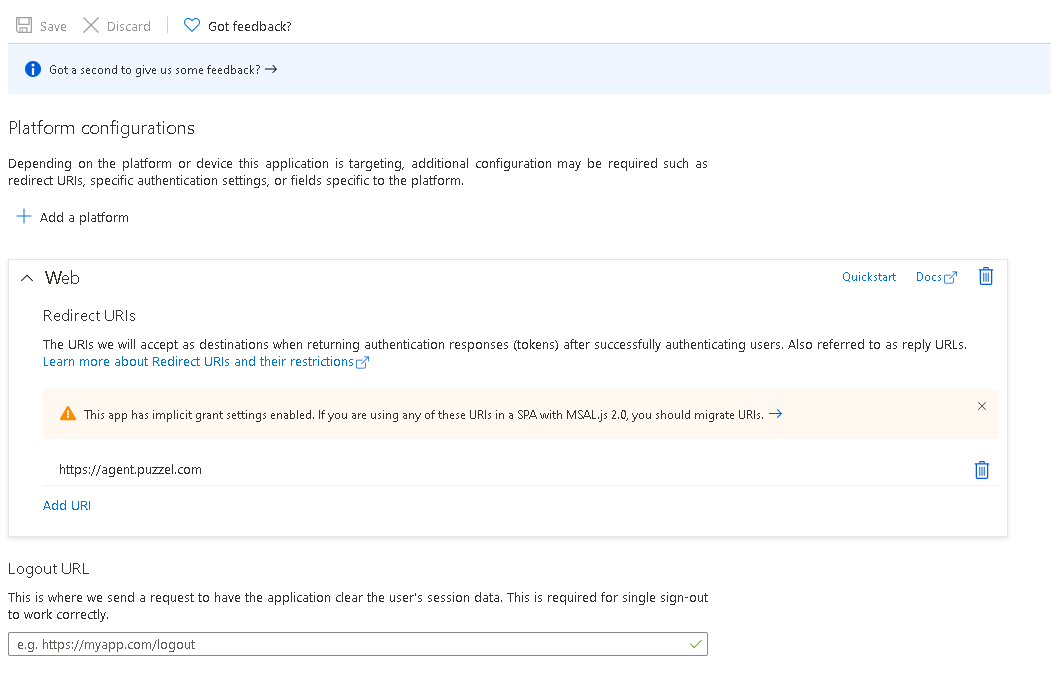
- Go to Authentication page and you will see the following warning as shown in the picture.
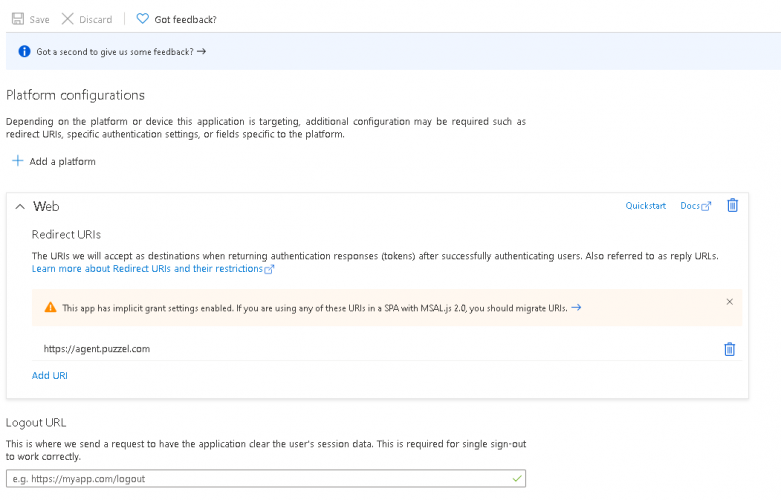
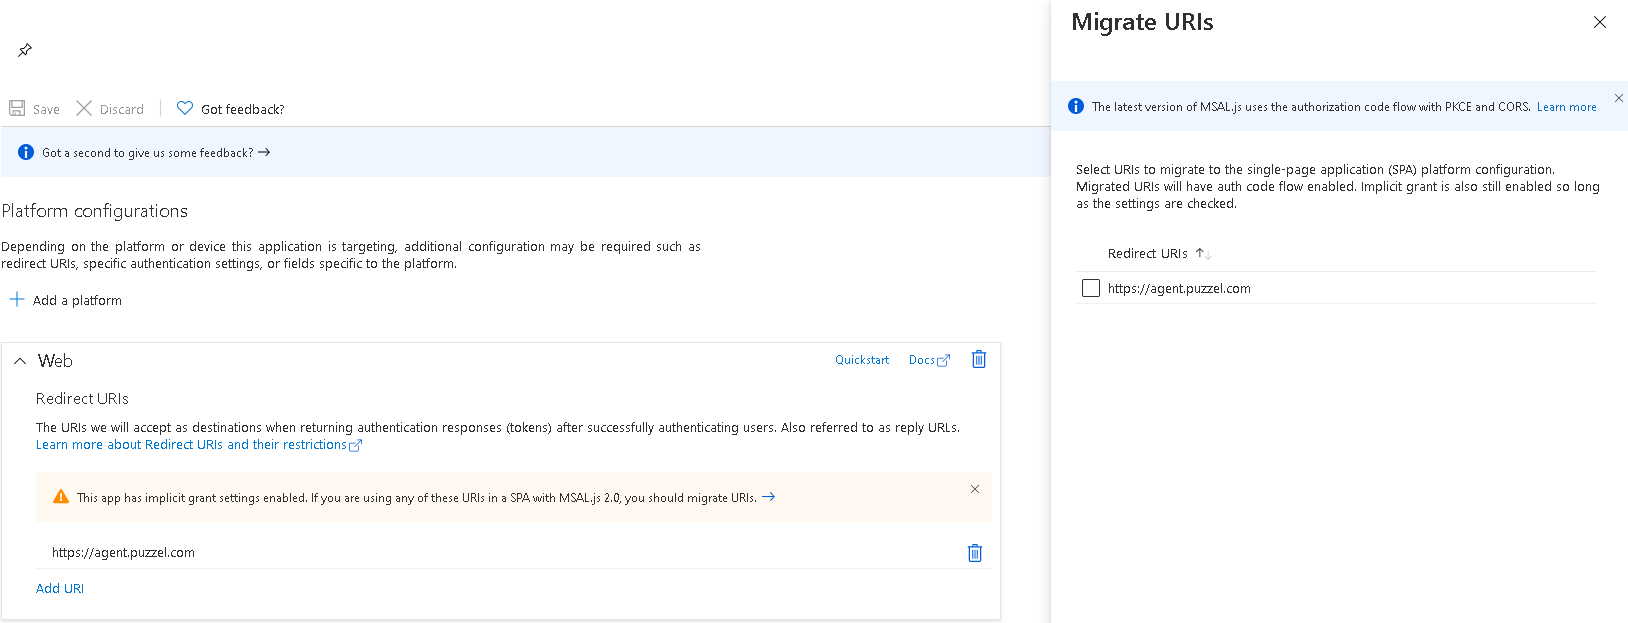
- Click on the warning to open the Migrate URIs window

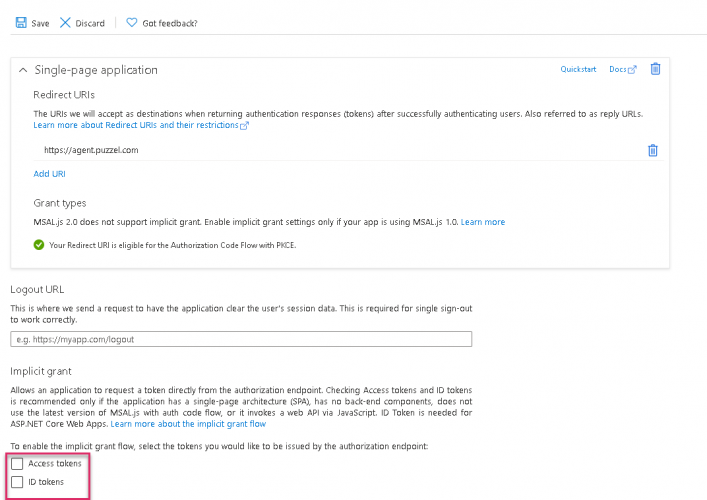
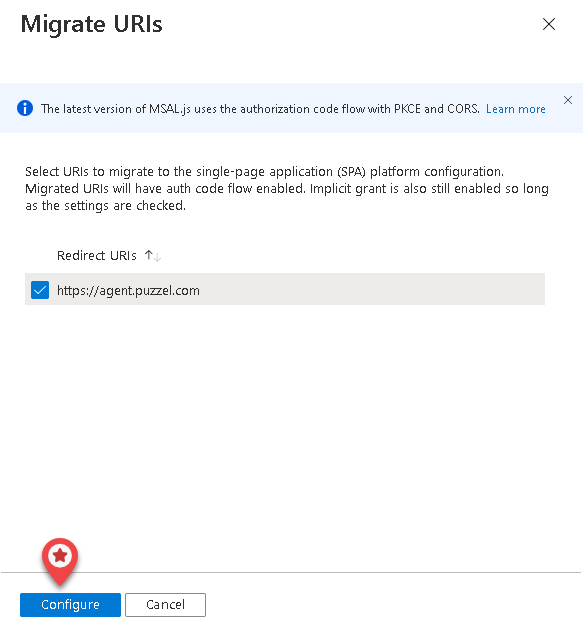
- Select the URI and click on Configure

- Add Redirect URI ”https://app.puzzel.com/agent/" OR "https://uk.puzzel.com/agentapp/" for UK as described in step 9 above.
- Untick the Access tokens and ID tokens under Implicit grant and save the changes.

Setup for Skype for Business integration in the Puzzel’s admin portal
In the admin portal, you need to add your Azure app details in order to have the Skype for Business functionality work properly.
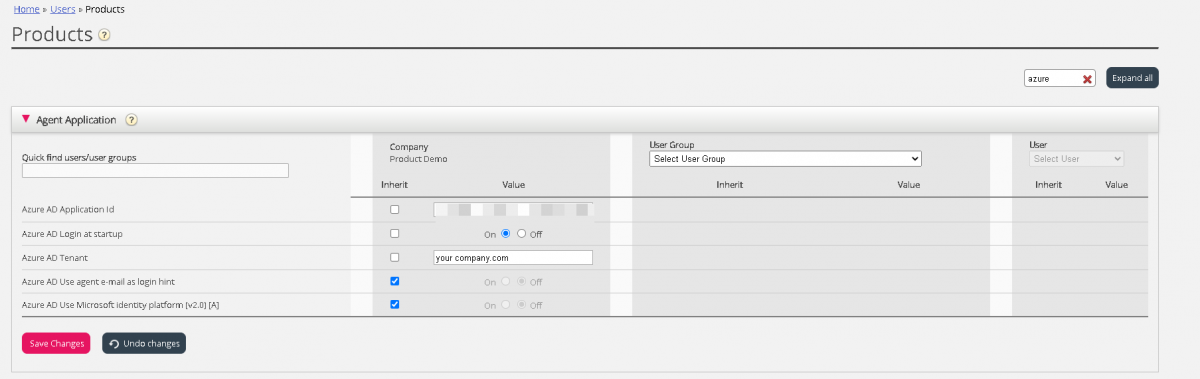
- Add the general agent application authentication properties for your Skype for Business integration. This is done in the admin portal under “Users -> Products -> Agent Application”. The relevant 5 properties are easily found if you enter “Azure” in the top right filter field. If you have registered the app using old method in step 4, the configuration would be as shown below:
- Azure AD Application ID – Add the Azure App ID fetched from the Azure App setup
- Azure AD Login at startup – Enables to log on to Skype for Business upon signing into the agent application, if authenticated.
- Azure AD Tenant – Add your tenant/domain (without https://) for the directory used for fetching contact information.
- Azure AD Use agent e-mail as login hint – Upon authentication, the user’s e-mail address registered in his or her Puzzel account is suggested.
- Azure AD use Microsoft identity platform[V2.0][A] - By default this property is turned off to enable the customers using the old method to continue without disruption to their services.

If you have registered the app using latest method in step 4, do the following:

- Azure AD Application ID – Add the Azure App ID fetched from the Azure App setup
- Azure AD Login at startup – Enables to log on to Skype for Business upon signing into the agent application, if authenticated.
- Azure AD Tenant – Add your tenant/domain (without https://) for the directory used for fetching contact information.
- Azure AD Use agent e-mail as login hint – Upon authentication, the user’s e-mail address registered in his or her Puzzel account is suggested.
- Azure AD use Microsoft identity platform[V2.0][A] - Turn this on for Microsoft recommended way of authentication using MSAL.
- Remember to save your settings
- Activate the Skype for Business widget on your solution, if you already haven’t. This is done under Widget -> Widget Administration. Find the Skype for Business widget (Owner 10000) and tick the rightmost belonging to check box

- The Skype for Business widget should now be available under Widget -> Widget Configuration -> Skype For Business. Unless you want to disable Skype for Business for some agents, you should use the default settings

- Allowed – Enable or disable ”Skype for Business” features for users.
- Client ID – Not in use. Leave blank.
- Display authentication prompt – Prompt user for authentication towards Skype for Business, if not already authenticated.
- Domain – Not in use. Leave blank.
- Module – System property. Do not change.
- Unique Source name – System property. Do not change.


Remember to save your settings
Your users should now have access to search for your company’s Skype for Business contacts.

If not already authenticated, users are prompted to do so when signing in or searching for a contact in the “Skype for Business” search source. They should then sign in with their corporate e-mail address.