
Report Builder
The Report Builder in Puzzel Ticketing is designed to allow you to create and generate your own custom reports as standard. You can even set these reports to generate automatically at a frequency of your choice and email the results directly to you.
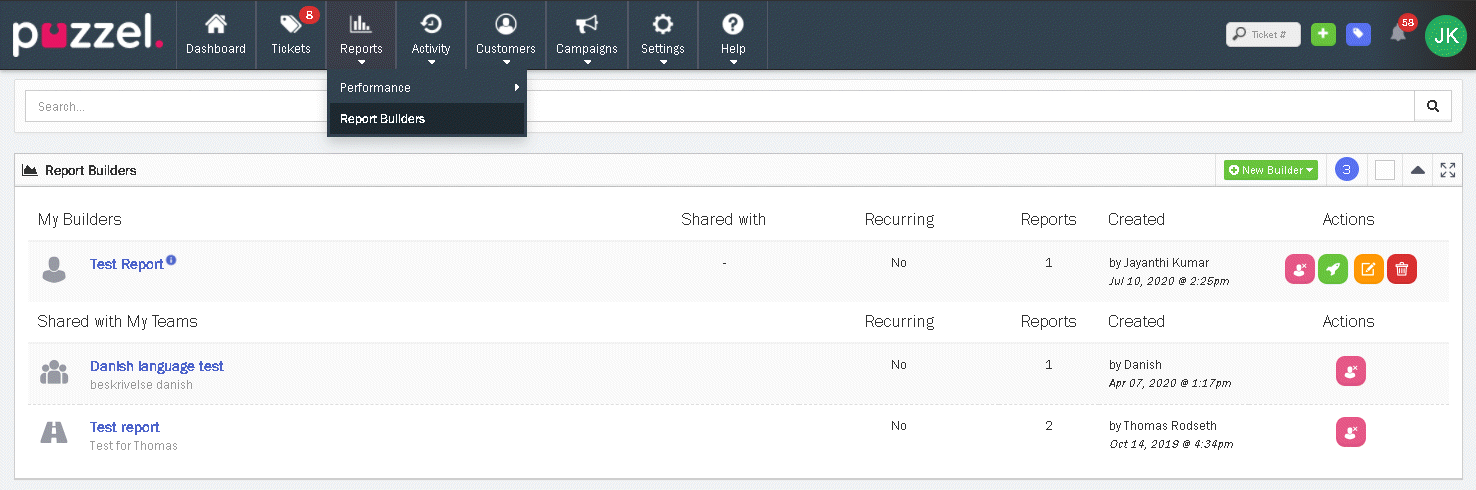
Report Builders can be found under the Reports tab in action bar for Users with access to Reports:
Reports > Report Builders
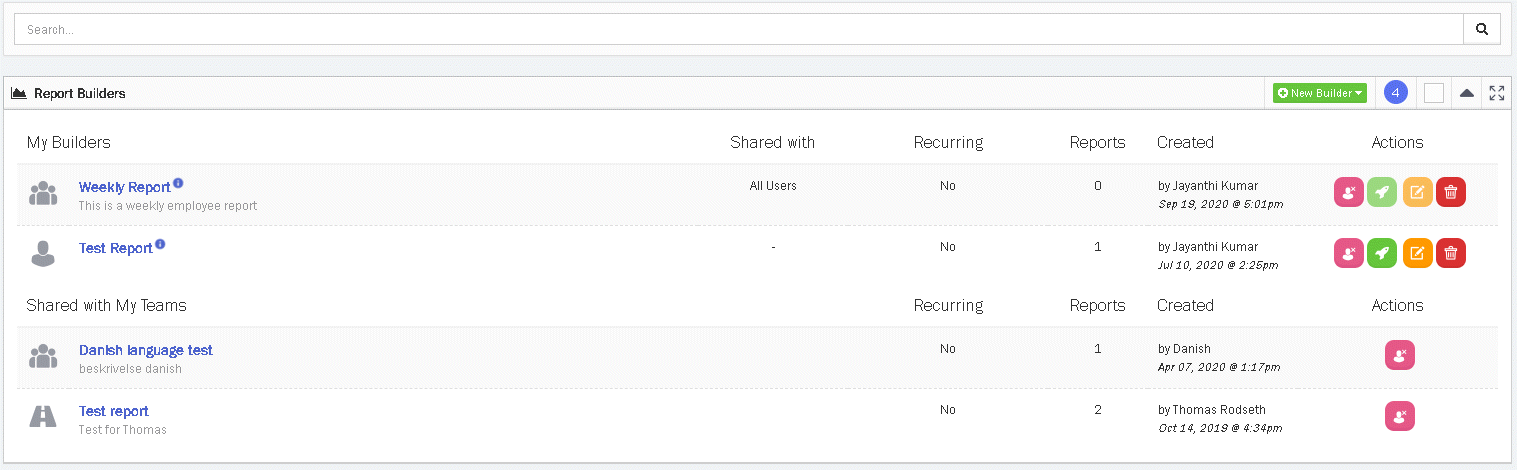
Your list of available Report Builders will be shown. This is divided into Report Builders you own, and Report Builders owned by another User that has been shared with you.
Create a new Report Builder
Creating a Report Builder is broken down into 6 quick and easy steps.
To create a new Report Builder, click on the ![]() button
button
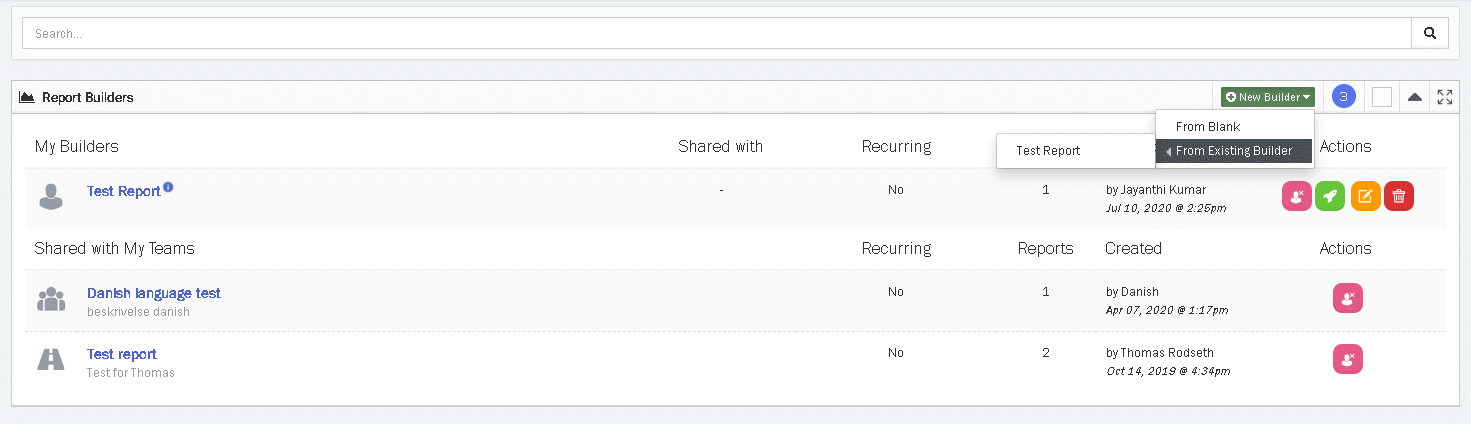
If you already have at least one Report Builder, you will have the option to create a new Report Builder From Existing Builder, otherwise you can create the report builder from scratch.
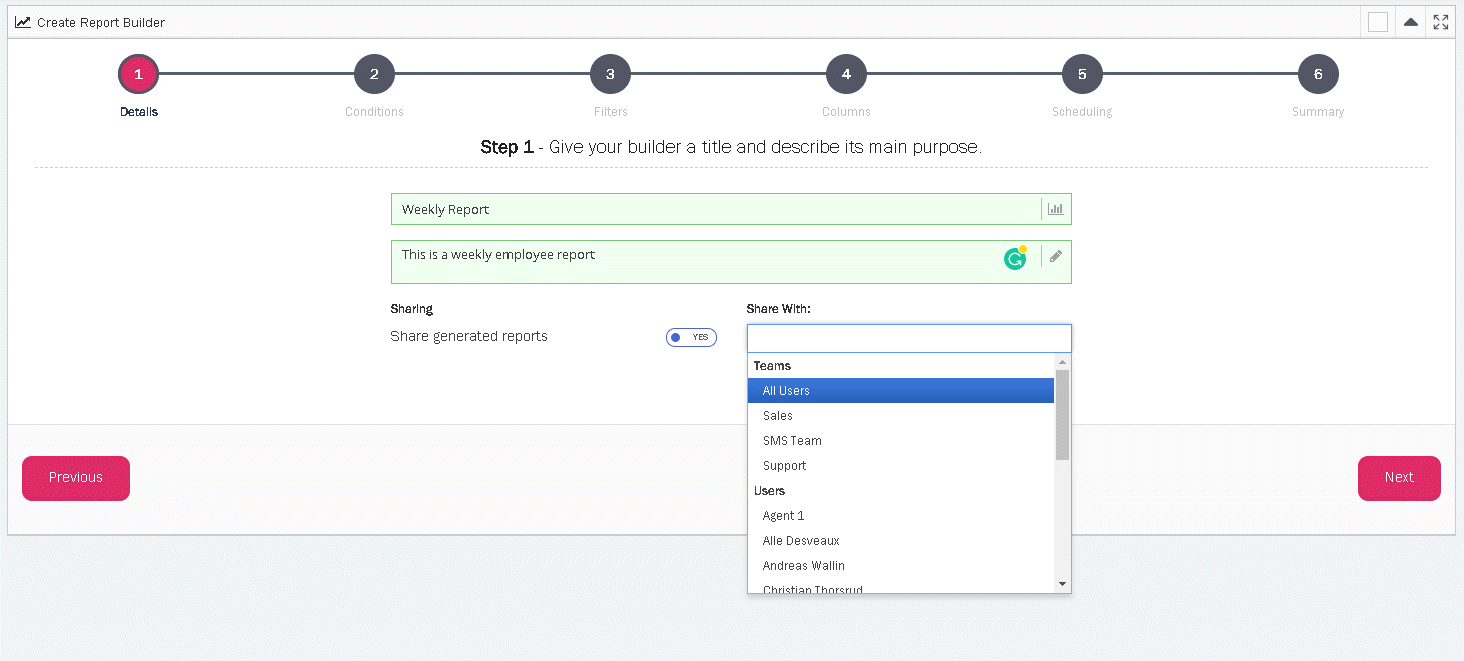
Step 1
Specify Name and Description of your Report Builder
The name of the Report Builder must be unique and descriptive enough for you to know what type of Reports the Report Builder will generate. Use the description field to provide further information for the Report Builder (optional). You also have an option for sharing it with everyone or with a certain group. If you wish to keep it private share the Share generated reports to NO. Click Next to go to the next step.
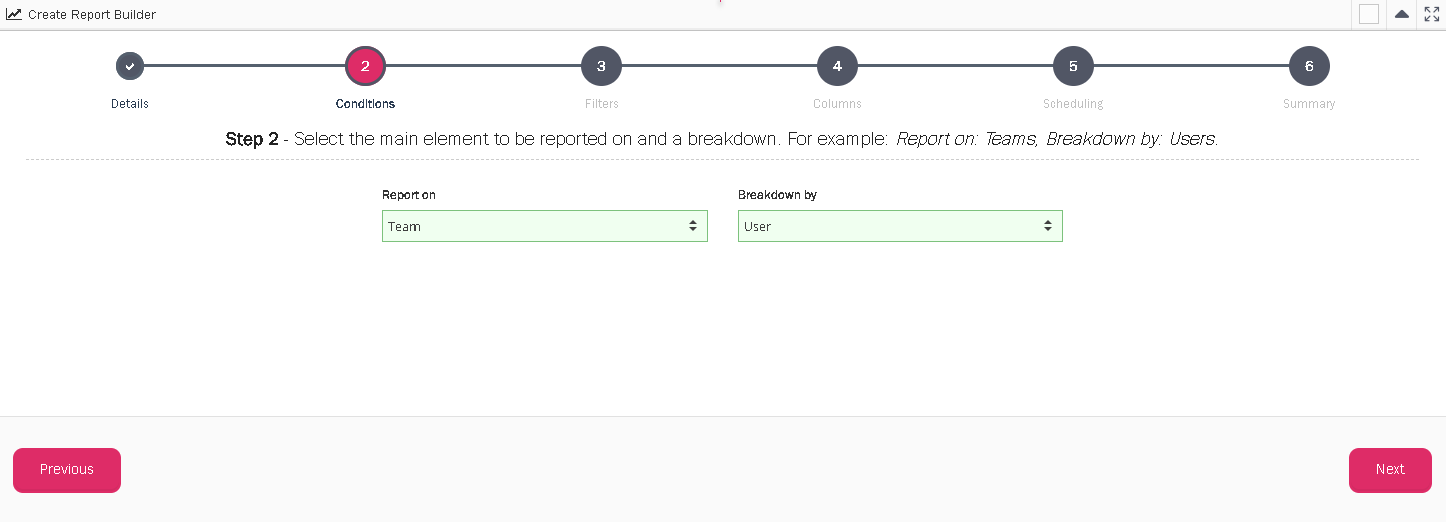
Step 2
Select the conditions for your Report Builder
In this step you can select what data you want to report on. Simply select the Ticket Attribute type from the Report On drop-down menu.You can choose to further break down this selection by selecting a different Ticket Attribute type from the Breakdown by drop-down menu.
E.g. If you select to report on Teams and Breakdown by Users, your report will Report on the individual Teams in your Puzzel Ticketing account as well as the User’s performance within these Teams. Click Next to proceed.
Step 3
Select the Time Period for your Report
You can select a specific time range of your choice, or choose from a pre-defined Time Period, such as This Week or Last Month etc. – These pre-defined Time Periods are relative to when a new report will be generated, even if you set your Report Builder to automatically recur.
E.g. If you set your Report Builder to recur every month and selected the Time Period Last Month, the data from the previous month at the date of generation will be used each month.
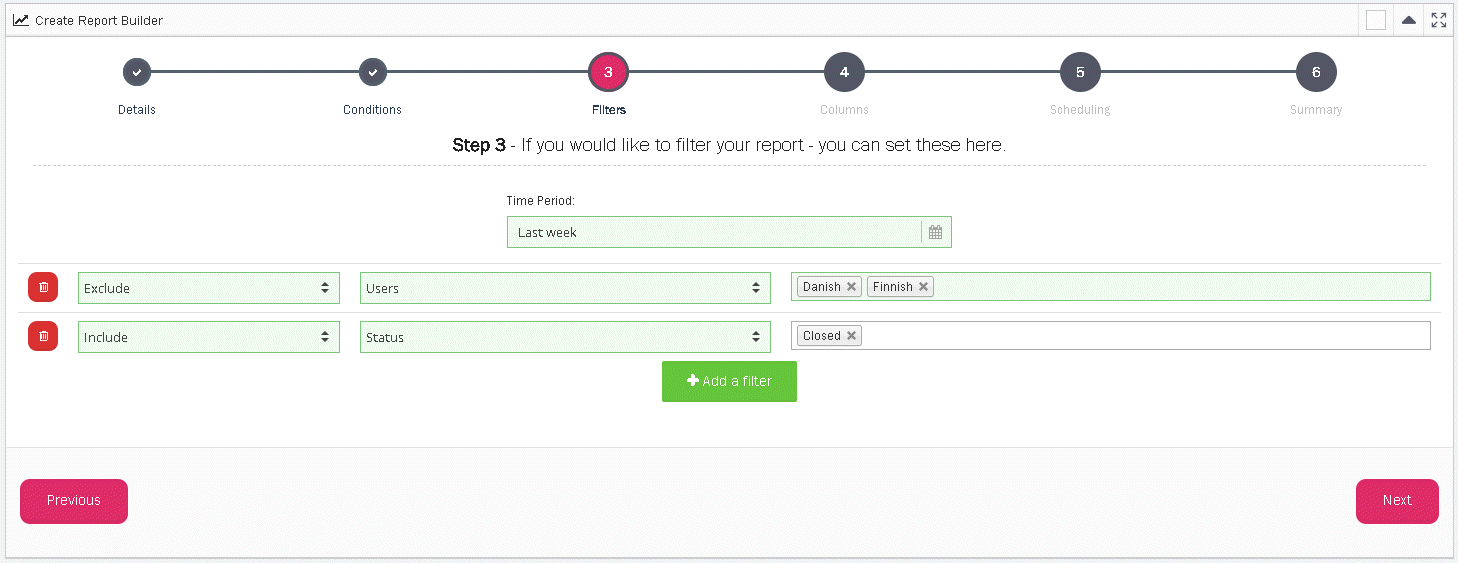
You can also set custom filters to Include or Exclude specific Ticket information from your Reports. Simply click the Add Filter button. Choose to Include or Exclude from the first drop-down menu. The type of attribute or information you want to Include or Exclude in the second drop-down menu. You select the specific attributes to Include and Exclude in the third drop-down menu.
Step 4
Include the Columns of your choice for your Report Builder
The Columns on the left are the available Columns that can be added to your Report. The Columns on the right have already been added to your Report and can be removed by clicking on it.
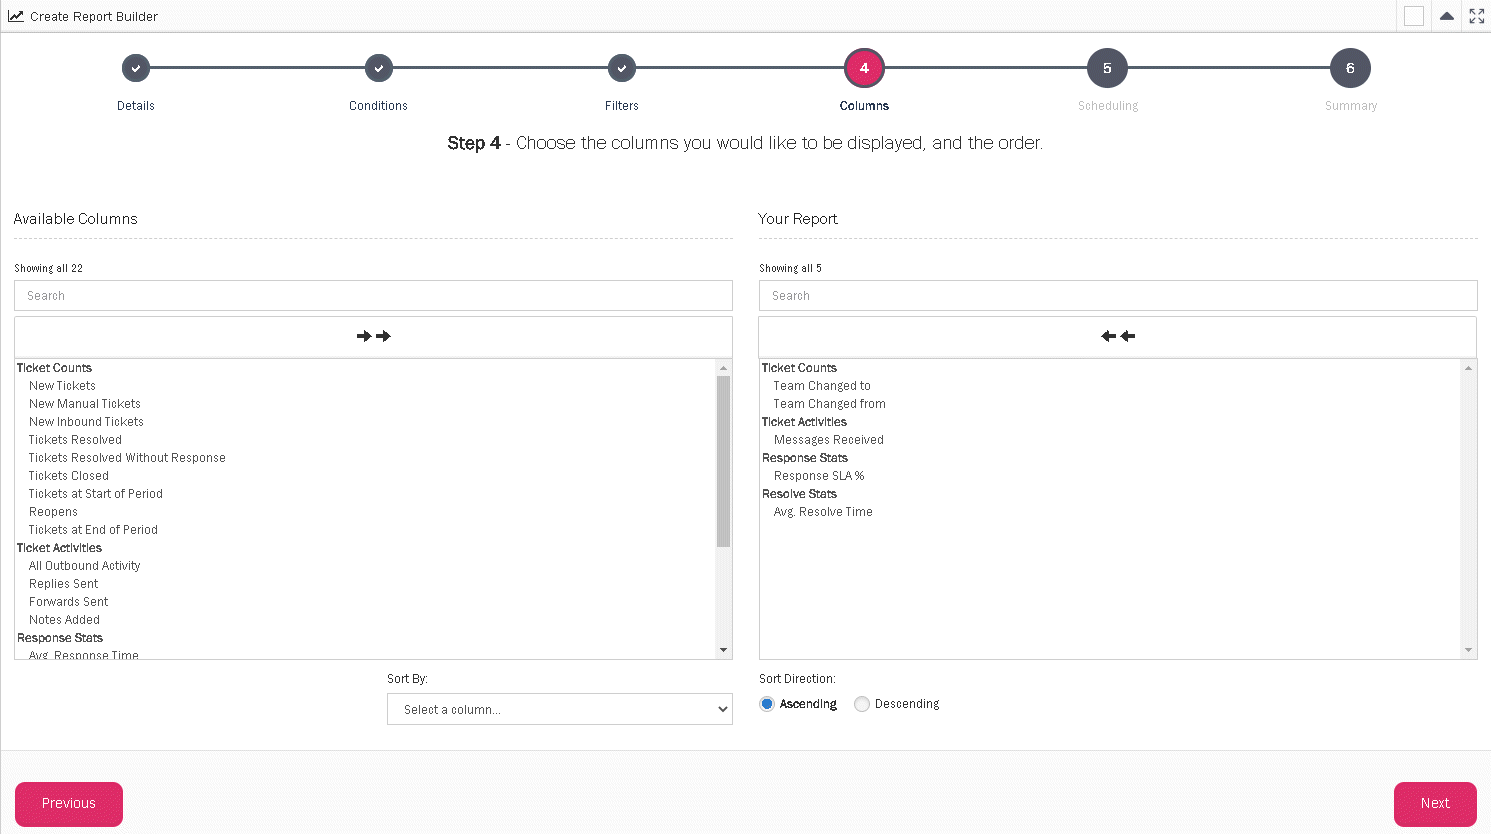
These Columns are broken down into four categories:
- Tickets Counts
- Ticket Activities
- Response Stats
- Resolve Stats
Most of these Column names are self-explanatory, but more information about each Column is available here.
You can include and remove all columns by selecting the two arrow buttons. Alternatively, you can select a specific Column to add or remove by simply clicking on it. You can click and drag to select a range of Columns to add or remove. Click Next to proceed.
Step 5
Result Format
You can select to make your Report available in additional downloadable formats:
- CSV
- XLSX
- PDF – Only available for Report Builders with 10 Columns or fewer.
If you want to download your generated Reports for this Builder in PDF format, but have already selected more than 10 Columns, you can go back to the previous step and update your selected Columns.
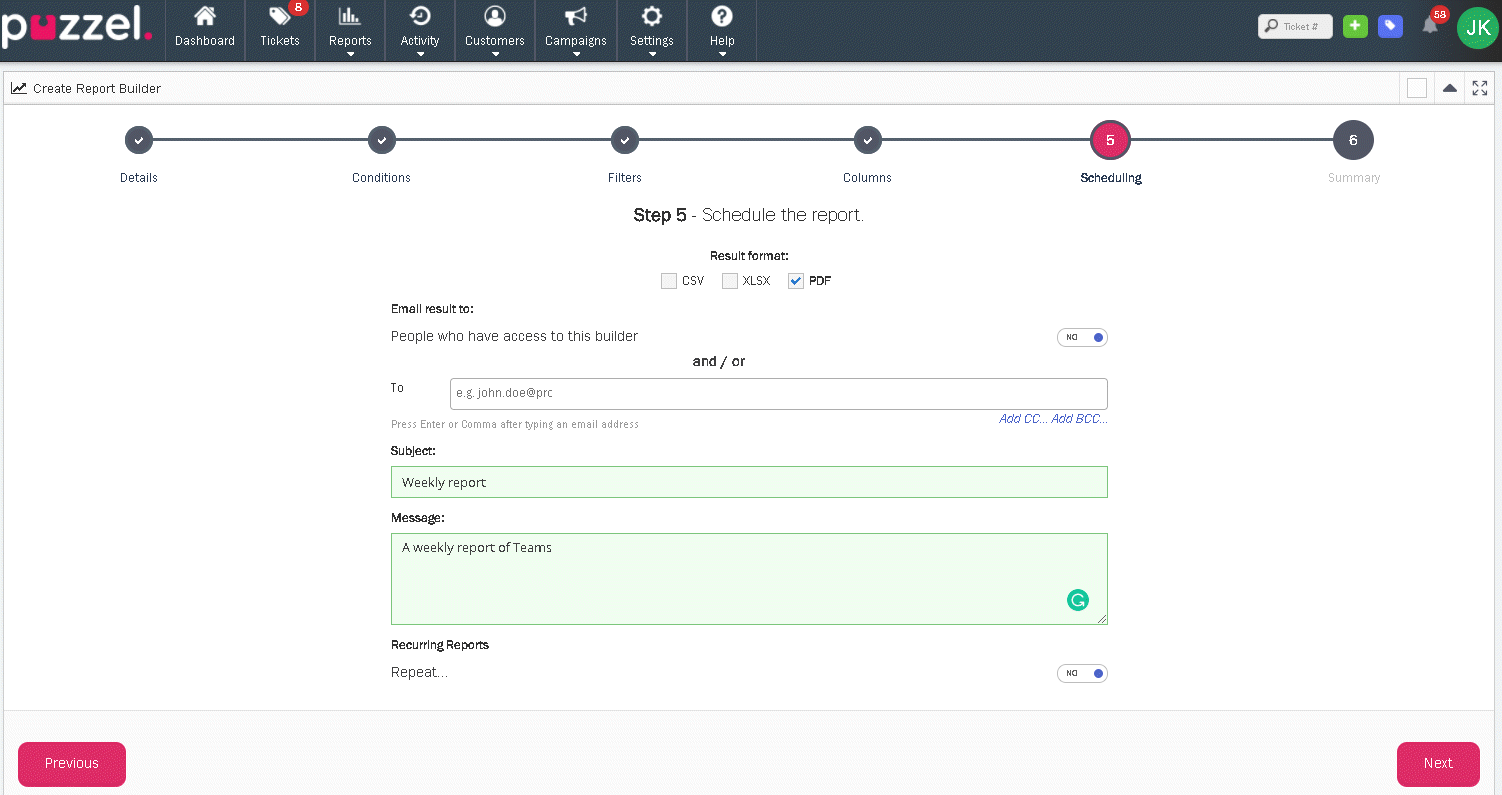
Email Result
By turning on this option you can choose to email the report from this Report Builder to contact(s) of your choice. Enter the Email address in the To field and optionally in the CC and BCC filed by selecting Add CC… and Add BCC…
You must enter a Subject and Message at this Step even if you choose not to Email the Results as the Results are sent to your User Email address by Default.
Recurring Reports
Turn this option On to automatically generate reports at a frequency you define. When enabled, your first report will be generated at the end of the selected interval, according to the following schedule:
- Daily: Report will be generated at 00:01 every day
- Weekly: Report will be generated at 00:01 every Monday
- Monthly: Report will be generated at 00:01 on the 1st of each month
- Yearly: Report will be generated at 00:01 on the 1st of January each year
Note: These times refer to when the report job runs, not the date range included in the report itself. You can still configure each report to include any specific time period.
If you leave this option Off, your first report will be generated immediately when the Report Builder is created. After that, you can manually generate reports at any time with a single click.
Step 6
Review the Criteria and selections for your Report Builder. Once you’re happy with everything, select ‘Finish’ to create your new Report Builder.

Additional Actions
There a set of additional actions for each Report Builder you own. These actions are slightly different for Recurring and Non-Recurring Report Builders.
Recurring
- Unsubscribe/ Subscribe – Stop or Start receiving email notifications & attached results when a new Report is generated.
- Pause/ Resume Generation – Stop or Start automatic Report generation.
- Edit – Update the Title, Description, who the Report Builder is Shared with, who the Report result are emailed to, and the Subject & Message for the sent Email.
- Remove – Remove this Report Builder from the System.
Non-Recurring
- Unsubscribe/ Subscribe – Stop or Start receiving email notifications & attached results when a new Report is generated.
- Run – Manually Run the Report Builder to create a new Report.
- Edit – Update the Title, Description, who the Report Builder is Shared with, who the Report result are emailed to, and the Subject & Message for the sent Email.
- Remove – Remove this Report Builder from the System.
Reports
Report Builder reports are viewed by clicking on the Report Builder option under Reports in the main menu. This list consists of available Reports created by yourself and also the reports shared with you/your team.
The Results are interactive allowing you to sort the results by selecting the Column header. Results broken down by a subgroup can be expanded by selecting the ‘+’ icon, and collapsed by selecting the ‘-‘ icon.