Export
Export
Detailed information can be transferred to Excel through the export feature, this also includes form (like booking forms, reasons for no etc)
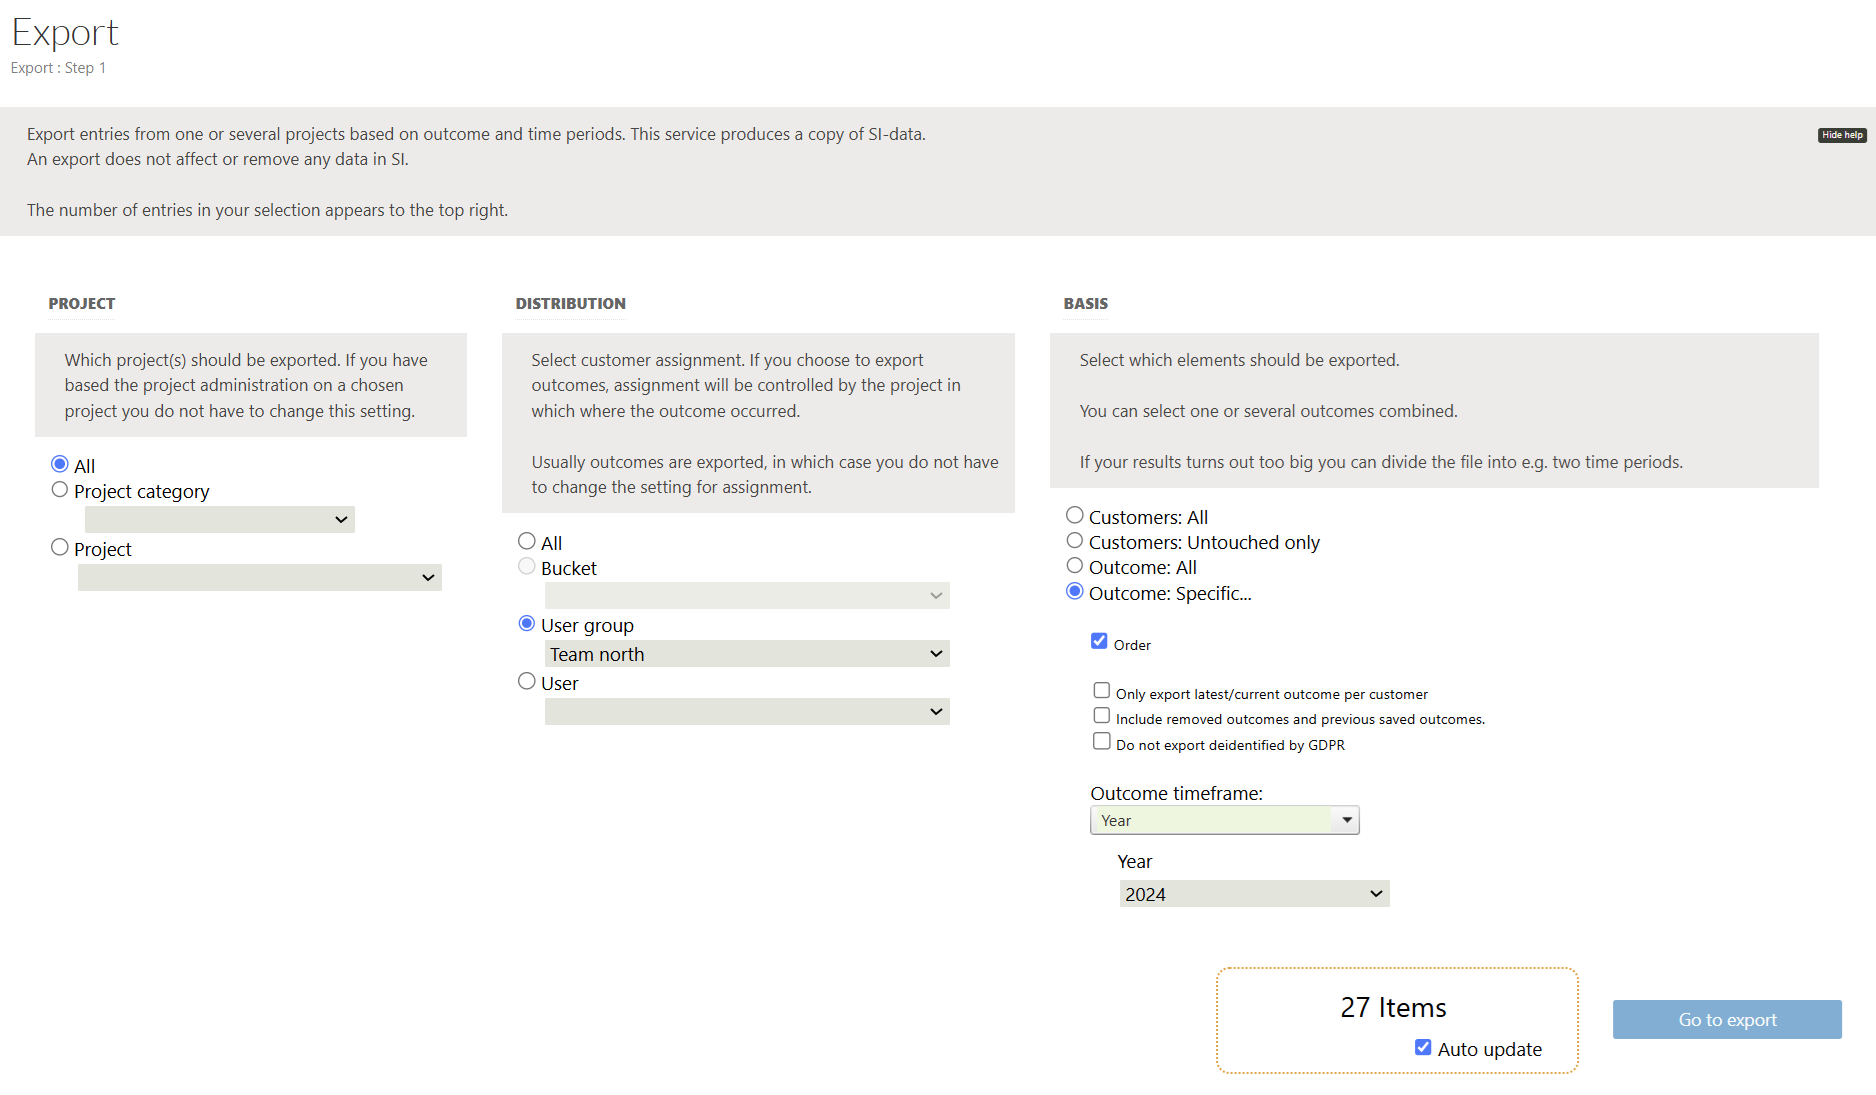
The export process involves two steps: first, specify your selection and the desired time period; second, choose the data you wish to retrieve.
You can access the export feature either through Results > Export or from the Export box in the project overview.
Data can be exported in various ways, excel export, base exports via API, and exports from reports. This article focuses on the standard excel export.
Select what entities to export

Good to know
- Possible to export current outcome (only) per customer
- Possible to avoid exporting outcomes from GDPR-deleted customers
- Main entities for the export are:
- Customer OR
- Salesprocess (Outcome)
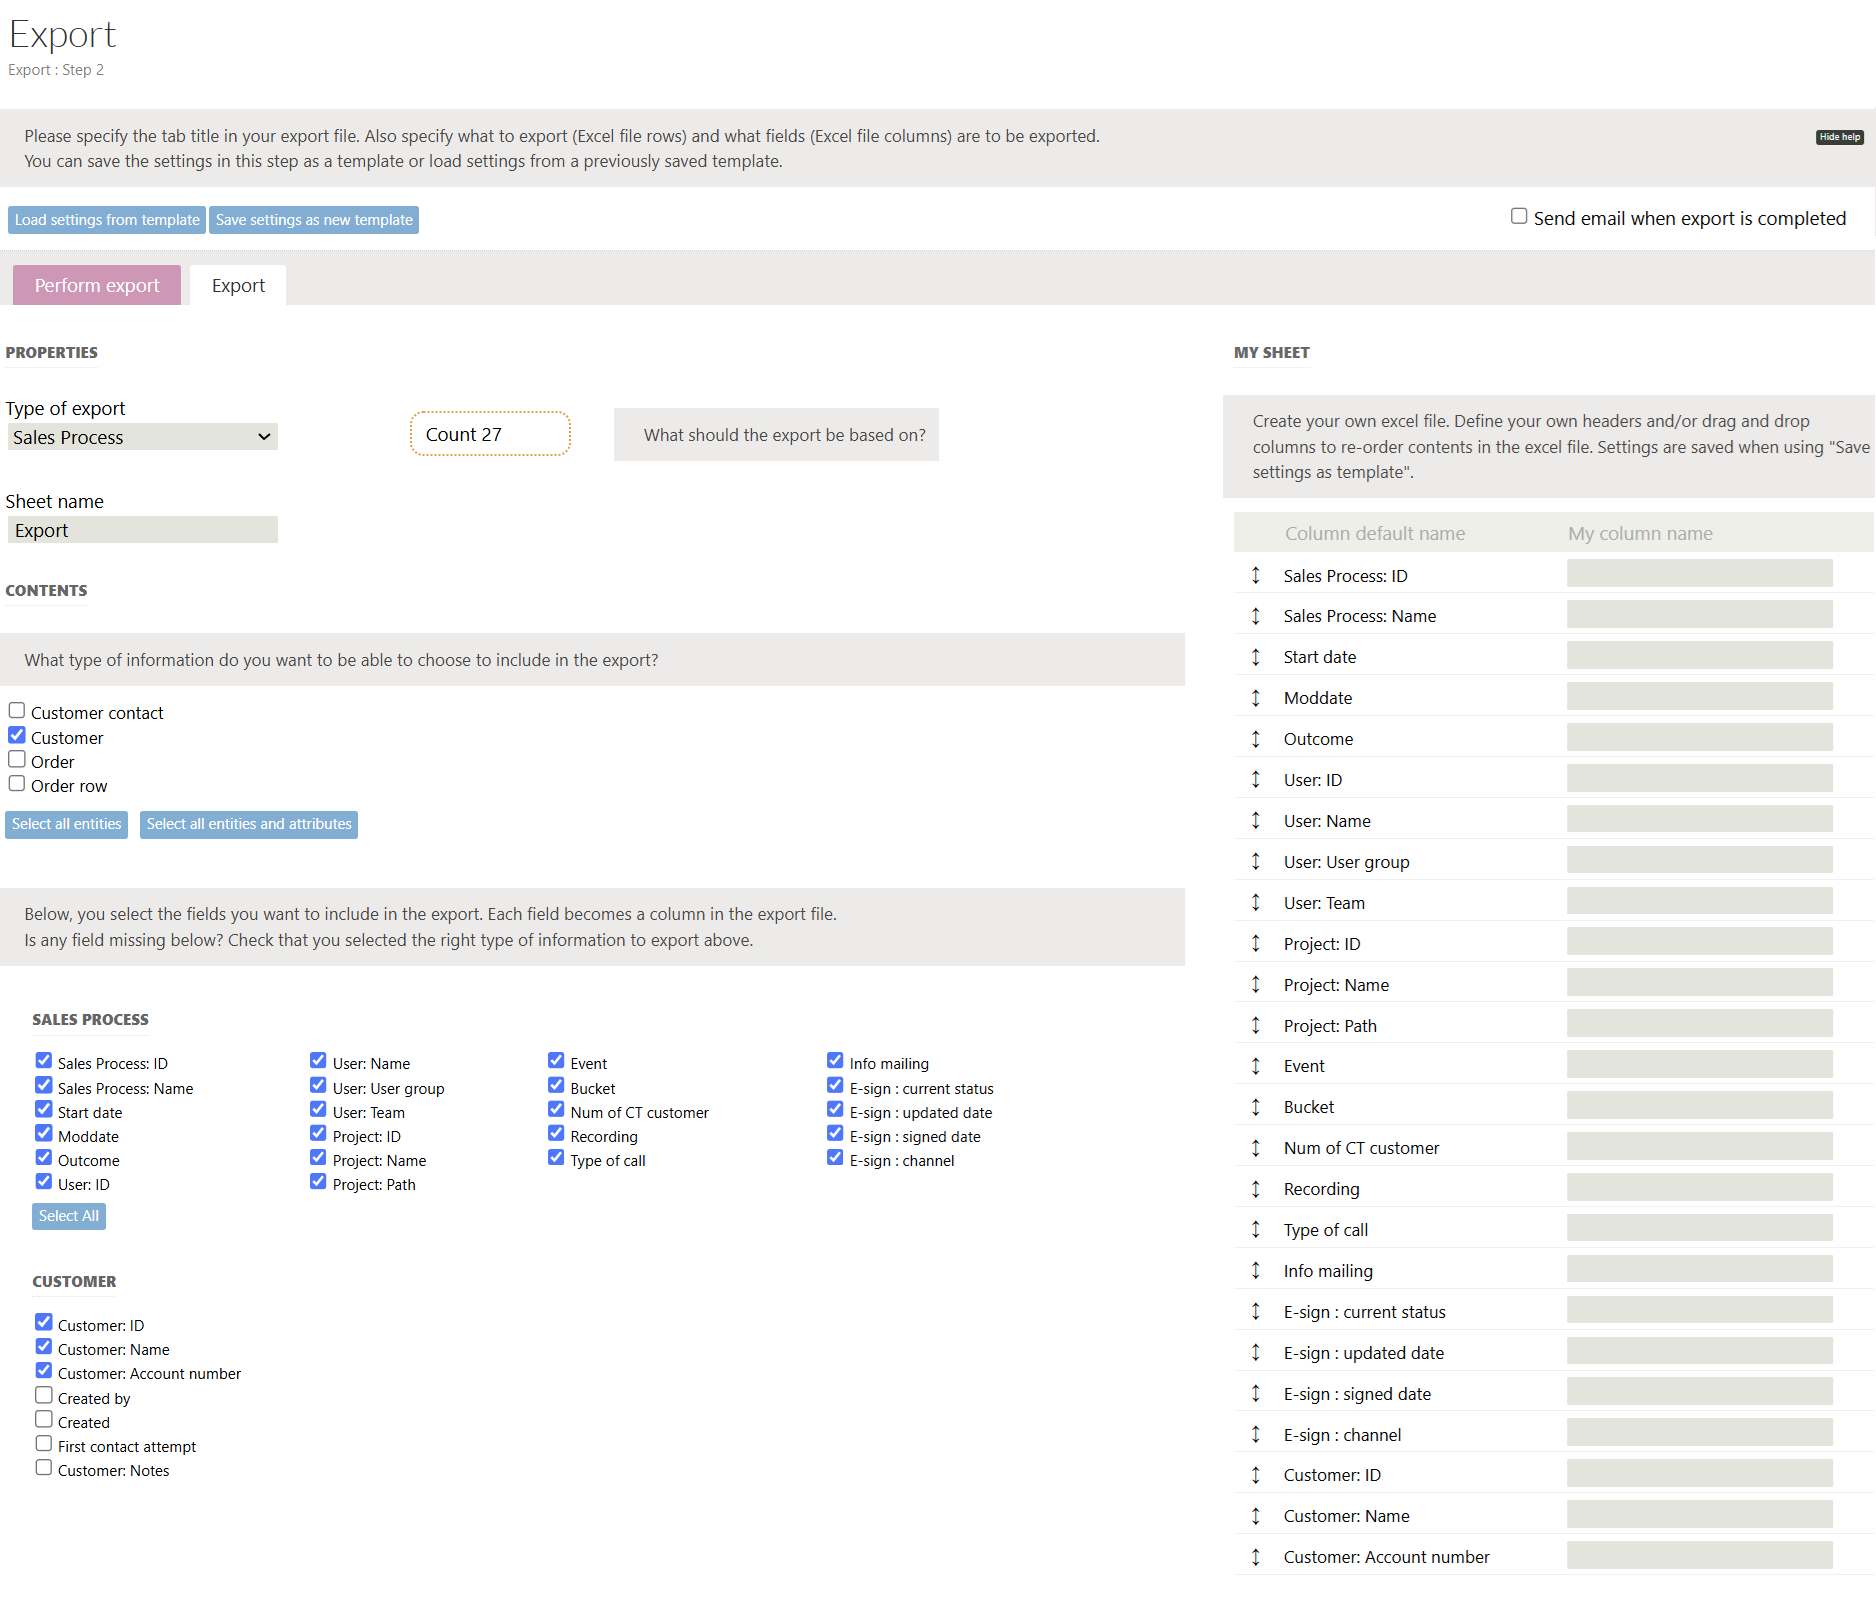
Columns
Select what entities and attributes to export. Your selection builds an excel sheet "My sheet". When you are ready, just click "Start" in "Perform export" tab.
- You may also use a predefined template, click "Load settings from template".

- Options include customer info, contact info, booking details (e.g., status, location, notes, etc.), order details, and processing info (e.g., last processed time, callback status).
- Drag and drop selected fields to customize their order in the export file.
- Set your own headers for your excel columns.
- Additional Export Features
- Templates: Save export settings as a template for reuse. Enter a template name under "Save settings as template."
- Email Notification: Check "Send email when export is complete" to receive an email notification.
Export progress
The export may take some time depending on the size. You can follow the progress in the export list.
- When finished you can click and download, or send the export to the secure workspace service in PSI.
- Click the name column to load the export settings and change settings.

