
Contact card component
The customer details are searched, retrieved, and displayed to you in the format as shown in the picture below. It consists of full contact details including phone, email, organization, department, address information and all other fields that have value in them.

On an incoming request, the customer’s number or email address is passed to the contact card component to be searched for a matching record. There can be three outcomes to the search results and the specifics of each are as listed below:
- Single contact match: Full customer details will be displayed within the widget
- Multiple match found: A list will be displayed for you to choose from. You can go back to the list at any time by pressing the back button provided in the widget. Also a search can be performed to look for a contact from within the loaded results.
- No contact match: The phone number/ email id that the customer is using to communicate will be listed along with the interaction history of the corresponding number/id. No match situation arises when the contact card does not exist, or it has not been imported properly.
Adding and editing contacts
If enabled by the admins, agents can add a new contact card information or edit the existing one.
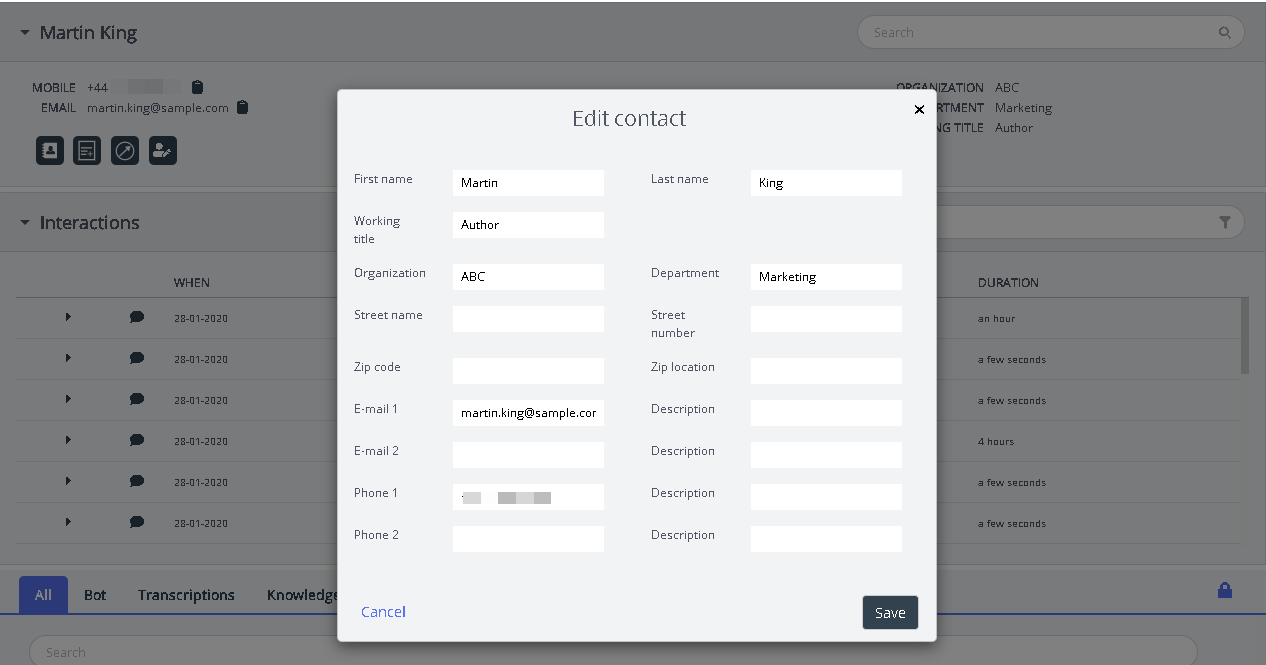
To edit the existing contact card information, click on the Edit contact icon as shown in the picture below.

The edit contact window will appear populated with the existing customer details. You can make the necessary changes and click on Save.
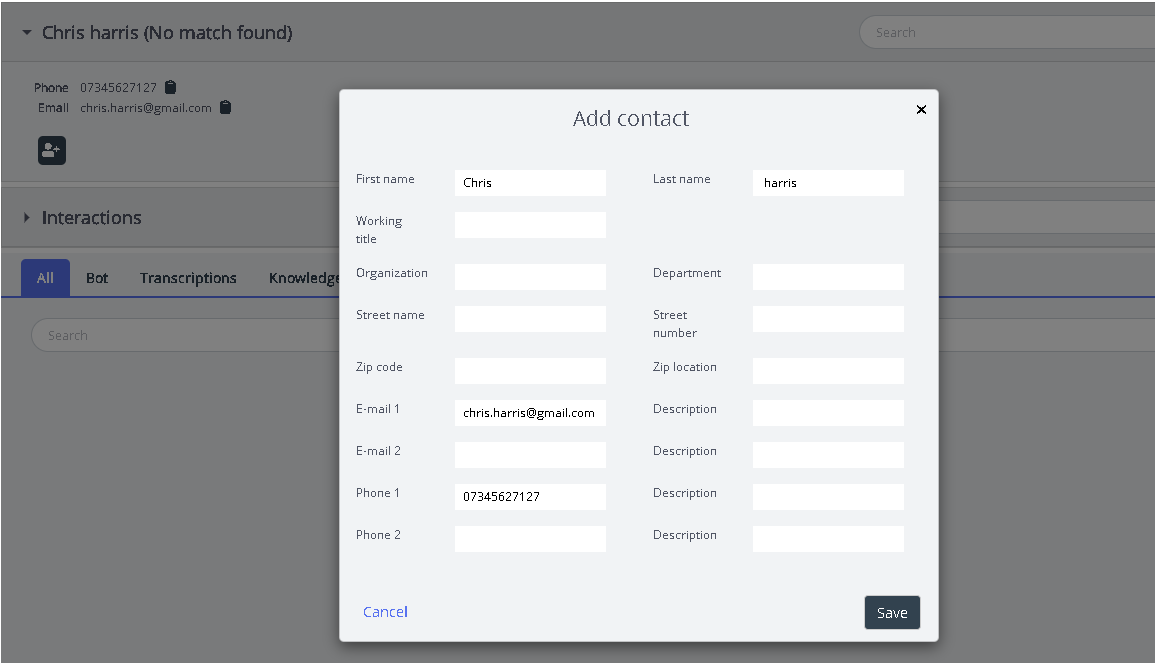
If the contact information was not found, the agent will have an option to create or add a contact card as shown in the picture below.

By clicking on the Add contact icon ![]() , the Add contact window will be opened. Enter all the personal details and click on Save.
, the Add contact window will be opened. Enter all the personal details and click on Save.
Callout to the customer
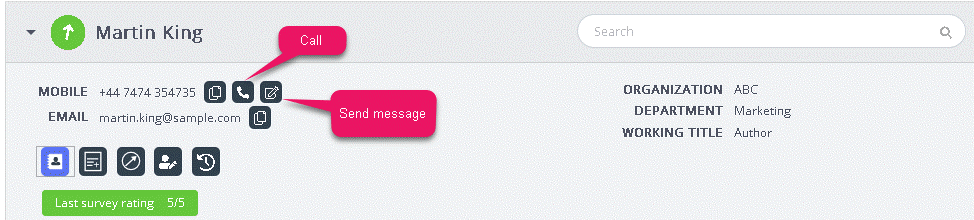
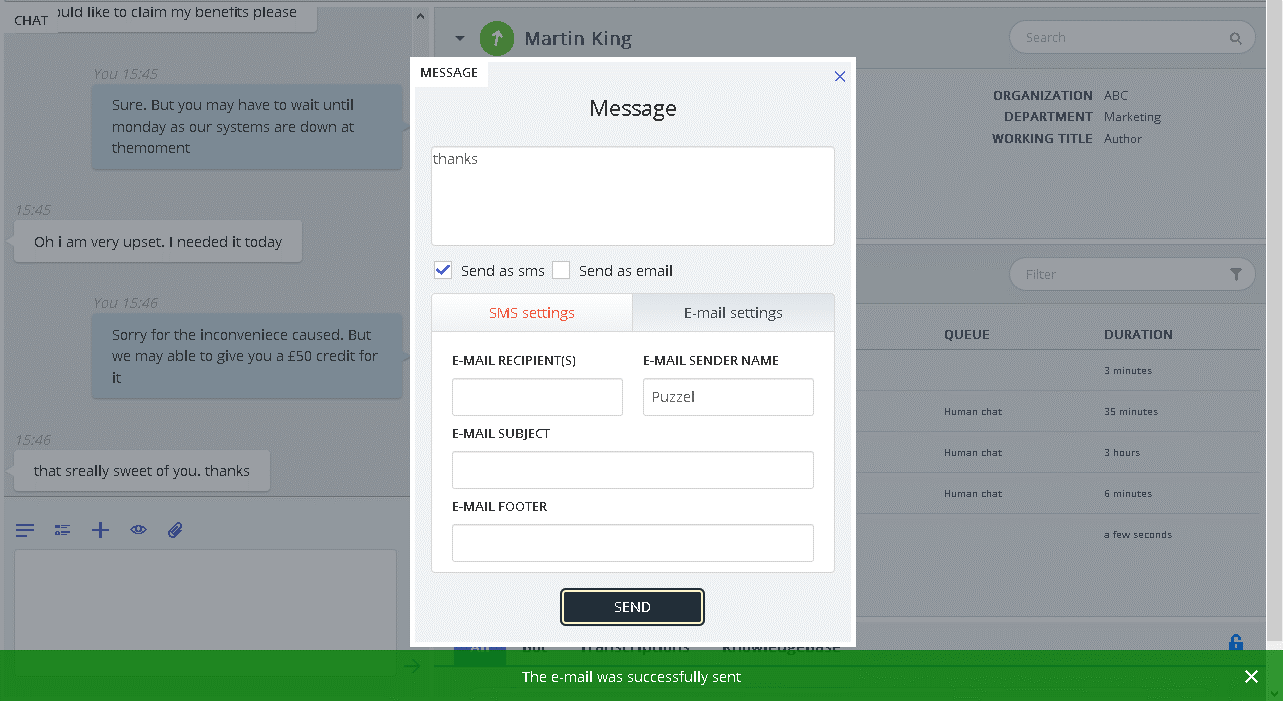
Agents can now send information via SMS or email to the customer during or after the interaction by clicking on the icon as shown in the picture below. Please note that the email/SMS service must be configured to your solution to be able to use this feature.
On clicking on the send message icon, the message window will pop up, populated with the available customer details as shown.
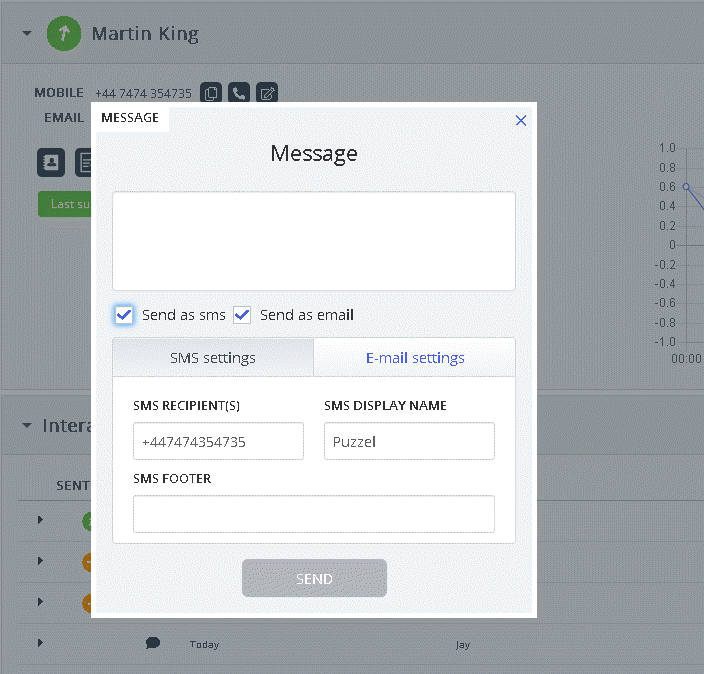
Agent can enter the message and choose to send via SMS or email and click Send. A confirmation message will be shown as below.
Agents can also choose to make calls to the available number in the contact card by clicking on the click to call icon.
Viewing or adding a note
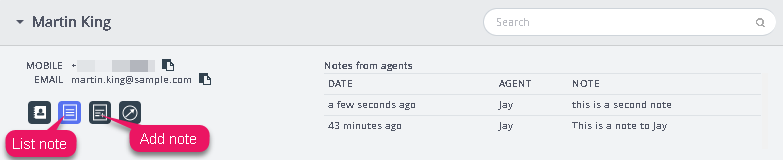
You can view historical notes to yourself or from other agents by clicking on the icon shown below. This provides a list, sorted from newest to oldest including the date, time, name of agent who created it and a snippet of the note content. You can click the note text to see the full note text.
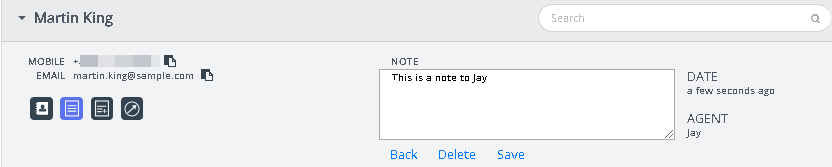
You can also edit/delete a note of your own if this feature has been configured for your solution. To edit a note, go to list view and select the note you wish to edit. You can either make changes and save it or delete the note altogether.
Customer journey indicator
This is a graphical representation of customer navigation within the website. This will help agents to analyse if the customer is looking into the right webpage and direct them to the right one if necessary.
