Create API Ticket Channel
Create a new API channel:
To create a new API channel,
- Go to: Settings > Ticket Channels > API.
- Click the
 button on the top right.
 - Give the API Channel a recognisable name
- Insert an optional From Address
- Insers an optional HTML and/or Plain Text Signature
- Select an authentication level. Global (Access to all ticket) or select an Organisation. (Access to tickets associated to a specific organisation)
- Select your Token Type (Basic Token OR oAuth Token).
- Click Save.
Configure an API Channel for Starting Conversations or Responding via an Outbound Integration
Select one or more of the following checkboxes for the scenarios 'Start Conversation' and/or 'Reply/Forward'.

- For each selected scenario, a corresponding tab will be highlighted. Configuration settings should be added for each scenario (Reply / Forward / Start Conversation).
When editing a configuration for each scenario, you need to specify the following:
Webhook: Choose from the available webhooks. To set up a webhook, navigate to Settings -> Integrations -> Outbound Integrations -> Webhooks.
Schema: Select from the available schemas. To set up a schema, go to Settings -> Integrations -> Outbound Integrations -> Schemas.
Note: To include content written in the message editor by the agent, use the placeholder {{ticket:recent_content}}. For all placeholder options, please refer to the following article: Placeholder Documentation.
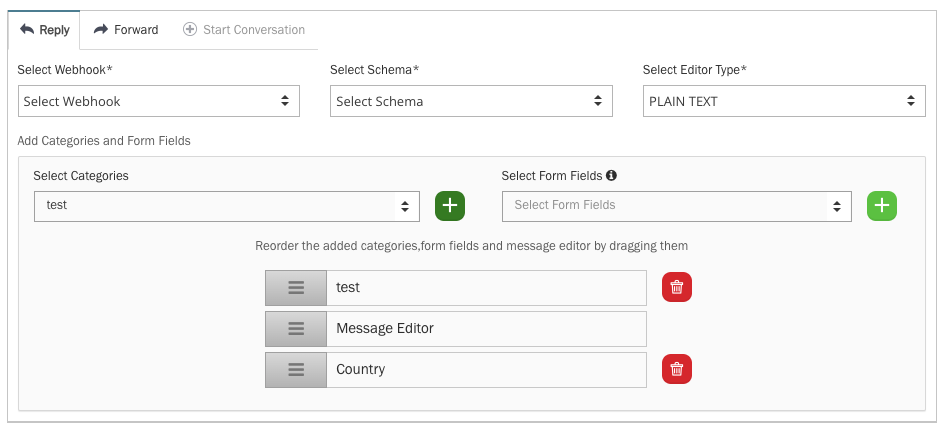
Select Editor Type: Choose between HTML or PLAIN TEXT. This determines the type of message editor available to the agent.
Add Categories and Form Fields: Select any available 'Category' or 'Form Fields' to be added as fields next to the message editor. Using drag-and-drop functionality, you can position these fields to appear above or below the message editor block.
Example of configuration editor:
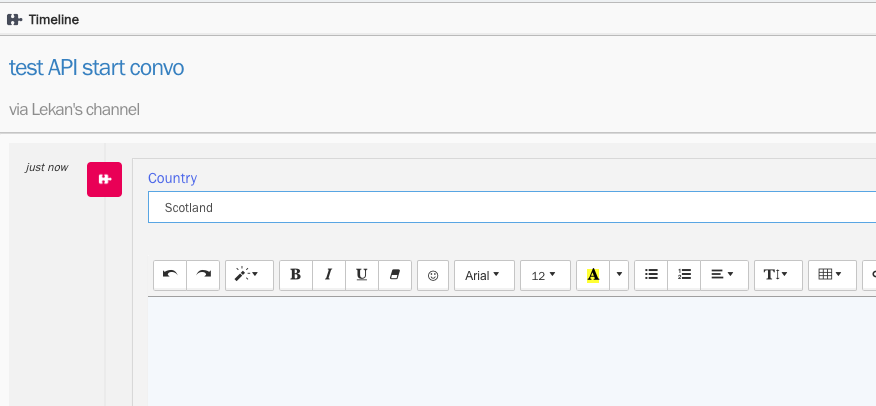
Example of the agent user interface:
Configure API Channels using (Templates)
If you're managing a large number of API channels, we offer a scalable solution that simplifies the process: creating and maintaining templates that your API channels can inherit their settings from.
Here's how to configure and use Templates:
1. Go to Settings > Ticket Channels > API.
2. Open the Templates tab.
3. Click New API Channel Template.
4. Enter a name for the template and define the settings to suit your requirements.
5. When creating a new API channel under the Channels tab, select your desired template in the Inherit from Template field.
Once linked, your API channel will automatically inherit its settings from the template. This means any updates to the template will seamlessly apply to all channels using it, saving you time and ensuring consistency across your setup.