Pre-requisites - Verify access to Chat (New)
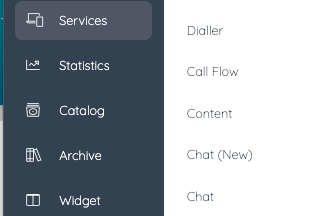
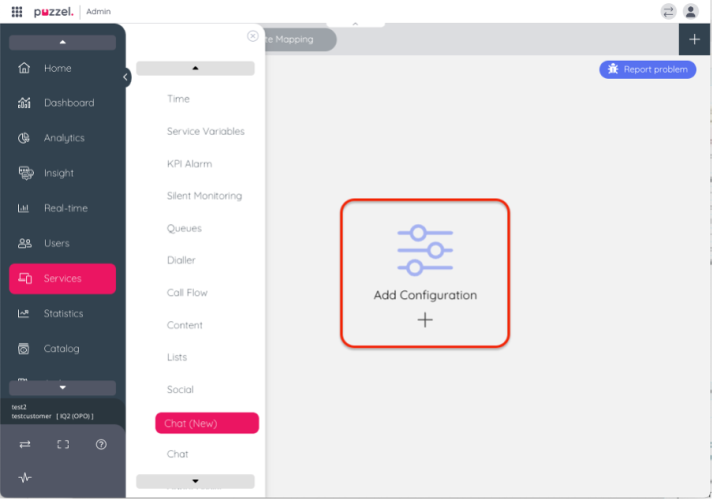
In the Puzzel Admin Portal under Services you will have a menu item called Chat (new).
Following is the description of two different ways to test and configure Puzzel Contact Centre Chat. Instruction 1 contains instructions to test on Puzzels demo page which is the quickest way and instruction 2 is the same instruction set, including instructions how to test on your own website.
- Test Chat (New) on Puzzel demo page
The fastest way to test Chat (New) is to create a Configuration, an Interaction, a rule and Sitemapping. Then test this on Puzzels demo page.
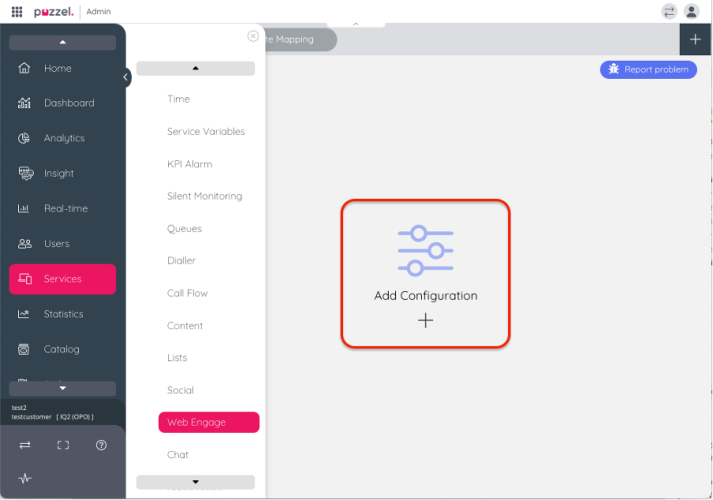
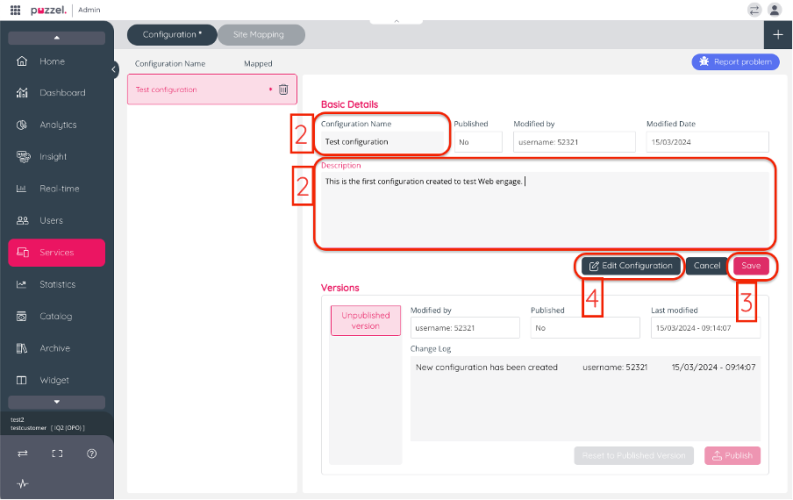
- First, create a configuration in Puzzel Admin (Services / Chat (New))
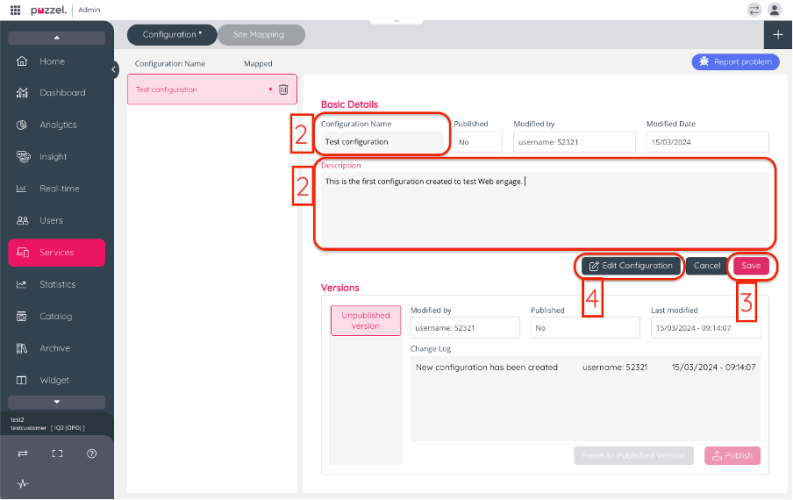
2. Give the configuration a “Name” and “Description”.
3. Click Save.
4. Click “Edit Configuration”
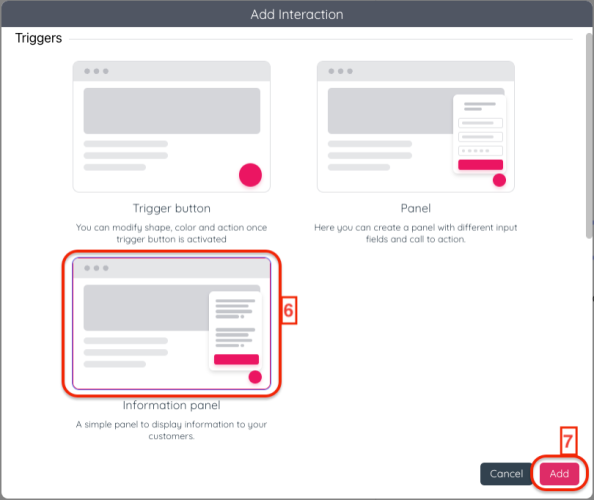
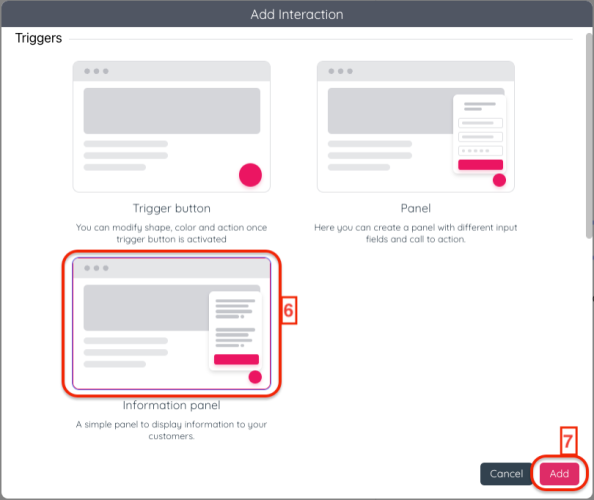
5. Click “Add Interaction”.
6. Click “Information panel”.
7. Click “Add”-button.
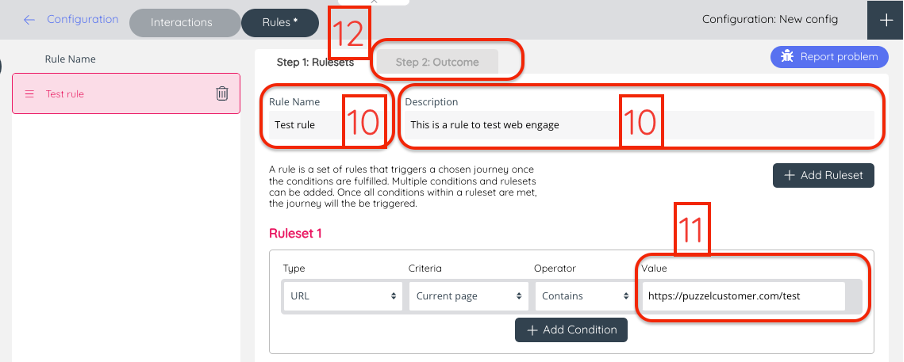
8. Click “Rules”
9. Click “Add Rule”
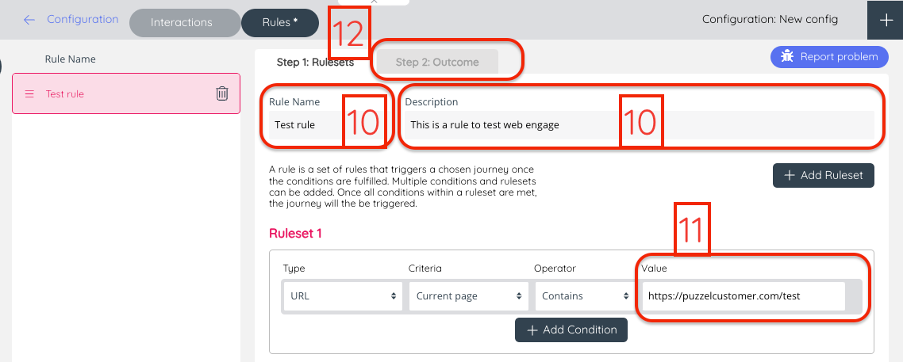
10. Give the rule a “Name” and “Description”.
11. In text field “Value” add the exact URL to Puzzels demo page:
https://demo.puzzel.com/webengage/testyourconfig/?customerKey=xxxxxx&environment=prod
Replace xxxxxx with your customer key.
12. Click tab “Step 2: Outcome”
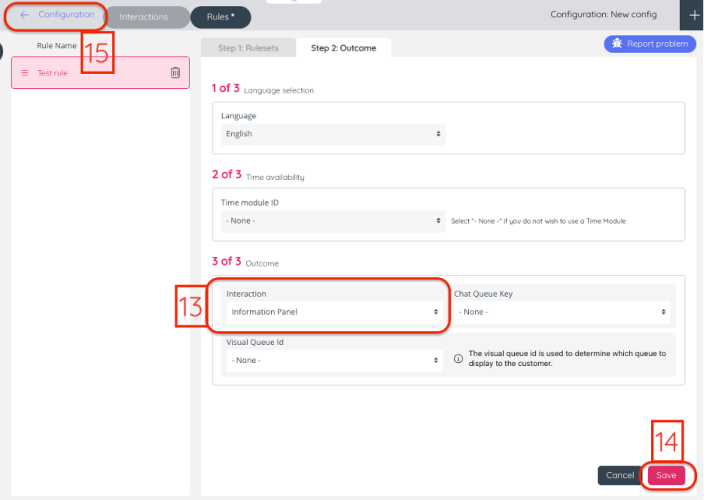
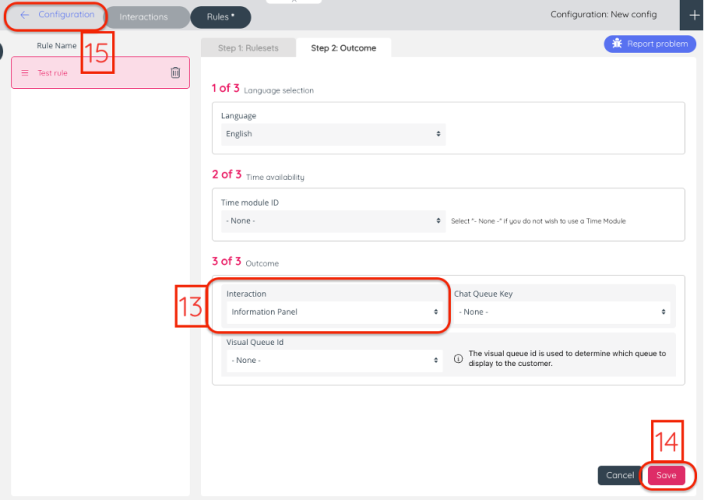
13. In the dropdown “Interaction” choose the Information panel created in step 4.
14. Click Save
15. Click “ <- Configuration”
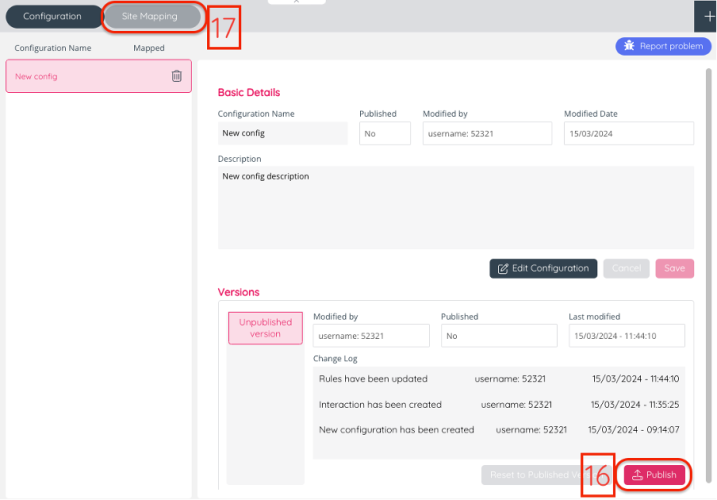
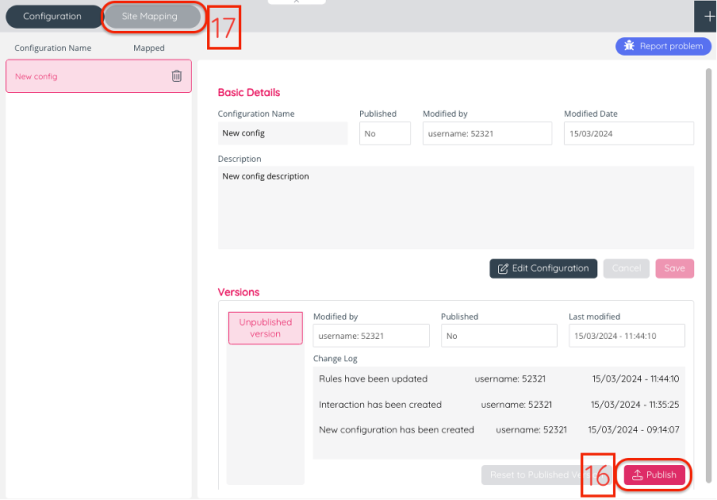
16. Click button “Publish”
17. Click “Site Mapping”
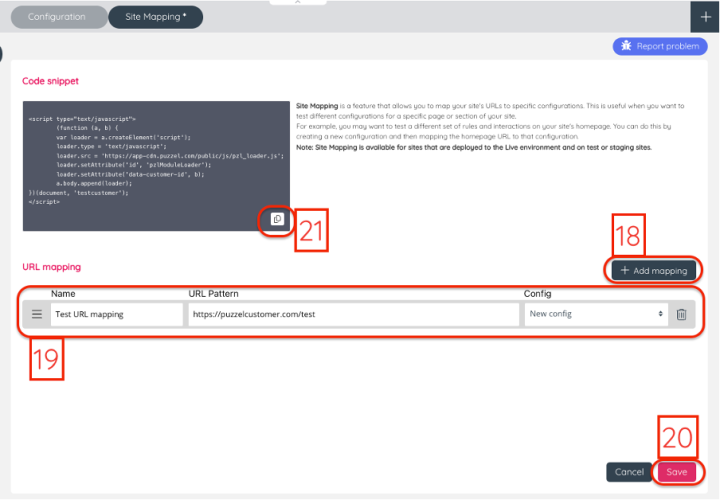
18. Click “+ Add mapping”
19. Give the mapping a Name paste the exact URL to Puzzel demo page https://demo.puzzel.com/webengage/testyourconfig/?customerKey=xxxxxx&environment=prod to your test web site in text field “URL Pattern”.
Replace xxxxxx with your customer key.
In drop down “Config” choose the Configuration created in step 1
20. Click Save
21. Go to https://demo.puzzel.com/webengage/testyourconfig/?customerKey=xxxxxx&environment=prod
Replace xxxxxx with your customer key.
2. Test web engage on a customer’s website
The customer needs a test website, a way to add a code snippet to that website and the URL to that website accessible.
1. Create a configuration in Puzzel Admin (Services / Web Engage)
2. Give the configuration a “Name” and “Description”.
3. Click Save.
4. Click “Edit Configuration”
5. Click “Add Interaction”.
6. Click “Information panel”.
7. Click “Add”-button.
8. Click “Rules”
9. Click “Add Rule”
10. Give the rule a “Name” and “Description”.
11. In text field “Value” add the exact URL to your test web site
12. Click tab “Step 2: Outcome”
13. In dropdown “Interaction” choose the Information panel created in step 4.
14. Click Save
15. Click “ <- Configuration”
16. Click button “Publish”
17. Click “Site Mapping”
19. Give the mapping a Name paste the exact URL to your test web site in text field “URL Pattern”. In drop down “Config” choose the Configuration created in step 1
20. Click Save
21. Copy “Code snippet”
22. Paste in source file for the test web page.
23. Go to URL for your test web site.

