
Contacts Tab
The Contacts tab is where you can find your contacts to see their status and details, send messages, or make outbound calls. You can send a message or make an outbound call to a given phone number, an available agent, or a contact in one of the contact-sources available in your solution. When sending a message or making a call, you must first choose among your available search sources (irrelevant if you are entering a given number to call).
To send a message you must click on the Send Message button (requires a setup)
To make an outbound call you must be logged on. When a call is initiated, a new Callout tab is opened. The system will first call you upon the number you are logged on with (or your Softphone if logged on with that). When you are connected, the system will call the number/agent/contact you want to call.
When in an outbound call, most of the call handling functionality is similar for an incoming call. See the following chapters Receiving a call and Making a call for further details.
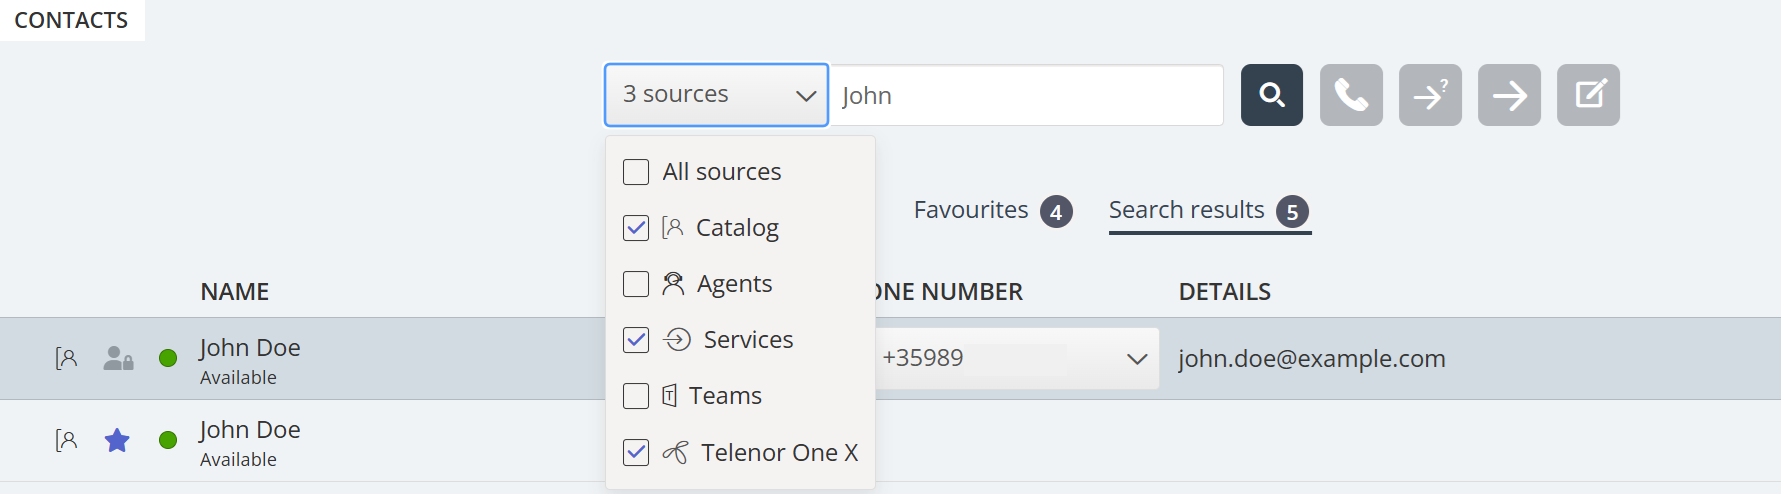
Search
Select the sources you want to use for your search, enter a search query, and click the search button or press Enter. The application will keep your selected sources in memory.
To call a given number
Chose any search source, enter the number you want to call and click on the call button.

To call an agent
Choose Agent as a search source, enter the name of the agent you want to call, and press enter or click on the search button. You will now see the result of your search. Choose the relevant agent from the list (if more than one hit) and click on the belonging to call-button.

To call a contact
To call a contact (not an agent), choose the relevant search source ("Catalog", "Skype for Business", "Teams", "Customers") and enter your search criteria followed by pressing Enter or the Search button. You will now see the result of your search. Choose the relevant agent from the list (if more than one hit) and click on the belonging to call-button.

Add a '#' to your search term to perform a phonetic search. For example, searching for '#Jon' will find contacts named 'Jon' as well as those with similar-sounding names. Phonetic search is available for Catalog.

You can also add/edit/delete an event for contacts in a catalog search source if you are allowed access by your admin.
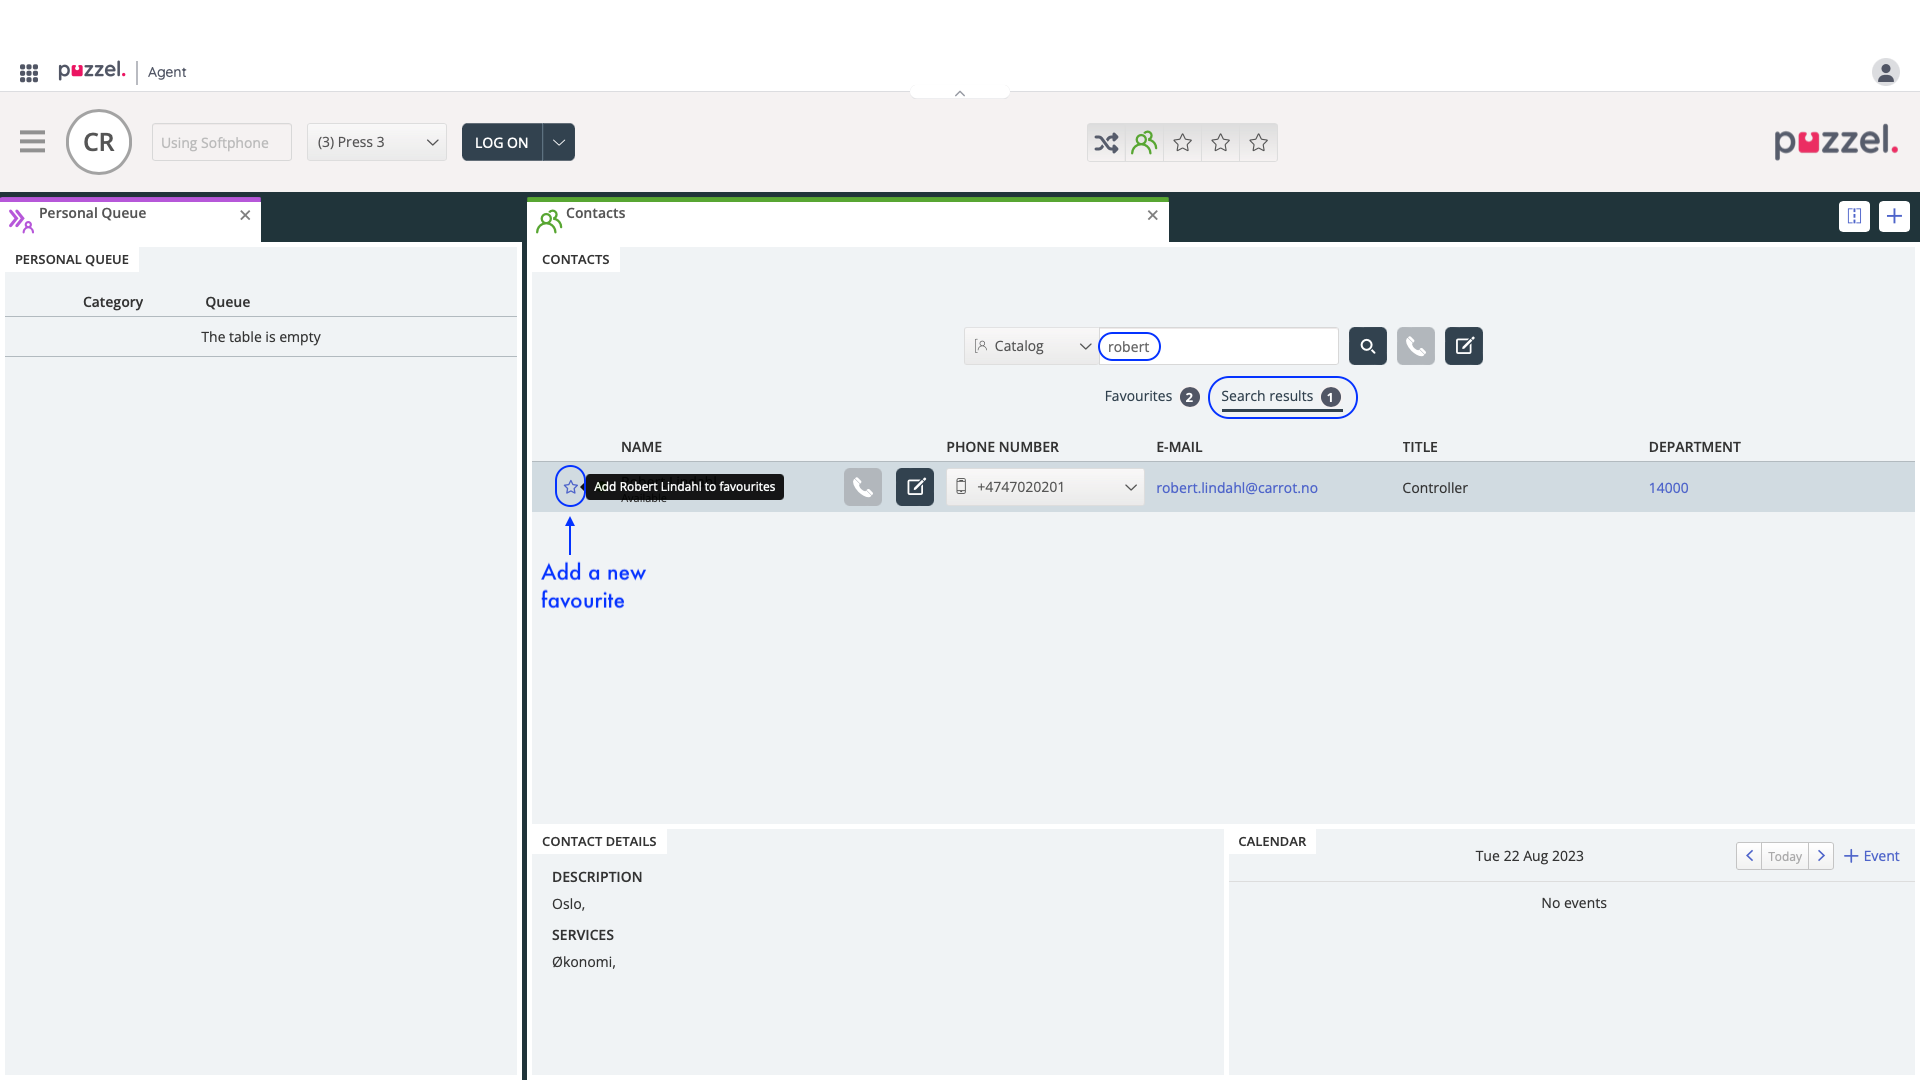
Adding a contact to Favourites
It is now possible to add a contact to your Favourites, allowing you quick access to your most used contacts.
Adding a new favourite contact can be done quickly and easily, by clicking the star button to the left of the contact name.
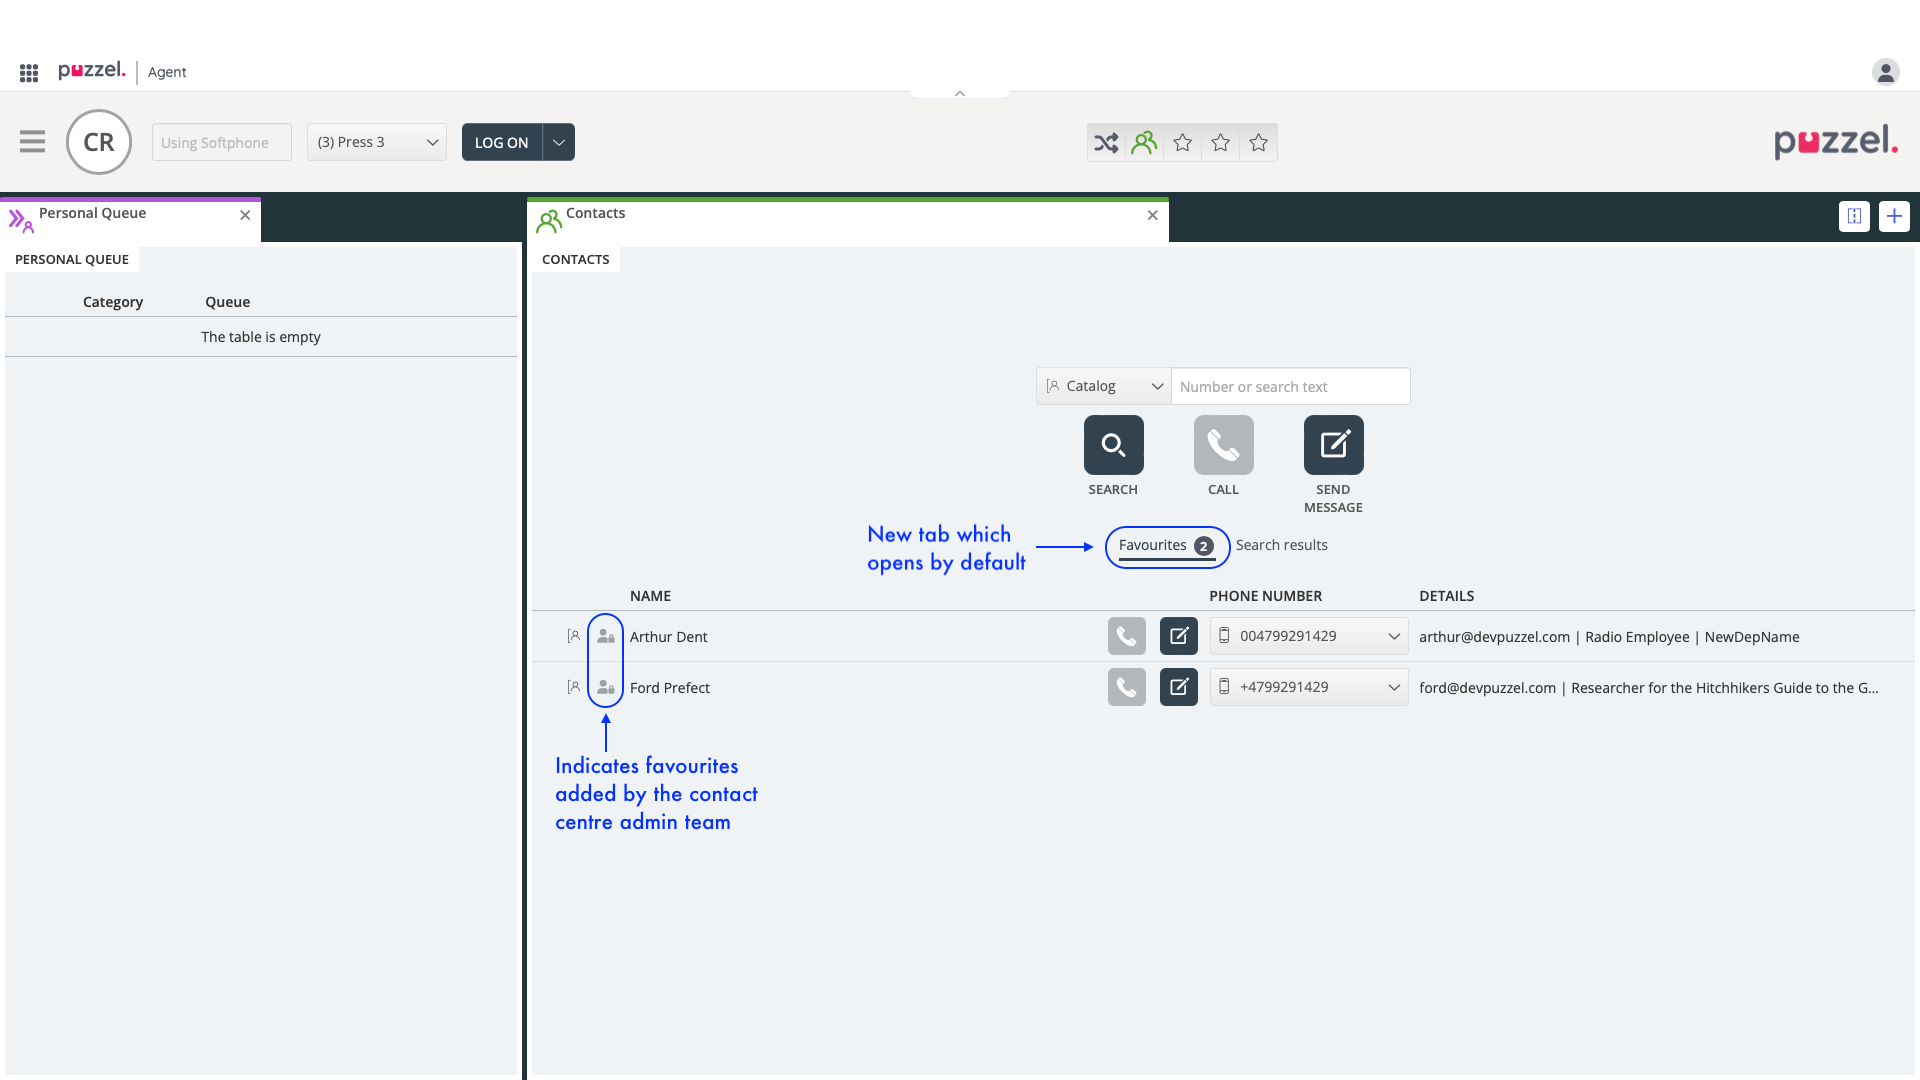
The contacts that have been added to your Favourites - either through the Agent Application or via the Admin Portal - will then appear in a new tab, which opens by default on the Contacts Tab.
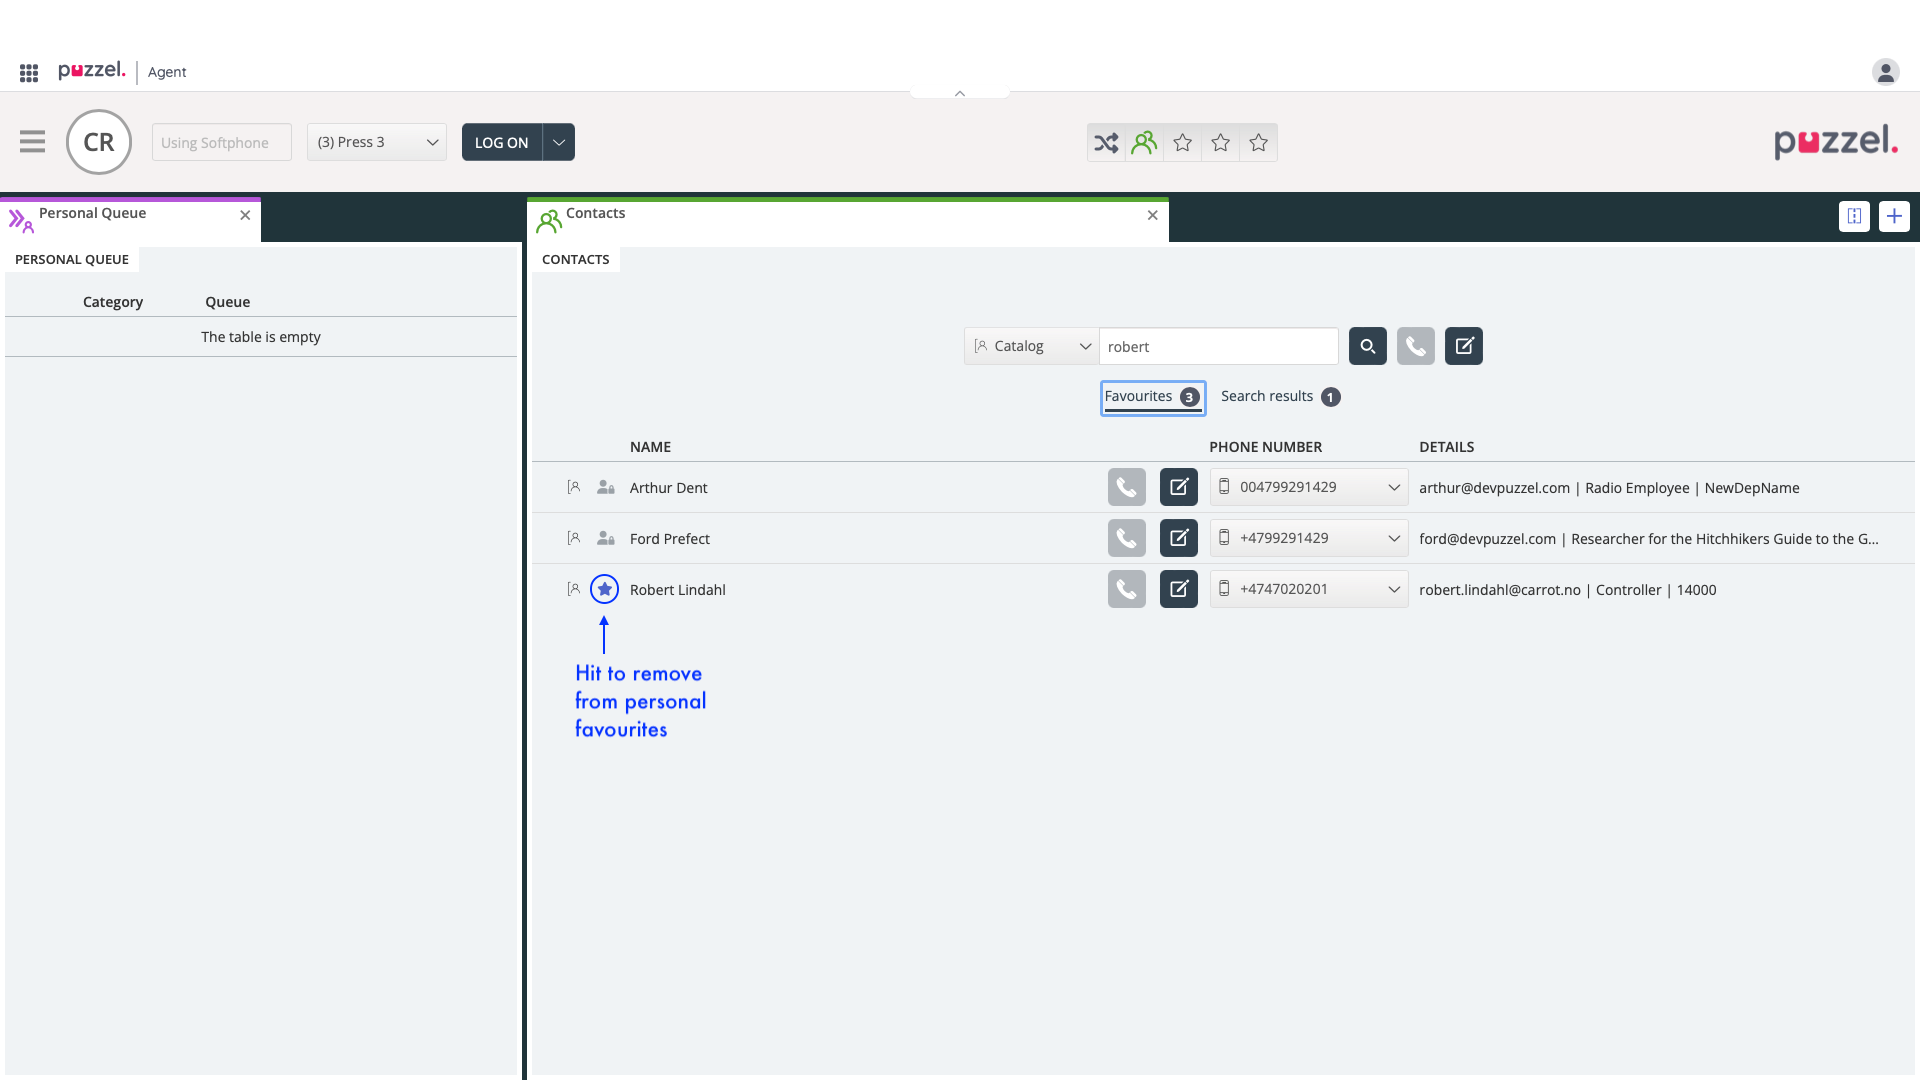
To remove a contact from Favourites, simply locate the contact in the FAvourites tab and click on the star icon again.
This functionality is also available in the Switchboard tab.