
Adding activities to the Schedule
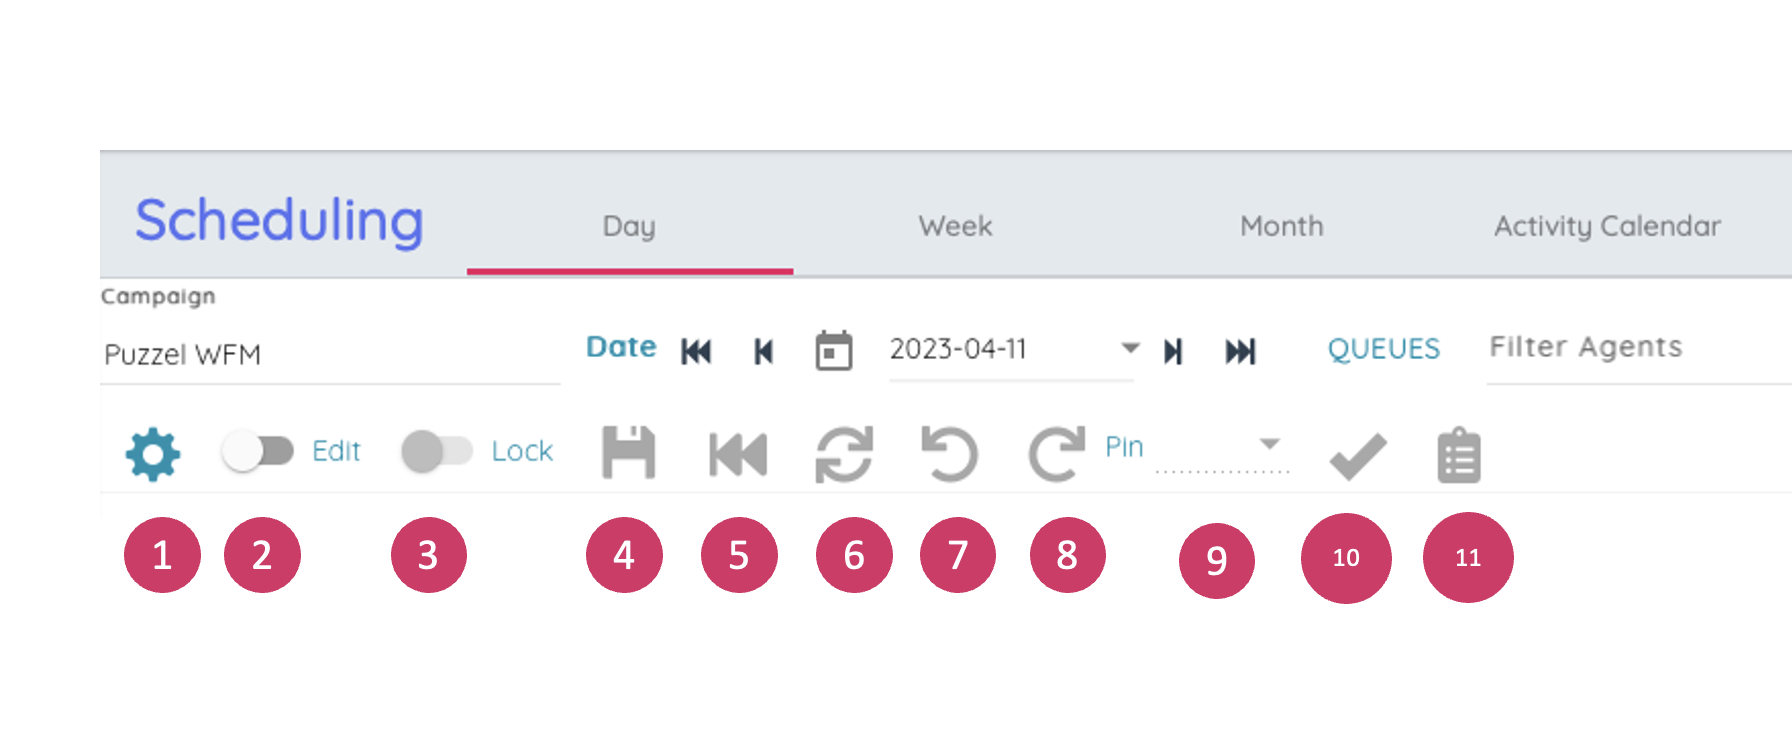
Action Bar
Filters and Sorting
Agents can be filtered in two ways:
- Typing into the filter agents text box. This will filter on name, team or skill set.
- Selecting an agent type from the drop-down list (this will only display if more than one agent type is available)
The agents can be sorted by selecting an option under Sort By. This will default to the start of the shift in ascending order.

Action Buttons
The buttons on the action bar are as follows:Settings – See below for more details
- Settings – See below for more details
- Edit Toggle – Enabled editing of the schedule, if it is currently locked this will prompt to unlock.
- Lock – when toggled on users won’t be able to edit the existing schedule.
- Save – Saves any changes to the schedule
- Rewind – discards any changes
- Refresh – Refreshes the service metrics to take into account changes to the schedule
- Undo – Undo any pending changes
- Redo – Redo any changes that have previously been undone
- Pin – Pin options for shifts and breaks
- Publish – Publish the schedule
- Exports the shifts that agents have including activities to MS Excel
Settings
Clicking the settings button displays the schedule settings popup. The available options are:
- Service Metrics toggles the visibility of the data at the top of the schedule
- Grid lines toggles the visibility of the grid lines on the schedule
- Auto save toggles whether to automatically save changes as they are made
- Agents without shifts toggles whether to display agents that do not have a shift on the displayed day
- Working hours toggles the loading of the agents minimum & maximum working hours and number of hours scheduled in the current week. This is will be highlighted if the agent is over or under their contracted hours for the week
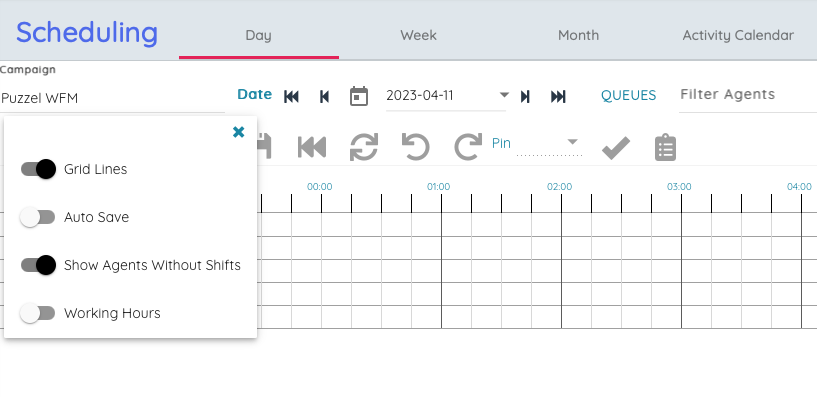
These settings are all saved locally so any changes made will be preserved the next time the user visits the schedule screen.
Service Metrics
The service metrics along the top of the schedule are mostly unchanged.

The service level for the day and week are displayed next to the Service level (%) label on the first row.
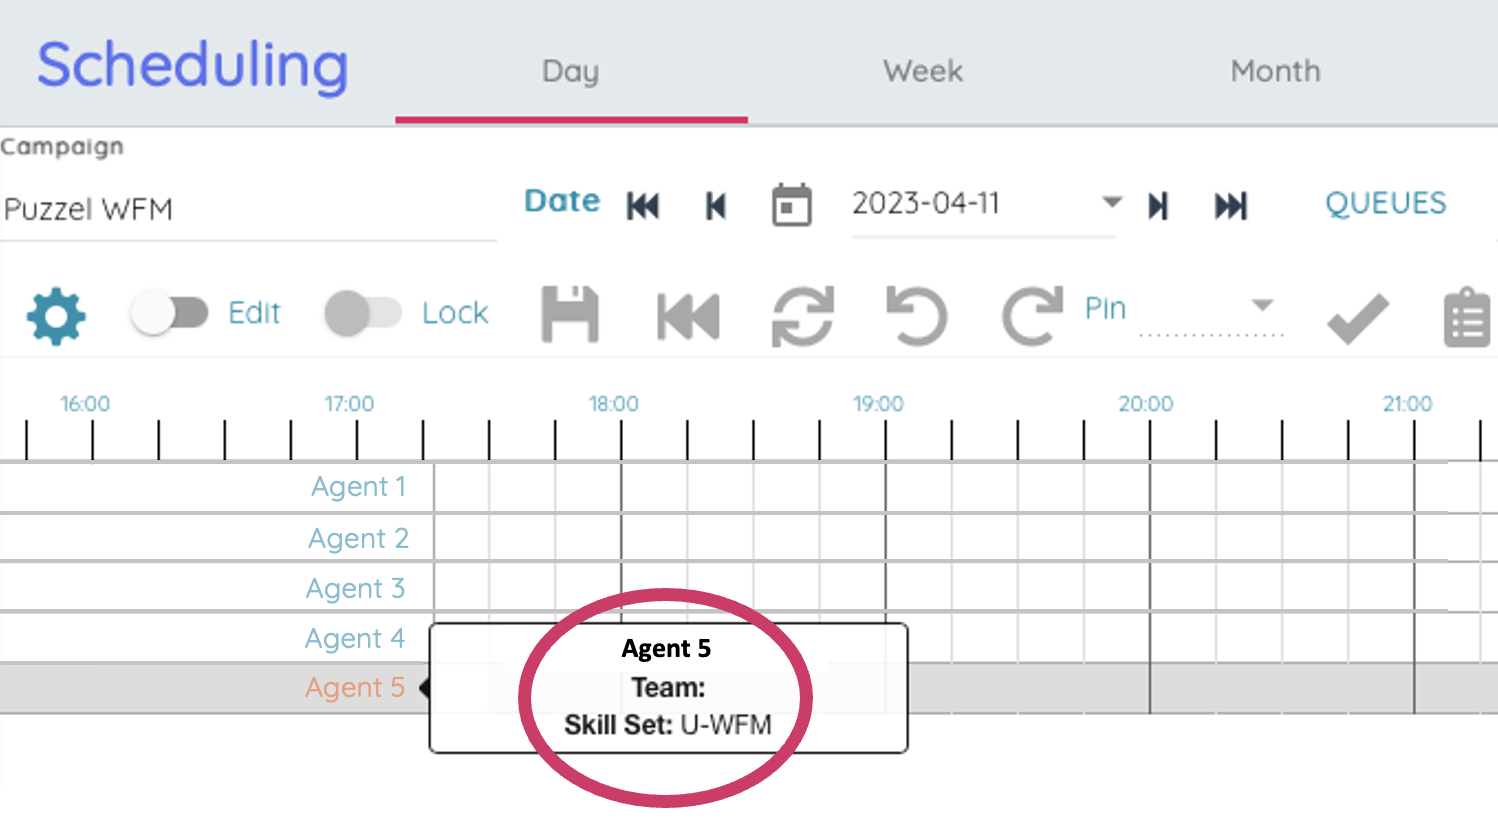
Agents
The agents are displayed on the left-hand side. By default, agents without a shift are displayed at the bottom. The team and skill set for each agent is displayed in a tooltip on mouse over.
Schedule
The shifts are displayed as bars on the schedule, with breaks and activities displayed on top and overtime either before or after.
On mouse over a tooltip will be displayed showing the agent name, the start and end of the shift and the shift name. The tooltip for an activity/break will display the name of the activity and the start and end times.
While in Edit mode (By clicking the Edit toggle) the shifts and activities can be moved by clicking and dragging or resized by clicking and dragging the white resize bars at the end of each item.
Schedule Right Click Menu
Additional interaction is possible by right clicking on the items on the schedule. This will bring up an menu of options.
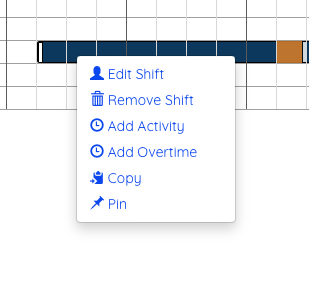
- Edit Shift – Show popup to edit the shift details
- Remove Shift – Delete the shift
- Add Activity – Show popup to add an activity
- Add Overtime – Show popup to add overtime
- Copy – Copy the shift so it can be pasted elsewhere
- Pin/Unpin – Pin/Unpin the shift
- Copy – Copy the item so it can be pasted elsewhere
- Remove – Delete the item
- Pin (for breaks) – Pin the break
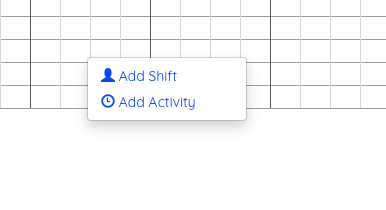
- Add Shift – Show the Add Shift popup to add a shift for this agent
- Paste Shift – Paste in a copied shift
Add/Edit Shift Popup
When adding or editing a shift via the popup the start and length must be selected as well as the lunch and any breaks that are required.

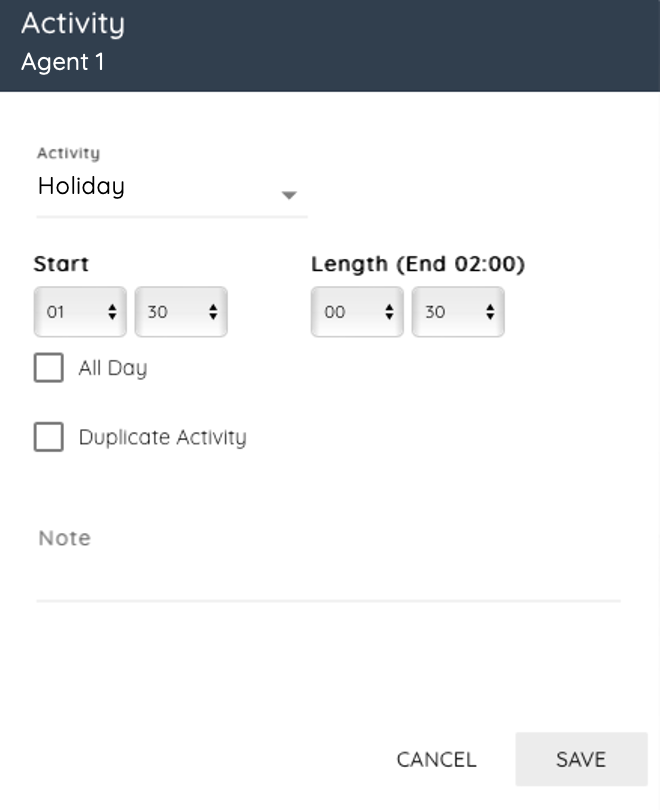
Add Activity Popup
To add an activity, select the activity type, the start and the length (or Full Day) and then enter any additional notes then click Add.
Add Overtime Popup
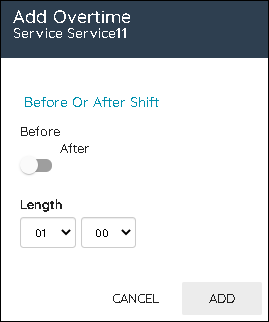
To add overtime to a shift, select whether it is before or after the shift and then select the length then click Add.