How to set up a new configuration
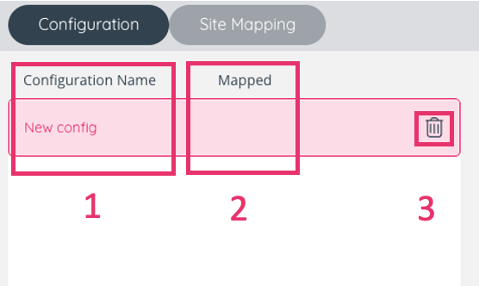
The Configuration page shows a table with the following columns:
- Configuration name
- Mapped – indicating whether the chat has been mapped.
- Bin action button allowing you to delete a configuration.
To add a new configuration, you can click on the plus icon on the top right corner of the screen.
You will then see the “Basic Details” menu:
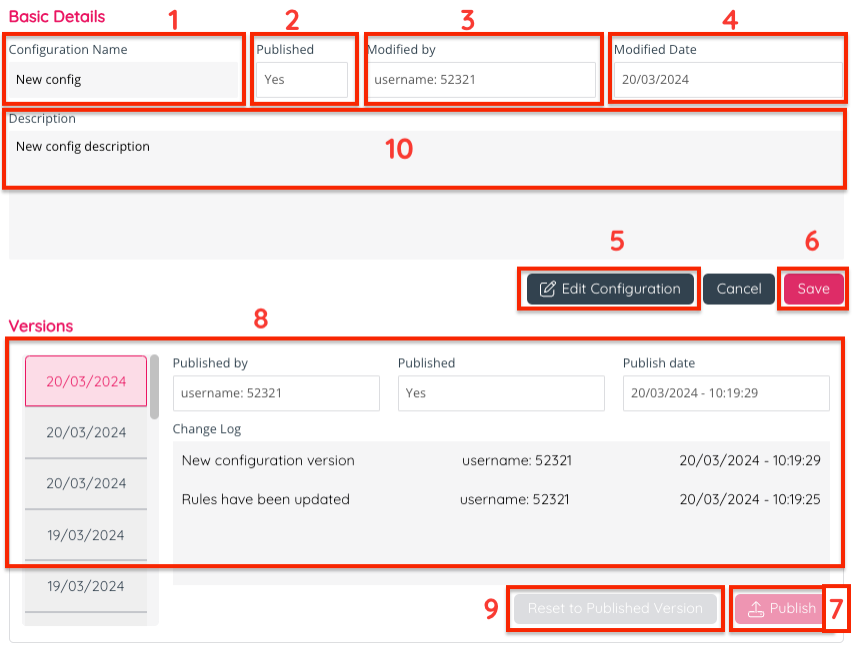
- Insert a name for your new configuration.
- “Published” indicates if the configuration has been published or not.
- The “Modified by” field indicates who last modified the configuration.
- The “Modified Date” field indicates when the configuration was last modified.
- The “Edit Configuration” button redirects you to the relevant space where you can set up your configuration and/or change its elements when re-visiting it.
- Click Save to save your changes.
- The Publish button allows you to publish new or edited configurations.
- The area that is called "Versions" is a change log where you can track published versions of the configuration.
- Reset to the last published version of the configuration.
- Insert a configuration description providing context on the configuration.
Please note the Publish button will need to be clicked whenever a new change to the configuration is saved, for the change to go public.
This allows you to work on updates for your configuration, without setting them to be made visible to the customer. However, once the “Publish” button is clicked, any updates will go live on your website’s chat.
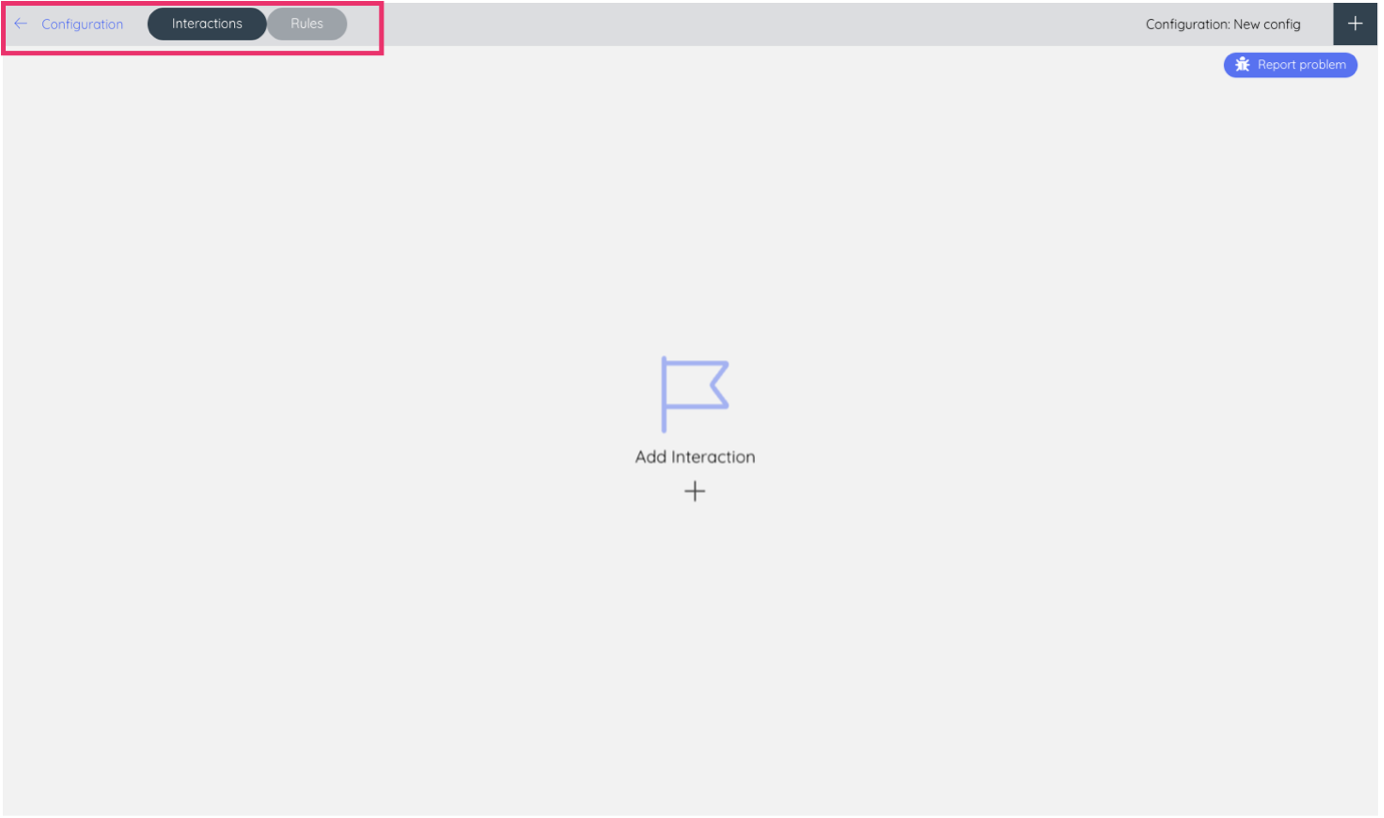
If this is a new configuration, after clicking “Edit Configuration” you will see an empty screen with “Add Interaction” at the centre and a plus icon underneath.
The same screen features two buttons on the top bar, the “Interactions” and “Rules” buttons.