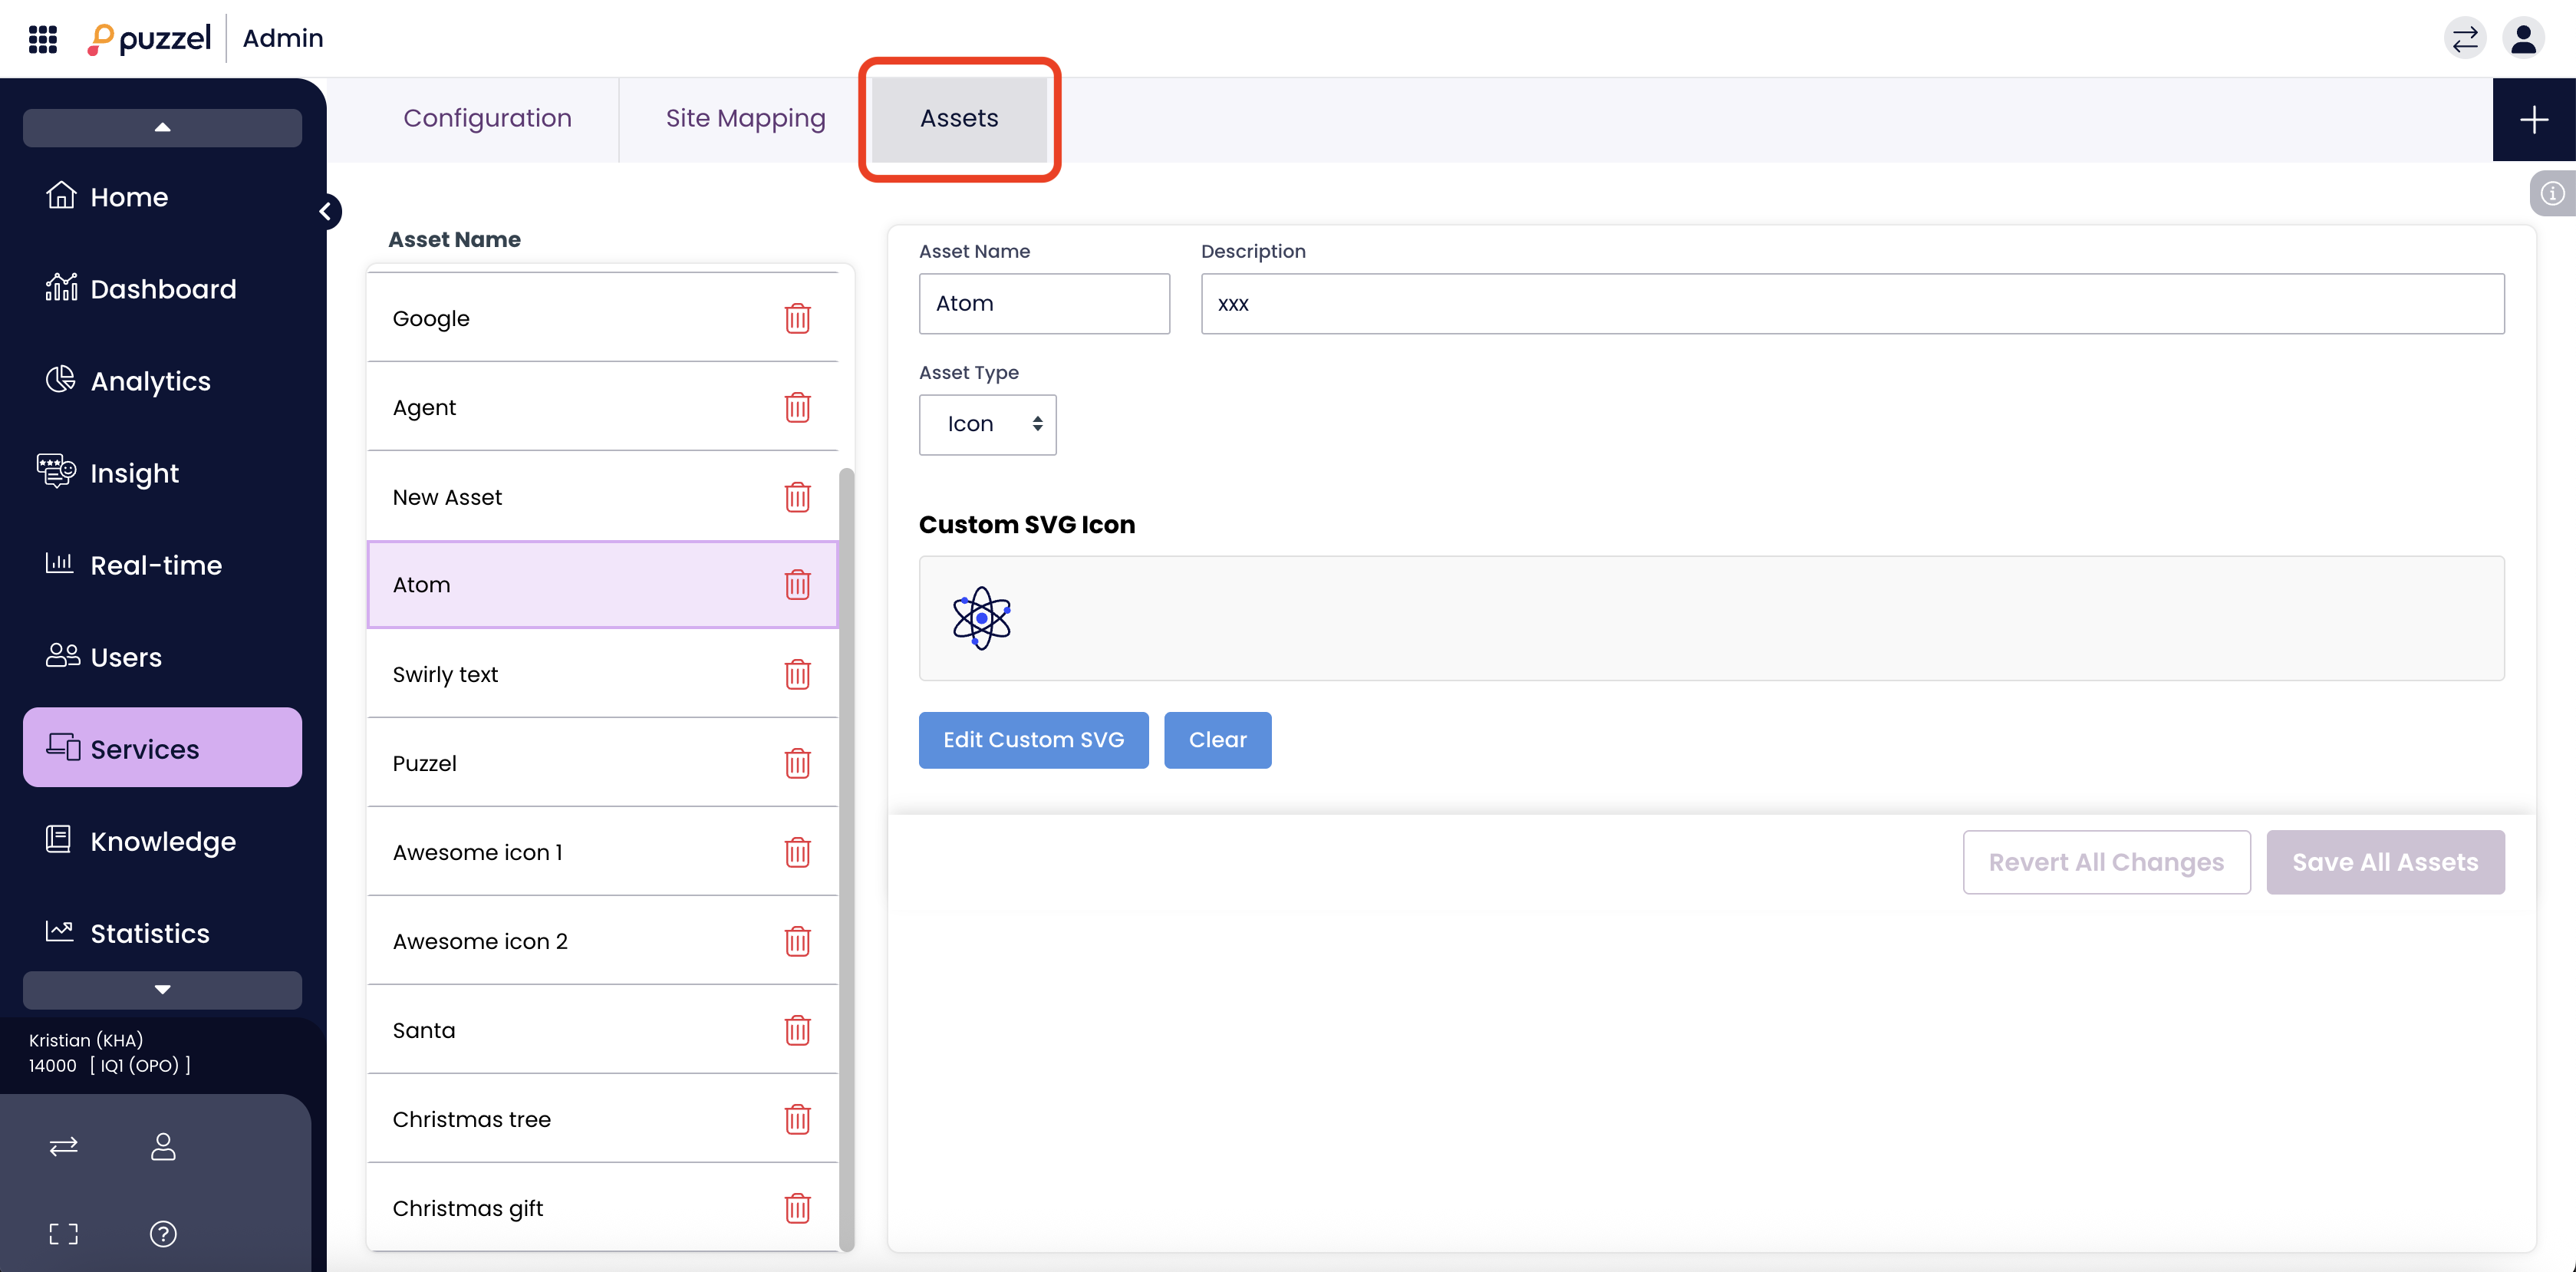
Assets Management
The Assets tab allows administrators to manage the visual icons used throughout the chat interface. This functionality provides flexibility for branding by allowing you to choose from extensive pre-built icon libraries or upload your own custom SVG graphics.
Overview
The Assets interface is split into two main sections:
- Asset List (Left Panel): Displays all currently configured assets.
- Configuration Area (Right Panel): Where you define the name, description, and visual source for the selected asset.
Managing Assets
Creating a New Asset
To add a new icon for use in your chat widget:
- Navigate to the Assets tab.
- Enter a name in the Asset Name field (e.g., "Support Icon").
- (Optional) Enter a Description to explain the asset's usage.
- Ensure the Asset Type is set to Icon.
- Choose a source for your icon:
- Select from Library: Browse standard icon sets.
- Import custom SVG: Use your own custom vector code.
Option A: Select from Library
Use this option to choose from thousands of standard web icons.
- Click the Select from Library button.
- A library browser will appear listing available collections (e.g., Ant Design Icons, BoxIcons, Bootstrap Icons, Font Awesome 5).
- Select a library from the left sidebar to filter results.
- Use the Search bar to find specific icons (e.g., type "alarm" or "user").
- Click on an icon to select it.
Option B: Import Custom SVG
Use this option to use a specific brand logo or custom graphic.
- Click the Import custom SVG button.
Paste your raw SVG code into the text box labeled Custom SVG markup.
Note: Only a subset of standard SVG tags and attributes are supported. Complex animations or scripts may be stripped.
- Click Import as Icon to confirm.
Editing and Deleting
- Edit: Click on any name in the Asset List on the left to load its details. You can rename it, change the description, or swap the icon source at any time.
- Delete: Click the red Trash Bin icon next to an asset in the list to permanently remove it.
Saving Changes
Changes are not live until they are saved.
- Save All Assets: Click this purple button in the bottom right to apply your changes.
- Revert All Changes: Click this button to discard any unsaved modifications.
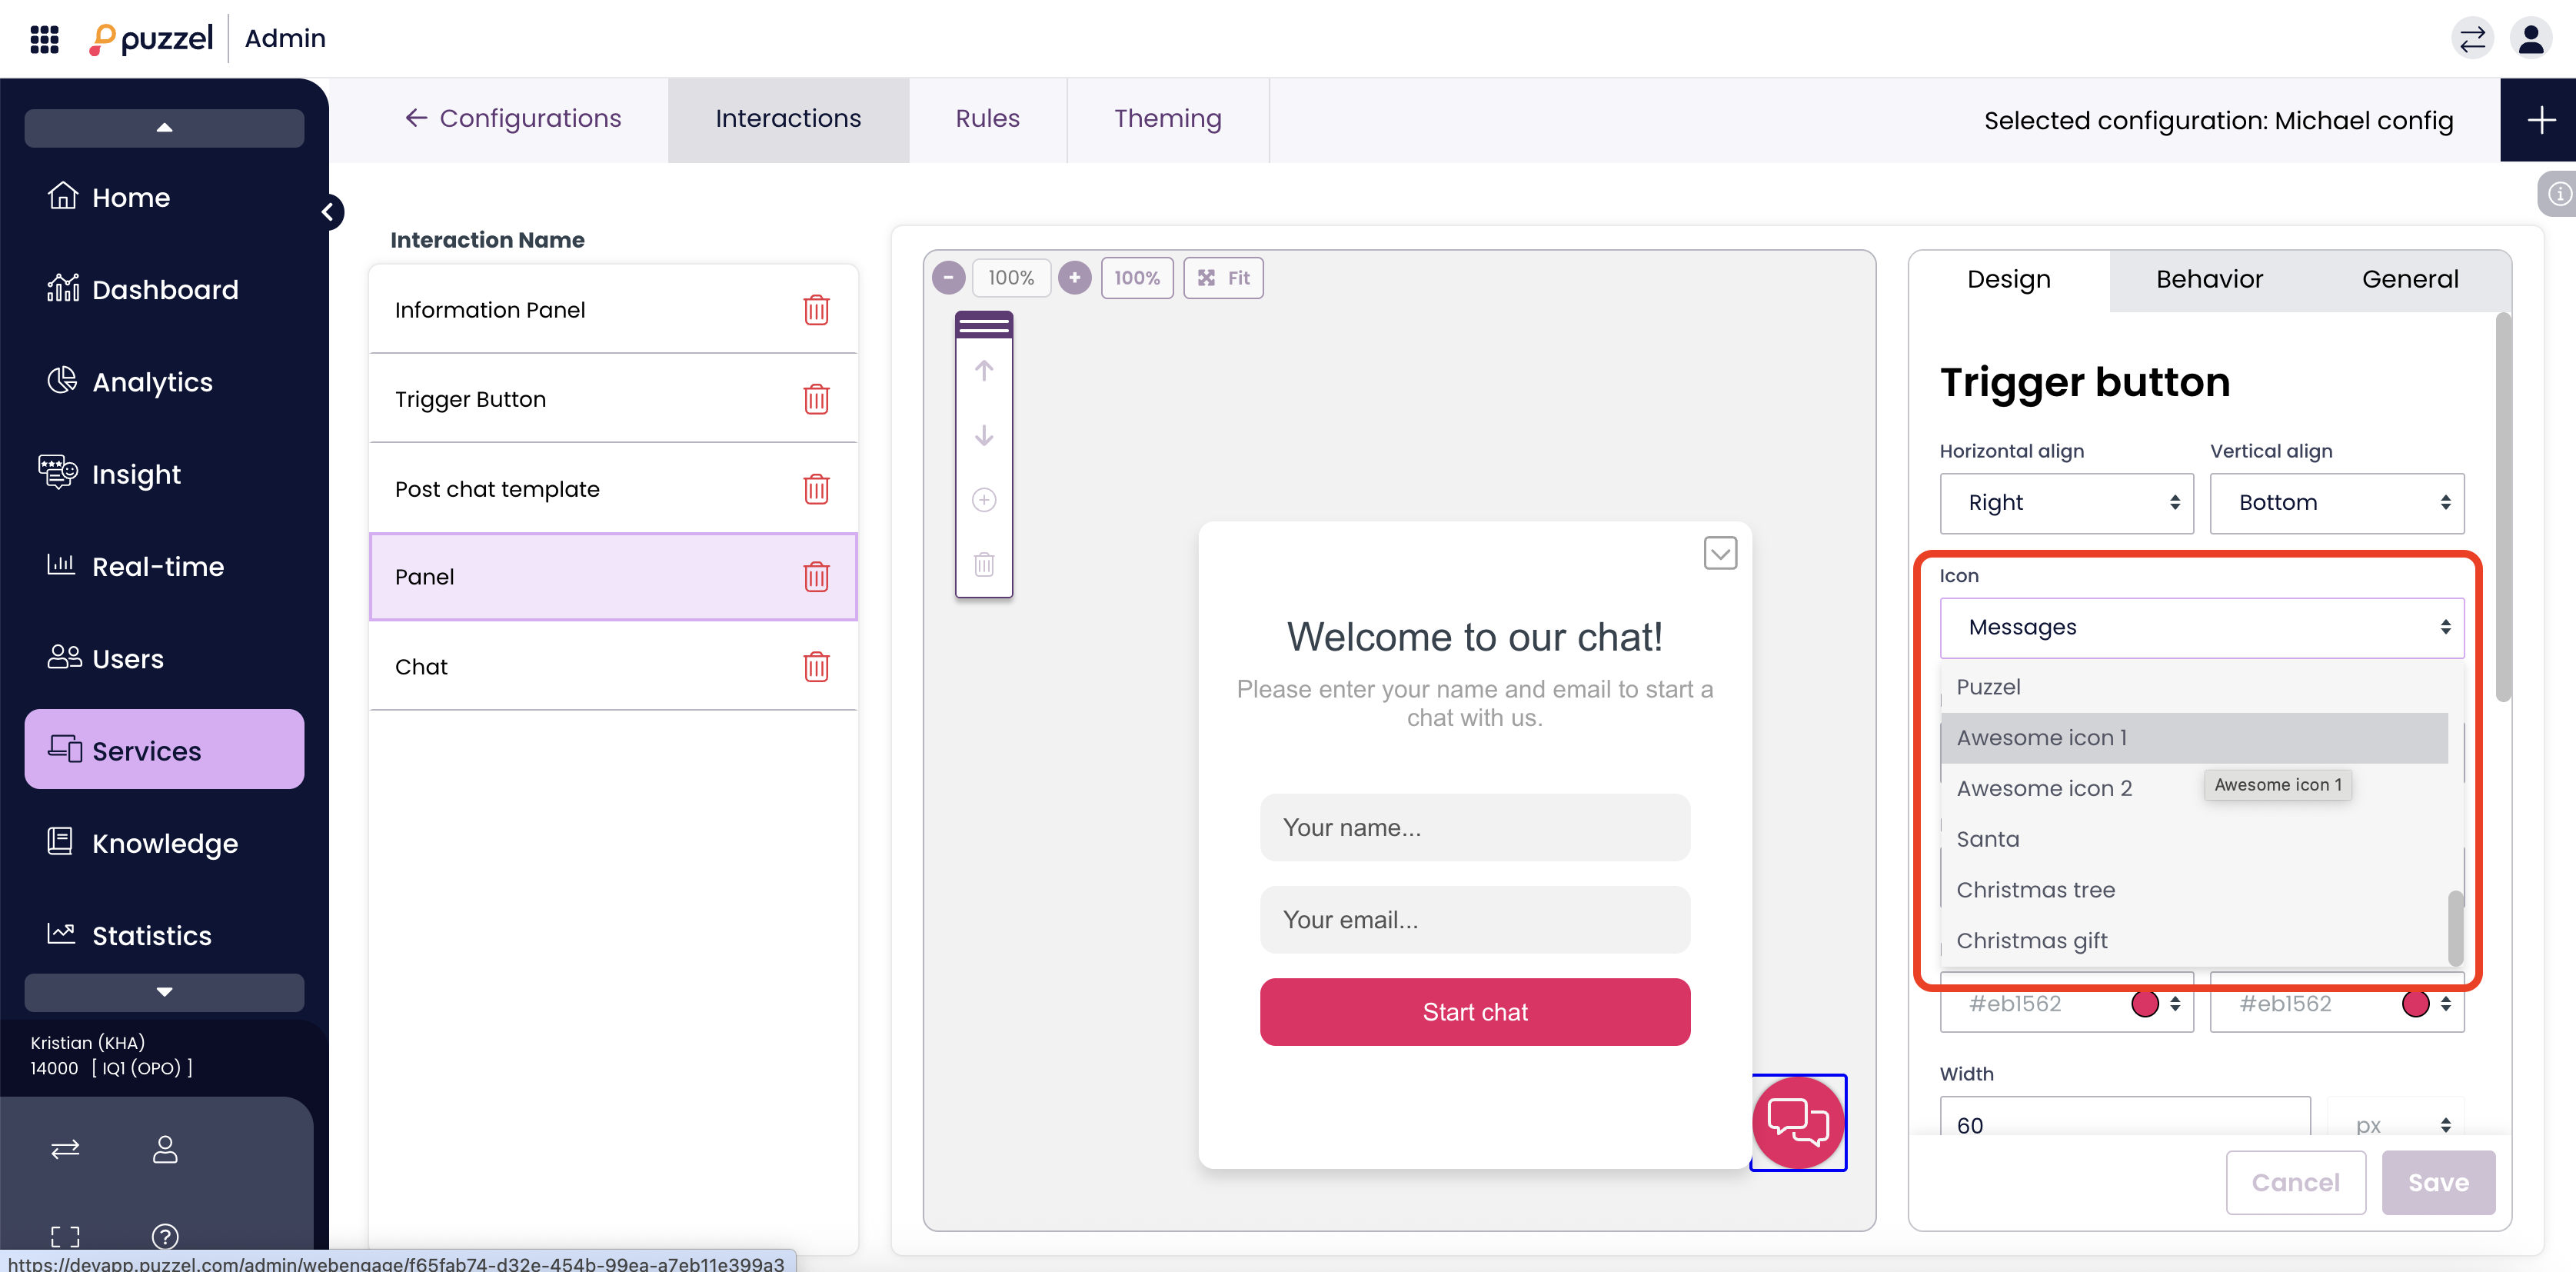
Using Assets in the Chat Design
Once an asset is created and saved, it becomes available for selection in the Chat Designer.
- Navigate to the chat Design tab.
- Select a component to customize (e.g., the Trigger button).
- Locate the Icon dropdown menu in the properties panel.
- Your custom assets will appear in the dropdown list.
- Select the asset to apply it to the chat widget immediately.